Some call it the "fantastic plastic" and given the build quality, you'll know why. The Canon 50mm f/1.8 II is the lightest lens you're likely to ever hold in your hands (except for maybe the lens baby); the lens cap is laughably small, the focus ring is too! Also, it's autofocus is quite noisy and doesn't perform well in low-light or low-contrast conditions at all.
BUT!
This lens is quite sharp and for the money, it can't be beat. If you even THINK you might have a use for a fast normal prime, it may be worthwhile to check this lens out!
Here's a link to my sharpness test results for this lens.
Here's a link to my sharpness test results for the Sigma 30mm f/1.4 (around $400) for comparison.
And here's a link to all of my lens test results.
**PLEASE NOTE**
In the real world you aren't usually taking pictures of black and white text. I do my testing this way to show minimal differences that would probably never be noticed on actual photos. Also, remember when viewing the test results at 100%, this is the equivalent of having your photo printed at 30x20. If you don't crop much and don't print that big, you don't need a lens that's perfectly sharp at 100%.
My Thoughts:
...In the past few weeks I've been using this lens for studio photography, pics of my fish, etc and I must say that it's definitely a workable lens. If your subjects are moving (like my fish), you'll have to focus manually with that tiny little focus ring, but for me it really didn't matter. I got used to it pretty quick. In fact, I almost feel bad that I spent the money on the Sigma 30mm f/1.4 -it seems like a waste when this lens is so close in focal length and quality (of pictures). The Sigma is definitely better built, but I don't think I'd ever be able to tell the difference in quality between the two if real world photos from them were placed side-by-side. If you're deciding between the two and you're willing to live with the downsides of the "Fantastic Plastic", I'd say go for it!
What do I mean by "Prime"?
Prime lenses are non-zoom lenses, so they stay fixed at one focal length. If you want to "zoom in" or "zoom out", your only option is to do so with your feet.
Why would you want a "Prime" instead of a "Zoom" lens?
In the old days primes were considered superior because zoom lenses were often poorly made. Technology has since improved and some zooms are as good as primes. Zoom lenses, however, cost more (sometimes MUCH more). So, these days people usually buy primes to get a better quality lens for a lower price. Besides, "zooms" are not usually needed for studio work, macro photography, etc.
What do I mean by "a Fast lens"?
Fast lenses allow you to get higher shutter speeds in low-light conditions without a flash. Most of the time they are used to avoid blur in indoor photos when you can't (or don't want to) use a flash.
How do you identify how "fast" a lens is?: Lenses are identified by their focal length (for this lens, that's the 50mm part, which tells you how close your subject will appear through the lens), followed by the maximum aperture of the lens (for this lens, that's the f/1.8 part). The lower the number that follows that "f/", the "faster" the lens is (or the better it will perform in low-light conditions). f/1.8 is VERY fast, although my Sigma is a f/1.4 and Canon makes a 50mm "L series" lens that's a f/1.0!
Tuesday, January 29, 2008
Tuesday, January 15, 2008
File type choices once the photos are on your computer.
If you read my previous article, you know that one of the advantages of having the camera save your files as .jpg's instead of RAW is the size of .jepg's are much smaller. That comes with the downside of loosing some of the detail that you get with RAW files, though, because jpeg's use what's called "lossy compression". The size difference is substantial because RAW files record exactly what the sensor sees, pixel by pixel, all 8 million of them (on my Canon 30D). Jpeg's take shortcuts by recording blocks of the same or very similar colors together -like instead of "pixel 1, red; pixel 2, red; pixel 3, red" , jpeg's record "pixels 1 through 3, red". Sounds like a good thing, right? But, with 65,000 possible colors that can be recorded, it's likely that even a block of color that looks all red will have slightly different colors pixel-to-pixel. So, jpeg's fudge it a bit. Where RAW would see "pixel 1, red#12,433; pixel 2, red#12,632; pixel 3, red#12, 548", Jpeg might still record it as "pixels 1-3, red#12,548" to save space. Generally there's no problems with this. After all, most of us convert our photos to jpg to upload them to the internet anyway and we could probably never see a difference between a RAW original and a jpeg conversion.
But, you've probably heard horror stories about saving in jpeg format and loosing detail in your photos. It's true that when you save a photo as a jpeg over and over again it'll being loosing detail. That's because each time it says "well, these pixels are close enough to record as the same color" it'll include more and more pixels in that "close enough" category, which means where there were details before, after a lot of re-saving, you'll eventually loose it.
So, how many times can you re-save a .jpeg file? It depends on how many pixels you have to start with. ("Megapixels" describe how many MILLIONS of pixels your camera has.) But, with my 8 Megapixel camera, I often convert my RAW files to jpg, then de-noise and save it as a jpg again, then edit it in Gimp and save it once or twice more. That's up to 4 times for those who are counting and I've yet to see any ill effects, either on-screen at 100% or printed at up to 14x11, so I think some people are a bit over-dramatic about how much you loose. Still, though, if you can save in a "non-lossy" format you should.
Alternatives -I save as .jpg because it's the only way I can retain my EXIF data, but it's definitely recommended that you save as TIFF or .png instead if you can. TIFF is much like RAW -the files are big, but they record everything pixel-by-pixel. On the other hand, .png files are smaller because they record blocks of the same color together to save space just like .jpegs. BUT! unlike .jpg's, they don't loose data by recording blocks of similar colors as "close enough" to be recorded as being the same color
So, to summarize, try to save your photos as .png or as TIFF's while editing, especially if you tend to save and re-save a lot. TIFF's are larger, so you may want to stick with .png's since they have the best of both worlds -they are smaller, but you don't loose any data when saving the file over and over again.
Jpeg myth-busting:
- Jpeg's do not loose quality each time they are opened. They only loose quality when they are re-saved.
- Saving a file under a new name each time will not prevent data loss.
- Saving a file under a new name will not cause data loss on the original file.
- Renaming a jpeg will not cause data loss.
- Saving jpeg's at 100% quality does not mean you won't loose any data (or detail), you just won't loose as much.
Thursday, January 10, 2008
New Year's Resolution: Understanding your sensor and your file format choices.
Sorry for the pun in the title, but I've noticed that there's a lot of confusion over file formats and resolution. Let's see if I can help clear things up:
First, think of your camera's sensor as a grid with millions of tiny squares on it. Each square records the color that it sees when you take a picture, and all of them together make up the photo itself. This isn't abstract -it's really how digital cameras work. In fact, the "resolution" of your full-size photos will tell you how many tiny squares your sensor has.
My 30D, for instance, produces photos that are 3504x2336 at full size. This means that the sensor has a grid that's got 3504 squares on one side and 2336 tiny squares on the other. And if you multiply the two numbers together you get 8,185,344 tiny squares total, which we usually divide by 1 million and call "megapixels". So, the number megapixels a camera has is directly related to the number of tiny squares on the sensor, all of which describe what is known as the camera's "resolution" or how much detail it can capture in a given scene.
So, on with file formats:
On your camera you probably have some or all of the following choices:
* RAW: This format records exactly what each and every one of those millions of tiny squares on your camera sees. You get every scrap of detail in the scene with nothing lost. The downside, as you may imagine is space. These files can be VERY big and fill up your card fast! You'll also need to convert them to jpeg at some point before you can upload them to the internet for viewing or before prints can be made from them. This format is best for people who intend to do a lot of manipulation in software where the extra data is necessary.
* High/Medium/Low Resolution jpeg: Now that we know that "resolution" means the number of tiny squares, this becomes more obvious. These settings effect how large the photo is, and it usually gives you the size in pixels: 1600x1200, 1024x768, 800x600, etc. The smaller the photo, the lower the resolution, and the less memory on your card that it takes up. The downside is that you loose detail in smaller sized images and if it comes out really good you may not able to print it at large sizes like 8x10. An easy rule of thumb about resolution vs printing sizes is to just divide the resolution by 100. In other words, 1600x1200 would print to 16x12, 1024x768 would print to about 8x10, and 800x600 would print at about 6x4.
* High (Fine) /Medium (Normal)/Low Quality (Basic) jpeg: The quality rating allows you to get smaller images by allowing the camera to compress the image more than it otherwise would. On Medium or Low you'll be more likely to see rough, blocky looking edges to the details in your photos. I'd recommend shooting on "High" or "Fine" at all times. This is a really bad way to save space on your card.
Coming Soon: More about jpeg's, compression, and their effects on your photos.
Wednesday, January 2, 2008
My goal for 2008 -a photo a day
Last year, for a few weeks I had a goal of taking a photo a day and posting it on Flickr. It didn't last long, but one of my favorite photos was taken out of desperation to get a photo for one of those days:
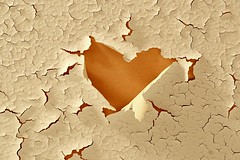
(click on the photo for a larger version and a description of what it is and how it was taken)
Now, I'm not usually one to make New Year's Resolutions, but I think that, starting today, I'll try my best to take a photo a day. To increase my chances of this lasting more than a few weeks, I'll add that only 1 a week has to be good enough to post to my Flickr account.
Having such a goal keeps you shooting (and therefore practicing) daily. It also helps you look for subjects that you may otherwise miss. And lastly, it helps me get over my habit of skipping photo opportunities if it means I have to break my routine by pulling the car over or even worse -having to turn around! ;-)
So, there you go. This is my public announcement of my goal -perhaps that'll help me stick to it as well. And for those of you who are reading this, I highly recommend setting a similar goal for yourself.
Subscribe to:
Posts (Atom)