Showing posts with label walk through. Show all posts

Tuesday, January 11, 2011

Growth comes from overcoming frustration

With the funds I received from a rare and generous donation I was able to buy a Pullip doll that I intend on using for photography. That might sound really stupid, but as you can see from the examples of Pullip photos here, they really can make great subjects.

So, the doll arrived the other day and I immediately started to think about how to photograph her. My first thought was to make it animal-oriented. I bought her because she looks a little like me, and so I thought about posing her with all of my Vet Tech books (for school) in the background.

I arranged the books and the doll and this was my best shot out of the first shoot:


That wasn't nearly as effective as I thought it would be. So, I re-assessed the situation and decided to focus more on the doll. Here's my best shot from the 2nd round:


That's better, but still not a very good photo. I started getting frustrated. Why did I spend all that money on this stupid doll? Why can't I do this? Maybe I should stick with the still life genre or macros -things I'm good at.

I took a deep breath and thought about the advice I'd give to someone else in my situation -take a look at other people's photos of the same subject. That's when I found this photo. THAT's what I wanted to produce!

What's the difference? No background. They got in much closer. I decided to forgo the background and start working on the kitchen table. I propped my doll's head up and positioned her, then took some photos shooting down at the doll at various angles. And that's how I came up with this:


Untitled

Much better. Postable. I'm glad I stuck with it. The trick of searching Flickr for inspiring photos has helped me out of similar situations in the past and it's one of my favorite pieces of advice for frustrated photographers. The other lesson to be learned (or re-learned) here is that even though our instincts often lead us to want to include more in a photograph, it's often more effective to get closer instead. Zooming in can eliminate distractions and create more intimacy with your subject. I think that's where I was going wrong with the first couple of shots.

Tuesday, October 12, 2010

Is lack of time an excuse?

Since I lost my job a couple years ago I've had a lot more time on my hands. For the last year I've been volunteering and working a part time job, but that left plenty of time for photography. Funny thing is I lost my motivation or inspiration. I'm not sure which was the cause, but I just stopped taking photos. It frustrated me, but I'd pick up my camera and just have no idea what to shoot. Even dragging my equipment on hikes didn't inspire me. All I got was a backache.

So, it's funny that now that I'm back in school with no time on my hands, and worse yet in the middle of a week that started with an Exam and a quiz on the same day yesterday, another quiz today, and contains 2 Lab Practicals tomorrow -and it's now that I end up having one of those flashes of inspiration that I've been missing. I took a good hour or two out of my studying to play with a concept that occurred to me while on a study break in the backyard as I was playing with my dogs.

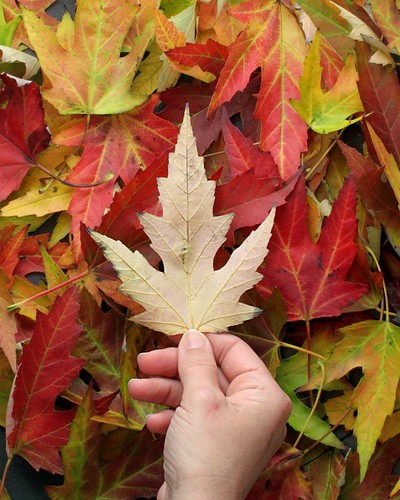
I was looking at the leaves that were falling from the Maple tree in my backyard. They are beautiful and they reminded me of a photo that I had submitted to a contest about a month ago. It was taken at least 2 years ago. I'm proud that it's currently in the top ten, but it's just a reminder that I have nothing new in my portfolio. ...anyway, I started looking at the leaves that were face-down on my lawn and how plainly white they looked. How is one side so different than the other? Then a concept occurred to me...

I heard something a long time ago that struck me. Two people who are intent on fighting could hold a quarter up between them and fight for hours about whether it was heads or tails. Both would be right ...from their own perspectives. But we rarely think about how much our perspective adds to the conflicts in our life.

So, there was my concept. The leaf would replace the quarter. Beauty on one side, dull and boring on the other. It mirrors the perspective idea and maybe even expands on it. But, how do you shoot that?

I tried a variety of shots to convey the idea, but simplicity won (as usual, for me anyway) and this was the photo I came up with:

The Importance Of Perspective:

The importance of perspective
It's easy to think your perspective is the only one, but much can be missed by not fully investigating whatever's at hand.

This shot was accomplished by gathering all the "pretty" leaves from my backyard in a bucket, bringing them inside, and arranging them on a piece of black poster board at the bottom of my light tent, which was on the floor. A lamp was set on the side of the light tent opposite my hand. I then put my camera on a tripod and attached the remote (although the self-timer would work as well), grabbed one of the leaves, held it up and pressed the button!

Wednesday, March 11, 2009

Gimp: Fixing Posterization

The following photo was taken by auntyre1 on Flickr and was used with her permission:


(Click on the photo to view it larger, see the EXIF, etc.)


I love everything about this photo from the perfectly white background to the soft shadows that define it's textures. The only thing wrong with it is the areas of lost detail in the highlights. When this banding and loss of detail occurs in a photo it's called "posterization" and the aim of this article is to help auntyre1 to fix it.

Fixing a photo like this requires talent more akin to painting than to photography, so for many photographers this will take a lot of time and practice, but it's well worth the effort to save a photo like this one, so here's how I'd go about it.

The first thing to do would be to open the photo in Gimp and zoom in to see it at 100%. From there we need to pick an area to start working on and I picked the petals at approximately 1 o'clock.


(Click on the photo to view it full size.)

There are 2 ways of bringing detail into the posterized portion of the image, and I'd probably use them both depending on the area I was working on. The first and probably easiest way is to use the "Smudge" tool (in Gimp this looks like a hand pointing downward). You use this tool by placing it on the photo and dragging it, which will bring a portion of the color from where you started in the direction you drag it, just like smudging paint or pencil on paper. Play with the opacity of the tool (which can be changed on the toolbox window under all those icons when the "Smudge" tool is selected). If your smudges are too obvious, just turn the opacity down until it starts blending smoothly.

The other way of adding detail to the petals is to use the "Clone" tool (which looks like a stamper). With this tool, you hold the "Control" key down (which may be labelled "Ctrl" on your keyboard) and click in the area you want to copy FROM. Then let go of the "Control" key, and use your mouse to click and drag, which will paint what's in one area to the other area. I'd use this in a similar manner as the smudge tool to bring the detail from the part of the petal that's further down up towards the tip of the petal. This is a more effective tool if you have a lot of blank area to fill in with detail. The smudge tool is best for smaller areas.

Here's a screenshot to show where I used these two tools as well as my result with them:


(Click on the photo to view it full size.)

After you get the detail filled in you'll notice that there isn't a clearly defined edge to the 2nd petal I was working on in the example above. Unfortunately, there are no other petals at the same angle that we can use to clone that edge in and making an edge where there wasn't one before is hard to do in a believable manner if you try to paint it in by hand. But there is a pretty easy way to do it...

Look for an edge that's about the right shape elsewhere in the photo. (See screenshot below for the one I chose.):
  • Use the "Free Select" tool (looks like a lasso) to select just that edge.
  • Go to "Edit" > "Copy" (or Ctrl + C)
  • Create a new layer by going to the "Layer" menu and selecting "New Layer". Keep the default of "Transparency" for layer type, and click "OK" to create the new layer.
  • You'll automatically be taken to the new layer, so just go to "Edit" > "Paste" (or Ctrl + V) to paste that petal edge onto the photo.
  • Click and drag that petal over to the place we want to put it (I know the angle's wrong, that's ok)
  • Click on the "Rotate" tool. It looks like a little box with arrows indicating rotation on it.
  • Then click on the petal edge (because that's the part we want to rotate) and a "Rotate" window will appear. Ignore it for now.
  • Click on one side or the other of that petal edge and drag it left or right to rotate it into the position that'll match the edgeless petal. Click "Rotate" when you get it where you want it.
  • Chances are, unless you are REALLY good the petal edge isn't EXACTLY where you want it yet. Click on the "Move Tool" (looks like a "plus sign" made with arrows going up & down and left & right).
  • With the Move Tool selected you can drag the petal edge to get it where you want it.
  • If you're like me you'll have to go back to the Rotate Tool and tweak it a bit more to get it to line up perfectly. Just keep tweaking it until it's right.
  • If you have any areas that look like they'll be hard to blend into the existing petals, use the Eraser Tool to erase them. It won't be perfect, we'll blend the old and new together in a minute...
  • When you have it like you want it, go to the "Image" menu and choose "Flatten Image" to merge the layers together so we can work on making the new and old areas seamless.
  • Use the Smudge Tool to blend the new petal edge into the existing petals around it.
Here's my result:


(Click on the photo to view it full size.)

So, there are the basic techniques for fixing this image and others like it. You just have to keep using those tools and techniques to finish the entire flower. Yes, it'll take some time, especially if you aren't familiar with these tools yet. They all take some practice to use well. But, like I said before, this photo is worth it. If you start getting frustrated, walk away and come back to it later. You'll learn a lot if you stick with it. And, if you get stuck, let me know and I can help you with whatever you are stuck on or expand on some of the tips and techniques to use whatever tool's giving you problems more effectively.

And, please auntyre1, send me an email when you complete your editing. I'd love to see how it comes out!

Thursday, May 15, 2008

Infrared Converted Camera Rental Part 2

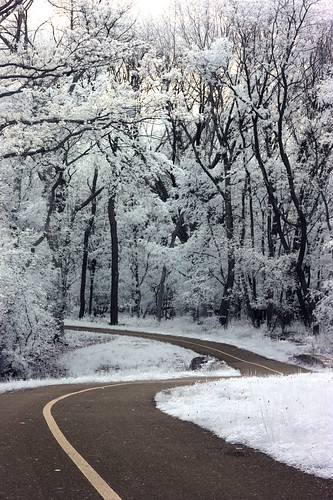
Infrared Road

I took the photo above on my lunch break yesterday. It was an enlightening day. Because the camera's exposure meter measures visible light while the sensor's been converted to see infrared light, it's not very accurate. I wrote about this yesterday, but at that time I was under the impression that the difference would be fairly standard -like if you always over expose by 2/3 you'll generally get good results. And this is why testing is so important.

Turns out that the exposure varied, sometimes wildly. In fact, for awhile I was underexposing according to the exposure meter. So, the lesson learned here is that it's important to know how to use your histogram to determine exposure when playing with infrared. RAW is a good idea as well since it gives you some leeway in post processing, and bracketing is also a good idea.

Another surprise was that my copy of DPP (Canon's RAW software that comes with their cameras) couldn't open the RAW files from the XTi. So, I had to download ufRAW in order to work with the files. I don't like it nearly as much as I like DPP (although it may just be that I'm used to DPP), so I'm hoping there may just be an update for DPP or something?

Anyway, I feel like I have the technical stuff down at this point so last night I spent some time searching Flickr for infrared photos to see what kinds of subjects and compositions I like in order to get ideas for my own photos while traveling. I favorited some. If you're interested in seeing them, click this link to go to my photostream and then click on "Favorites" under my name.

Wednesday, March 5, 2008

Blue Ice

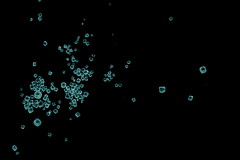
Blue Ice

I was going through photo withdrawl and it was icky cold outside, so I went on a scouting trip through the house looking for things to take photos of. I played with some alternative ways of lighting a model car, which worked well, but not well enough to post, so I got bored with that and started looking for something else. I'm not sure why, but I had this feeling that I wanted to do something abstract and macro. As I thought about it, salt came to mind. I've always been fascinated by how each grain of salt is a cube if you look close enough. So, I ran downstairs and grabbed the salt shaker (which I've yet to return to the kitchen) and one of our dark blue plates to use as the background (which I also haven't returned to the kitchen yet).

I grabbed one of my bendy floor lamps with 100W daylight-balanced CFL's in it and positioned it to light the scene from directly above. I didn't use my light tent for this one because glare, shadows, and reflections weren't really an issue here. Then I turned the plate upside-down because the bottom was less scratched than the top, and I sprinkled some salt on the surface. Next I giggled the plate, trying to figure out what part would look most interesting, and I started trying to line something up in the viewfinder. This scene appealed to me because it's off-center, which makes it more interesting, and I liked the grain in the lower left corner as well as the trailing off of the grains to the right across the frame.

Once I found the area to shoot, I started snapping photos with my Canon 30D and a Canon 100mm f/2.8 on a tripod, using a remote shutter release to eliminate camera shake. I believe mirror lockup was also enabled to eliminate that source of shake as well so that I could get the sharpest photo possible. I started at f/4, took about 4 shots, then 4 more at f/8, and 4 more at f/16. Afterwards, I ran downstairs and checked the results. They were ok. The best one was a bit blurry and I wished for a few tweaks in the pattern of salt grains, so I ran back upstairs and hand-picked some bigger salt grains to trail off right, and was a bit more careful about camera shake on this set as well. When I was done, I ran back downstairs and this time I was happy with the results.

The original photo showed the blotchy glaze job on the plate, which was kindof ugly and distracting, so I darkened the photo up in Digital Photo Pro to make the blue plate appear black, then used curves to brighten up the salt again afterwards. I cranked the contrast up a bit to make the salt really stand out from the background, then I converted the RAW photo to jpeg and imported it into Gimp.

My first thought in Gimp was color. It was dull in black and white, so I clicked on the "Colorize" tool. By default it opens to a color that's either exactly this hue or very close to it. I played around looking at reds and purples, but in the end this ice blue look appealed to me the most. That's it. I saved it and that was that. The whole thing start to finish took less than an hour.

Saturday, February 2, 2008

How to create a colorized black and white photo in Paint.NET

* Open your photo in Paint.NET
* Go to the "Layers" menu and select "Duplicate Layer". This is like taking two copies of your photo and setting one ontop of the other.
* Now you should see the two layers in the "Layers" box in the lower right hand corner of your Paint.NET workspace. Click on the top layer in the "Layers" box to make that layer the "active" one that you'll be working on.
* Go to the "Adjustments" menu and select "Black and White". This makes the top layer black and white.
* (Optional) The photo on the bottom is still in color; you just can't see it because it's on the bottom. To demonstrate this, uncheck the box next to the top layer in the "Layers" box. Removing the checkmark makes that layer invisible so that you can see the layer(s) underneath. If you do this, you'll see the color version re-appear. When you are done, re-check the box so the top layer (the black and white one) reappears.
* Make sure the top layer is "active" by clicking on it in the "Layers" box.
* In the "Tool" list, select the "Eraser"
* Erase the parts of the top layer (the black and white one) where you want to see the bottom layer (the color one) through it. (If it's a large area, you may want to do a rough selection with the lasso tool first and delete a large portion of it that way, then use the eraser tool to just do the fine details around the edges.
* When you are finished, for safety, you may want to save it as a .pdn file -at least temporarily.
* Then go to the "Layers" menu and choose "Merge Layer Down" -this pastes the two copies of your photos together so it can be saved as one image. BUT BE CAREFUL!!! This step cannot be undone! (This is why saving it as a .pdn file first is a good idea.)
* Save the file as a .jpg or whatever to upload to the web (.jpg files don't support layers, so you have to merge it down first).

Monday, October 29, 2007

Getting sharp photos in low light

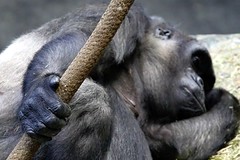
The gorilla's hand

(Click on the photo for a larger version, the EXIF data, etc)

On Saturday I met Mike (ndisgr8) from my yahoogroup at Brookfield Zoo and we spent the whole day taking pictures. It was overcast in the morning, which made many of the indoor exhibits, which are largely lit up via skylights, very dark. As a result, it was extremely difficult to get high enough shutter speeds to get a decent photo in there. I figured this was a great example of low-light photography which everyone seems to run into as a problem from time to time, so here's a write-up about how I dealt with the situation and managed at least a couple decent pics from the ape house...

Equipment:
I was using my Sigma 50-500mm f/4-6.3 lens because this zoo gives the apes a lot of space to roam around and play, so I needed all the "zoom" I could get. For those who aren't familiar with the "f numbers" on lenses, it's included in the description of the lens for just this purpose (low light photography). The lower the "f numbers", the better the lens performs in low light. When you have a range of f-numbers like for this lens, it means that at the wide end (50mm) , 4 is as low of a number as you'll be able to choose for your aperture. At the long end (500mm), it's 6.3.

The reason this matters is as follows: The lower the aperture number, the faster your shutter speed can be. This is because as the aperture numbers get lower, you're letting more light into the camera, with more light via aperture, you can get faster shutter speeds (which allow less light to get in because the shutter doesn't stay open very long). -It's all a matter of balance.

Step 1: Aperture
This lens (the "Bigma") is not very "fast" (meaning it has relatively high f-numbers), so it really limits me when there's not much light. Because of this, I immediately put my camera on aperture priority mode and set it for it's lowest aperture number so I could get the most light possible via aperture (which would, therefore, allow the fastest shutter speeds possible).

Step 2: ISO
Before even bothering to begin looking for photo opportunities, I also set my ISO to 800. The higher your ISO number, the faster your camera will record the light when you take a picture. So, in low light you want to choose a high numbered ISO.

The cost for using high ISO numbers, however, is noise. Most noise can be removed in software later, but there's always an effect on picture quality. You should, therefore, always shoot in the lowest possible ISO setting for the lighting conditions you are in. In other words, remember to set it back down to 100 when you're shooting in daylight again.

Each camera is different as far as how much noise it produces at different ISO's, so it's a good idea to experiment and know how your camera behaves and how well you can remove the noise it produces at each different setting. This way, you'll know not to go above (in my case ISO 800) or you're risking not being able to remove the noise from the photo effectively. -I did end up moving to ISO 1600 later on in the ape house as a last resort because I wasn't getting any clear shots at ISO 800.

Step 3: Check your shutter speeds
Next, I lined up a shot and checked my shutter speed. With most SLR's you can see the shutter speed in your viewfinder. In this case, I was seeing shutter speeds ranging from 1/10 to 1/60 most of the time.

Remember, the rule of thumb is that you need a tripod if your shutter speeds are faster then the reciprocal of your focal length. That's just a fancy way of saying that if you're shooting with a 500mm lens like I was, your shutter speeds should be faster than 1/500th of a second. If you're shooting at 300mm, they should be faster than 1/300th of a second, etc. (Although 1/60th of a second is as slow as you should go with any lens because it's hard to hold the camera steady enough when your shutter speeds are slower than that regardless of how wide the lens is.)

So, I needed shutter speeds that were up to 50 times what I was getting!

Step 4: Put your camera on a tripod
I had a monopod with me just because my lens is so heavy, but I didn't have a tripod. So, I leaned the monopod against the railing and steadied it further by bracing it against side-to-side movement with my foot. A tripod would have made it more steady.

Of course, the monkeys and apes were rarely perfectly still, so even with a tripod, you'd still get blur unless they happened to stay still during the shot.

Step 5: Use burst mode
If you've done all you can with settings and steadying the camera, but your shots are still coming out blurry, your best bet is to take as many shots as possible. Many people aren't aware of it, but they jerk the camera a bit when pushing the shutter button to take a photo. That may be contributing to the blur, so if you put your camera in burst mode you can hold the shutter button down and it'll take several shots one after the other. Even if you're sure you don't jerk the camera, just by shear volume, this will increase your chances at a clear shot.

Step 6: Get creative!
I was doing all of that as well as trying to concentrate only on the apes that were in the best light and I was still having trouble getting clear shots. So, for a few shots I decided to try something different. I was shooting in RAW, so I knew that I'd have a good chance of getting most of the data out of a photo even if it was severely under-exposed (dark), so I intentionally under-exposed several photos as a last resort.

Your camera should have an exposure meter that looks like this: [-2...-1...0..+1..+2] and there's a small indicator that shows you your current exposure setting. "Zero" is normal exposure, but if you use exposure compensation to move the indicator towards the positive numbers, you're telling the camera to over-expose the photo by that amount. When you move the indicator towards the negative numbers, you're telling it to make the photo darker (under-exposed).

Darker photos are a result of letting less light into the camera, so when you move the exposure down into the negative numbers you should get higher shutter speeds. When you're shooting in RAW you're often able to lighten up the photo by up to 2 stops (which correlate with the numbers on that exposure graph on your camera).

So, I moved the exposure meter down to -2 and took a shot. I reviewed the photo on my LCD and turned on the option to view the image's histogram. I made sure the data didn't run off either side of the graph (because that indicates that you're missing data, which you can't get back even in RAW). The photo was very dark, but the histogram looked ok, so I tried a few shots like that and hoped I'd be able to "save them in software" later.

Summary:
The photo above is one of the ones I took on ISO 1600 and under-exposed by 2 stops, then "saved" in the RAW software that came with my camera (Digital Professional Pro). The "right" solution to this kind of a problem is a "faster" lens (meaning a lens with lower f-numbers), but everyone eventually finds themselves in a situation where they didn't expect to have a low-light issue and they need to do what they can with what they have. Hopefully, this write up has given you some ideas for the next time you're shooting in low-light.


Extended reading / other resources:

Wednesday, September 26, 2007

Simplicity

So, I decided to break away from my botanical shots and just do whatever comes to mind. On my way home from work, I saw that there were already some leaves turning color, so out of habit or inspiration (who knows?) I decided to do an "Autumn Leaves" shot.

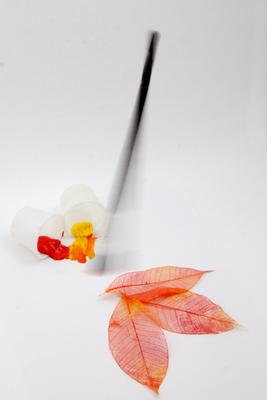
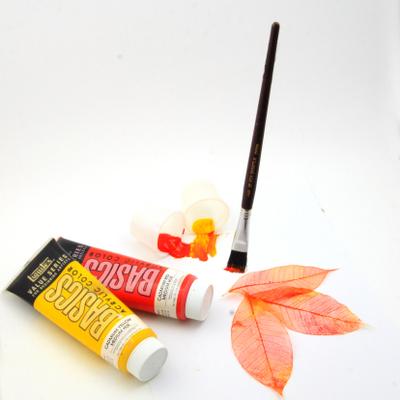
My concept was something along the lines of the gods of autumn painting the leaves their colors. What I really wanted to do was take my leaf skeletons (seen here), possibly paint them green, and then pour red and yellow paint onto them, catching the paint pour in the photo. But, that was a bit complicated -I wasn't sure how to stage it. So, I painted the leaf skeletons red, orange, and yellow instead, and then staged a shot where the paintbrush hung over the leaves by a thread I could clone out. I tried it 2 ways -with the paintbrush still to show detail, and with the brush swinging to get some motion blur. Neither worked in my opinion:


I thought the paint was too much and the leaves just weren't right. And the idea of the paintbrush hovering wasn't coming through because there was little to hint at such a 3-D space. So the next day I gathered a few colorful leaves -there weren't many, but I found a few, and I tried again. I thought this time I'd do something similar, but make the leaves more central since they are the main idea anyway. Unfortunately, I failed again.


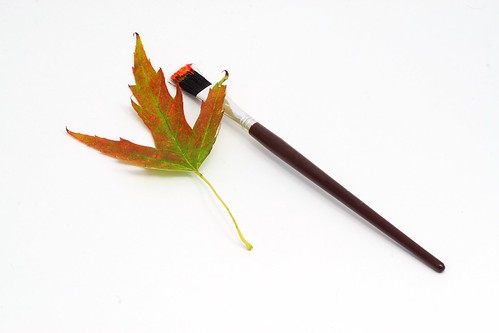
This one was getting a bit closer. It was less gimmicky, more about the leaves, but again -the paint buckets weren't showing up against the white. At this point, they were days old, the paint was dry, and they were very stuck to the white paper. I didn't really want to redo the photo with a black background and felt that the paintbrush would get lost if I did that anyway. So, I decided to lose the paint buckets. That left me with leaves and a brush. I arranged the items in several different ways, and eventually decided to simplify the shot by choosing just one leaf. As soon as I looked through the camera, I knew I was getting closer. Here's the end result:

Autumn's Painting

It looks quite nice large. I'm currently using it as my wallpaper and I think that although it underwent many changes, it still conveys the same feeling that I was hoping for when I first conceived of the project.

What do you think? Feel free to comment here, on the Photography_Beginners yahoogroup, or on Flickr.

Wednesday, September 12, 2007

Botanical Bathroom Project

I'm in the middle of painting my bathroom right now and while trying to decide what theme I'd like to go with in there, my Mom asked me if I could take some botanical shots for her bathroom. Hmm... I thought -there's an idea. So now, I'm looking to take at least three good botanical shots for us to use for our bathrooms.

At first I thought it'd be easy. I mean, what's more cliche' than botanical shots? -I immediately went to Bed Bath & Beyond and Linen's n' Things to see what they had for inspiration. I didn't find much. Searching for "botanical" on Flickr and Google Images didn't result in much either. The one place I did find some inspiring photos is allposters.com (that link will bring you to the botanical section).

So, I saved a few items that I liked from there:
* A set-up shot with twigs in a vase and a plate of rocks
* A set of 3 photos of curly things or 3 acorns (or anything of similar shape would work)
* A couple of pinecones in a comical arrangement
* A set of 3 matched studio shots of leaves

The most "doable" one is the last one. A kind of study of leaves resulting in a matched set of photos, all framed the same way. I think it'd be a nice clean look and it comes close to the photo that I took this weekend (although I think I'd like more recognizable leaves -Oak (although that local itch mite breakout makes me not wanna go anywhere near an Oak tree right now), Maple, and I like the fern... Maybe I can get one cheap at a garden shop.

Anyway, this project is "in progress" -I'll update this blog entry when I have some final images.

Wednesday, August 22, 2007

Planning for an Event (Part 3) -Results

Well, planning only goes so far. The race on Sunday was rained out. But, the car show did happen on Saturday, so lets back up to the previous topic, "Research", for a sec...

While researching drag racing photos, I took the time to look up some car show pics as well. Here's one that really stuck with me as one that I liked and would like to replicate: http://www.flickr.com/photos/motors/527999671/in/set-72157600304454278/


Now, back to Results:
On, Saturday, while driving to the car show I couldn't get over the sky. It was perfect for photos and I knew I'd want my polarizer out to enhance the blue sky and pop the white puffy clouds out even more. -Good photos often rely on the surroundings just as much as the subject. A great sky can make or break an image. I was in luck!

When we arrived, I walked around looking at cars for my own interest for while, then broke off from the group to walk around on my own. I started walking towards the field because I liked the idea of grass under the car like the photo I saw and liked previously. As I walked, the first thing I noticed was an old barn / warehouse building that I've used as a backdrop before. I love it's weathered wood look and kept it in mind as something to use in a photo again. The only thing I needed was a nice looking car in the right spot...

The problem I often run into with car show photos is that interesting cars, according to the laws of averages, often have cars parked beside them. Then, you're left zooming in, using a head-on shot, or otherwise compromising the angle of the photo to eliminate or hide the other cars. ...Part of what I like so much about the photo I found on Flickr is the simplicity. One car, alone in the grass, a nice blue sky. That's about it. Nice lighting, a nice angle, that all helps as well, but the hardest part is finding a car with enough space around it to single it out like that...

In my case, the car show was packed. There were no cars that could be singled out. But, I did find an interesting car, on the end of a row, in the perfect spot in front of the barn, while the sky was still looking good, and I took my opportunity: (click on the photo to view larger versions and EXIF data).

Car Show

I'm very happy with this shot. I like the angle, the colors, the background, the sky... So many things came together just right -and not much of it was technical. Sometimes you just have to be in the right place at the right time and be looking for such an opportunity. I was primed to see this shot, and that's the frame of mind you have to be in when you're at an event to come away with images. Many times I find that I have to choose between being a participant in the event (looking at the cars for my own enjoyment, looking at people's setups, talking with friends, etc) or taking pictures. I can't do both at the same time. So, I often break off from our group for stretches of time to "be a photographer", then I rejoin the group later.

Thursday, August 16, 2007

Planning for an Event (Part 2) -Research

After you have a general idea of what to bring, it's time to start thinking about the kinds of shots you'll want to take. My subject this weekend will be cars. The event I'll spend the most time on is the drag racing on Sunday, so how will I capture the action?

If it wasn't a closed track (and a very relaxed event), I'd think about calling to see if I could get an access pass. But, I've been there before and don't feel this is necessary.

So, I reviewed last years photos. Most of the drag racing photos I took were taken from above, up in the stands. This makes me, as a viewer, feel disconnected with the racing that's going on. I feel like a spectator instead of "part of the action". So, this year I want to get closer. ...Last year my biggest telephoto lens was a 300mm. This year, I have a 500mm, so that'll help. I can stand way down the track and still get some close-up photos so the car will fill the frame. -A couple years ago, reviewing my photos revealed that empty stands behind the cars made it look like it was a small event (everyone tends to sit on one side of the track because the other side is hard to get to). So, last year I made an effort to take photos from the other side so you could see the crowd more and it worked out well.

When I'm done critiquing my own previous work, I want some new ideas. I know I've seen good drag racing photos in the past, but I can't remember the specifics of how they looked: the angle they were taken from, what lens may have been used, etc. So, it's time to do some searching. I'm a member of the P.O.T.N forums, and I know they have some talented motor sports photographers, so I hit them first and searched for posts within the "motorsports" forum, and with the word "drag" in them to eliminate photos of other kinds of racing: rally, road racing, etc. I came up with a few really good photos: 1, 2, 3 -some of which also had details about lenses, apertures, etc. Usually, however, I just search Google Images or Flickr.

...however you go about it, this prep works means you won't be wasting time thinking about angles, etc at the event. Now I know that the photos _I_ like of drag racing usually show the car head-on or sometimes from behind, but always filling the frame and shot fairly level with the car, not from above. Also, from the forum, I know that for burnout pics my 100mm macro lens set at f/2.8 is probably a good choice. -Got it. I know just what to do when I arrive!


Having an idea of the outcome you are looking for is one of those things that can improve your photography 100% overnight. And this, of course, goes for any kind of photography including portraits, kids soccer games, birthday parties, whatever!

Wednesday, August 15, 2007

Planning for an event (Part 1). -Gear preparation.

This Friday I'm leaving for an annual car event my husband and I attend every year. Aside from the fun of friends, our cars, and the racing, I also enjoy the event as a chance to take some pictures. ...I don't often get a full day's worth of photography in, muchless an entire weekend! So, today (Wednesday) I'm starting to prepare for the photography part of the event, and I thought I'd share my planning with you. Perhaps you can use some of it for your own outtings, or perhaps it'll prompt you to share your ideas in the comments section. So, here goes:

I have a formal checklist I've made that contains all of my photography equipment and other items I've found useful to have in my photography kit. You don't have to make a formal checklist if you aren't a "checklist" kind of person, but you should at least have an idea of what gear you'll be bringing.

Basic questions to ask yourself:
* Which camera body/bodies will you take? (Sometimes it's nice to have both an SLR and a point and shoot)
* Which lens(es) will you need? (Remember you can often rent lenses for Nikons and Canons relatively cheaply if you wish!)
* Accessories? (Filters, extra battery, extra memory, remote shutter release, flash(es), cleaning cloth, rocket blower, whole cleaning kit, props, ???)
* Will you need a tripod? Monopod? Table-top tripod? Gorrilapod?
* Do you need your laptop? (Remember: power cable, network/wireless card, USB cable, memory card reader, memory card adapters, ???)
* Do you need your battery charger as well?

Other things I like to have with me:
* A garbage bag to stuff my camera equipment in if I get stuck in a downpour unexpectedly.
* A piece of black and white cloth to use as backgrounds for macros.
* A pieces of tinfoil, folded up -to use as a reflector for macros.
* A flashlight for seeing camera settings at night (also useful for light painting!)
* Etc. -After I get back from an outing, I usually write stuff down that I wished I had so I can remember to bring it next time.


I have two camera bags right now -one is a Tamrac Velocity 7 sling bag that holds my camera with an attached lens plus 2 other lenses and most of my accessories. I carry this bag daily, it's compact and not too heavy, yet holds enough for me to capture most anything I come across. My other bag is a photo-backpack that will hold my Bigma (50-500mm lens, weights 6lbs by itself!) as well as all my other gear and it also has places on the sides and bottom for tripods, etc.

For this extended weekend trip, I'll be carrying my sling bag most of the time: during the drive there (we caravan with friends), at the car show on Saturday, for the party Saturday night, and for "walking around time" at the track on Sunday. I do plan to spend a good amount of time Sunday with my Bigma on a tripod or monopod, though, so I am bringing my whole kit. -I'll just have to switch out the Bigma and tripod/monopod with my sling bag at the track as needed.

I will also be bringing my laptop for instant viewing as well as for dumping photos onto when I fill up my memory cards. Last year I know I filled up a card a day at least, but I was shooting on RAW + jpeg. Lately I've just been shooting RAW. Still, though, when entire days are potentially filled with photo ops, it's best to be able to dump a card when you need to (or at least have a backup card at hand). I never want to miss a shot because I'm being conservative with the shutter button. The more photos you take, the more chances at a winner. Good photography does take skill, but there are often elements of luck as well no matter how good you are!

So, my planning for what to bring is rather simple, then. I'm bringing everything. :-)

Thursday, July 26, 2007

Studio photography on the cheap

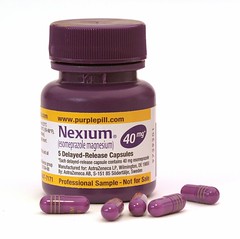
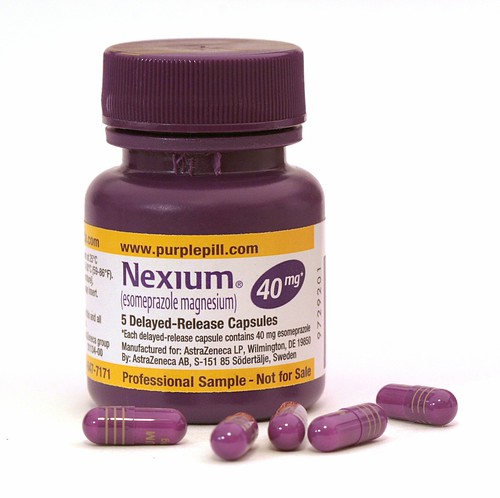
The Purple Pill

(Click on the photo to see a better version of it. Blogger is re-sizing it poorly, so it looks a little funky here...)

For "proper" studio photography, most people purchase light tents and photography lighting in order to get that soft light that eliminates harsh reflections as well as harsh shadows. But, I want to demonstrate how I get studio shots without any special equipment.

For those who are not interested in studio photography, note that the goals in studio work are the same as for portraits. It's just that for portraits, the subject's a bit bigger...

So, here's a walkthrough of how I took the above studio shot McGyver-style.

Equipment and supplies that I used:
* Camera
* Tripod
* Shutter release cable (a self-timer works if you don't have one)
* 2 pieces of copy paper
* A white plastic garbage bag
* A 5-foot piece of wire, bent
* A paper towel
* A drinking glass and empty boxes for propping stuff up.
* A bright lamp (a halogen desk lamp is perfect)
* At least one other lamp (another desk lamp, a clamp light, or a floor lamp -whatever you have around)

I set up under a halogen spot-light that's in the ceiling above my kitchen counter. (I've also set up in the bathroom successfully -under the lights above my sink.)

I propped the copy paper up against the drinking glass so it was sitting at a 90* angle. This created the white below the bottle and pills in the picture as well as the white in the background without creating a "seam" between the two. (This works well with white poster board as well when you're shooting larger items.)

I then set the bottle on the paper, and arranged the pills around it in a non-centered way so the overall shape of the subject was more interesting -it also gave the pills a more hap-hazard look I think.

Next I needed something to filter the light through to spread it around. This is what the walls of a light tent do, so I looked around for something that'd work similar to that. What I ended up doing is taking a white plastic trash bag and some wire to make a frame to keep it flat. You could just as easily tape the corners of the bag to 4 boxes or something to keep it flat. It doesn't have to be perfect, and you don't need to cut the bag either -double-thickness (at least for the brand I'm using -regular Hefty bags) seems to work just fine. (Of course, if your light is significantly brighter or more dim, this may not be the case.

I propped my trash bag light filter up so it's middle would be over the bottle and under my halogen desk lamp. -I then turned the lamp on and checked how the lighting looked from the perspective I'd be shooting it from.

I ended up with a lot of glare on the label because it's glossy and I also had 2 bright spots on the bottle. This meant that the light was too bright. I placed a paper towel on top of the trash bag and moved it around until the highlights and hot-spots were gone.

The next thing I noticed was that, while my "trash bag light filter" made the shadows fuzzier, the shadows were still more noticeable than I liked. I grabbed a fairly dim floor lamp and propped it at a 45* angle against a chair, and aimed it directly at the bottle (from the front so that it eliminated the shadows in the front where they'd be visible in the photo).

I checked the view through my camera once again and found that this created more hot-spots, so I lowered the floor lamp until it's harshest light was below my subject, leaving it's softer (more diffused light) to fall on my subject and eliminate much of the shadows that I had a problem with earlier.

At this point, the setup was done. I was happy with how the scene looked, and the next thing to think about was exposure. -I had a fairly dark subject on a very light background which is always tricky. I knew the camera's light meter would see all that white and would try to tone it down, which would my my photo darker than it should be. -On top of that, my goal was to over-expose the background so it ended up looking all white! (but not so much that it over-exposed the white label on the bottle.) I decided I'd start with exposing the scene 1 stop above normal or at +1.

Next, I had to decide what setting to use on the camera. For studio shots I tend to go with Aperture Priority so that I can control the depth of field without worrying about the shutter speed because it really doesn't matter much in still-life photos like this one. Generally, an aperture of f/8 to f/16 is the sharpest part of any lens, so I try to keep within that range if I can. -I wanted a fairly shallow depth of field, though, so I decided to try f/8 to start with.

Last, I turned on mirror lockup. -Not all cameras have this option, but if yours does (on my Canon 30D it's Custom Function 12, for other makes and models, check your manual). Mirror lockup can help you get sharper photos when you're using slow shutter speeds and here's how it works: When you take a photo what happens is the mirror that allows you to see the image through the viewfinder flips out of the way so that the image can get through to your film or sensor. When the mirror flips up it causes the camera to vibrate ever so slightly. Mirror lockup creates a delay between when you click the shutter the first time (and the mirror flips up), then you wait and click the shutter a 2nd time to take the picture (after those micro-vibrations have probably stopped). You can get sharp photos either way, so if your camera doesn't have mirror lockup, don't worry about it; but if you do, I think it's worth playing with.

At this point I was ready to take my first shot. From start to finish I arranged the photo 2 different ways and I took about 25 shots total. -I had to play with the exposure compensation and aperture just a little bit each time before I got it to come out how I wanted.

After I was pretty sure I got a "keeper", I connected the camera to my computer, downloaded the photos, and opened it in Gimp. I used the "Levels" tool (Auto) to fix the white balance (I compensated for the warmth of the incandescent lights in the camera, but not quite enough.). After that, I used curves to just slightly adjust the darkest and lightest portions of the photo. Then, I cloned out the dust that was on the bottle. (I'm a dork -I missed the most important part of studio photography -preparing your subject to be photographed!) When I was done cloning, I applied a slight Unsharp Mask, cropped the photo to a square, and saved it.

I am pretty happy with the above photo as it stands right now except that I think as a result of editing it on my LCD laptop screen, it appears that it looks a little washed out on my CRT (work) monitor. If this were a commissioned work, I'd go back and fix that, but...

Friday, July 6, 2007

Take a photo a day.

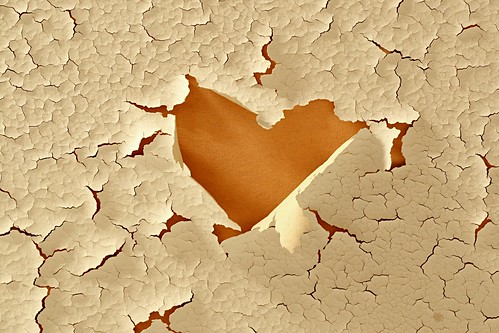
Heartbreak
(click on the photo to view it on my Flickr page where larger sizes are available)

There's a growing number of people subscribing to the thought that having a goal of taking and posting a photo a day to your web gallery can help your photography improve by leaps and bounds. When I heard about this, I realized that I tend to be a person who drives past photo opportunities because I don't like stopping the car, or I don't pull out the camera because I only have a half hour until I have to do something. So, I thought I'd give it a try.

On "Day 2" of my quest for a photo-a-day, I got back from dinner late and only had an hour before I planned to be in bed, so I thought "Great, I failed "photo-a-day" on Day 2"! ...I started getting ready for my shower while thinking of something photo-worthy that I could either get quickly tonight or at least get as a photo for tomorrow. Several things crossed my mind, but nothing good until...

While washing my hair, I looked up at the cracking paint on the ceiling of our bathroom. The stupid guys who flipped our house used cheap paint in the bathroom and the steam from the shower has it coming off in sheets. Blah, I thought -I hate painting. Seeing it cracking and peeling cheeses me off. Showers used to be my little retreat, a place where I could relax, but that paint and the future work it symbolizes stresses me out every time I take a shower. But this time I smiled...

A few weeks ago I noticed this heart-shaped patch of bare ceiling where the paint was peeled completely off. What was frustrating before, though, had become really interesting now. -I had my photo op! -I quickly finished my shower so I could grab my camera.

I only took about 8 photos because I was running out of space on my memory card and didn't have time to go through and delete stuff. (I'm really militant about getting my 8 hours of sleep!) But, I framed it 4 different ways and exposed it a couple different ways for each to ensure I'd get a good shot. Then, satisfied with having at least attempted to get a photo that day, I went to bed.

When I got to work, I downloaded the photos and they were a little "blah". -I opened them in my photo editor of choice (Gimp) and couldn't get the balance right between getting the paint a warm white-ish tone, but leaving the ceiling (the inside of the heart) warm like the incandescent lighting made it look. I played and played with it, but in the end I had to make 2 layers in Gimp and use the erase tool where I wanted the warmer color to appear. -It took me about 4 hours in software playing with it before I got a result I was happy enough with to upload.

In the end, I love the photo and it made it to Flickr Explore!. -The lesson learned is that it doesn't take a lot of time to take a good photo or a magnificent place to find a good opportunity. Just keep your eyes open, and having a goal of a photo a day can be a helpful way of motivating yourself to take more photos, which through forced practice, can speed up your learning curve by a lot!

Monday, May 7, 2007

Studio Photography On The Cheap


(Click on the photo to see a better version of it. Blogger is re-sizing it poorly, so it looks a little funky here...)

It's cold outside, so lately my creative juices have been flowing towards studio photography. Truth is, I have a real interest in it and I'm looking to start building a portfolio incase I get a chance to do some photos professionally.

So, this means I need practice (and hopefully some good photos). For "proper" studio photography, most people purchase light tents and photography lighting in order to get that soft light that eliminates harsh reflections as well as harsh shadows. -I'll probably buy the proper equipment eventually, but I wanted to demonstrate how I get studio shots without any investment in special equipment.

For those who are not interested in studio photography, note that the goals in studio work are the same as for portraits. It's just that for portraits, the subject's a bit bigger...

So, here's a walkthrough of a successful (in my opinion) studio shot McGyver-style.

Equipment and supplies that I used:
* Camera
* Tripod
* Shutter release cable (a self-timer works if you don't have one)
* 2 pieces of copy paper
* A white plastic garbage bag
* A 5-foot piece of wire, bent
* A paper towel
* A drinking glass and empty boxes for propping stuff up.
* A bright lamp (a halogen desk lamp is perfect)
* At least one other lamp (another desk lamp, a clamp light, or a floor lamp -whatever you have around)

I set up under a halogen spot-light that's in the ceiling above my kitchen counter. (I've also set up in the bathroom successfully -under the lights above my sink.)

I propped the copy paper up against the drinking glass so it was sitting at a 90* angle. This created the white below the bottle and pills in the picture as well as the white in the background without creating a "seam" between the two. (This works well with white poster board as well when you're shooting larger items.)

I then set the bottle on the paper, and arranged the pills around it in a non-centered way so the overall shape of the subject was more interesting -it also gave the pills a more hap-hazard look I think.

Next I needed something to filter the light through to spread it around. This is what the walls of a light tent do, so I looked around for something that'd work similar to that. What I ended up doing is taking a white plastic trash bag and some wire to make a frame to keep it flat. You could just as easily tape the corners of the bag to 4 boxes or something to keep it flat. It doesn't have to be perfect, and you don't need to cut the bag either -double-thickness (at least for the brand I'm using -regular Hefty bags) seems to work just fine. (Of course, if your light is significantly brighter or more dim, this may not be the case.

I propped my trash bag light filter up so it's middle would be over the bottle and under my halogen desk lamp. -I then turned the lamp on and checked how the lighting looked from the perspective I'd be shooting it from.

I ended up with a lot of glare on the label because it's glossy and I also had 2 bright spots on the bottle. This meant that the light was too bright. I placed a paper towel on top of the trash bag and moved it around until the highlights and hot-spots were gone.

The next thing I noticed was that, while my "trash bag light filter" made the shadows fuzzier, the shadows were still more noticeable than I liked. I grabbed a fairly dim floor lamp and propped it at a 45* angle against a chair, and aimed it directly at the bottle (from the front so that it eliminated the shadows in the front where they'd be visible in the photo).

I checked the view through my camera once again and found that this created more hot-spots, so I lowered the floor lamp until it's harshest light was below my subject, leaving it's softer (more diffused light) to fall on my subject and eliminate much of the shadows that I had a problem with earlier.

At this point, the setup was done. I was happy with how the scene looked, and the next thing to think about was exposure. -I had a fairly dark subject on a very light background which is always tricky. I knew the camera's light meter would see all that white and would try to tone it down, which would my my photo darker than it should be. -On top of that, my goal was to over-expose the background so it ended up looking all white! (but not so much that it over-exposed the white label on the bottle.) I decided I'd start with exposing the scene 1 stop above normal or at +1.

Next, I had to decide what setting to use on the camera. For studio shots I tend to go with Aperture Priority so that I can control the depth of field without worrying about the shutter speed because it really doesn't matter much in still-life photos like this one. Generally, an aperture of f/8 to f/16 is the sharpest part of any lens, so I try to keep within that range if I can. -I wanted a fairly shallow depth of field, though, so I decided to try f/8 to start with.

Last, I turned on mirror lockup. -Not all cameras have this option, but if yours does (on my Canon 30D it's Custom Function 12, for other makes and models, check your manual). Mirror lockup can help you get sharper photos when you're using slow shutter speeds and here's how it works: When you take a photo what happens is the mirror that allows you to see the image through the viewfinder flips out of the way so that the image can get through to your film or sensor. When the mirror flips up it causes the camera to vibrate ever so slightly. Mirror lockup creates a delay between when you click the shutter the first time (and the mirror flips up), then you wait and click the shutter a 2nd time to take the picture (after those micro-vibrations have probably stopped). You can get sharp photos either way, so if your camera doesn't have mirror lockup, don't worry about it; but if you do, I think it's worth playing with.

At this point I was ready to take my first shot. From start to finish I arranged the photo 2 different ways and I took about 25 shots total. -I had to play with the exposure compensation and aperture just a little bit each time before I got it to come out how I wanted.

After I was pretty sure I got a "keeper", I connected the camera to my computer, downloaded the photos, and opened it in Gimp. I used the "Levels" tool (Auto) to fix the white balance (I compensated for the warmth of the incandescent lights in the camera, but not quite enough.). After that, I used curves to just slightly adjust the darkest and lightest portions of the photo. Then, I cloned out the dust that was on the bottle. (I'm a dork -I missed the most important part of studio photography -preparing your subject to be photographed!) When I was done cloning, I applied a slight Unsharp Mask, cropped the photo to a square, and saved it.

I'm pretty happy with it as it stands right now except that I think as a result of editing it on my laptop screen, it appears that it looks a little washed out on my work monitor. I may have to go back and fix that...

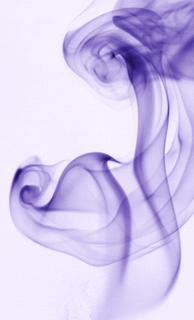
Colored Smoke How-To


This isn't the greatest example ever, see Jameela's Flickr site to see some better smoke photos, but here's how you achieve the effect:

You need:
  • Any camera in any mode (having your flash on is recomended, though)
  • Something non-reflective and black to use as a background
  • Incense (to create the smoke)
  • A light source (I used my Canon 30D's on-camera flash and the darkness of my backyard as my light source and background, and it resulted in a kindof flat photo in comparison to Jameela's which was taken indoors with a light source in addition to her on-camera flash).
What to do:
  • Set up the incense infront of the black background
  • Take tons of photos being careful that autofocus isn't focusing on the background rather than the smoke and that your shutter speed is high enough that the smoke isn't blurry)
  • Download your images to your computer and open one of the "good ones" in an image editing program of your choice.
  • Find the "Invert" option. This will invert the colors, giving you the white background.
  • There are many different ways to create the colored smoke. Gimp has a "Colorize" tool, saturation adjustments can help too, experiment to find what works for you.