You frequently see these kinds of photos on the covers of magazines because, well, they're impressive. They work for all kinds of sports, and the effect isn't hard to do (although it does take some practice!).
Use: Shutter Speed Priority Mode
The easiest mode to use for these kinds of shots is "Shutter Speed Priority" mode, since a slow shutter speed is what gives the motion blur effect.
Start out using 1/125th of a second:
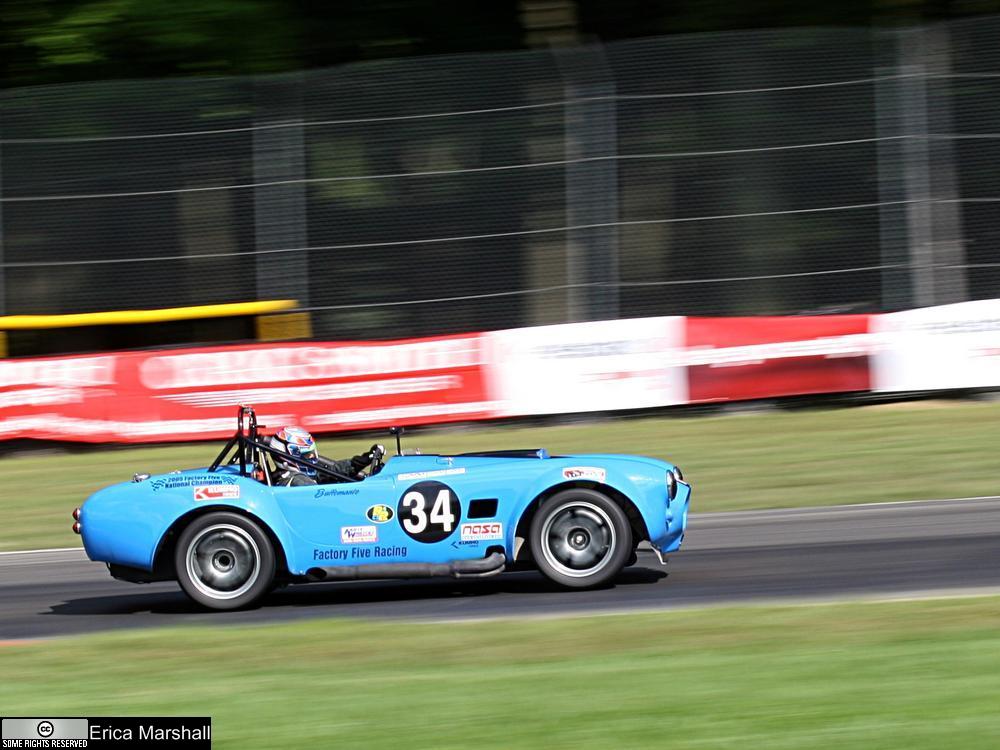
So, how slow is slow? -It depends on how fast your subject is moving and how far away from it you are, but generally, it's not as slow as you may think. The photo above was taken at 1/80th of a second.
With a fast-moving subject like a car, start with a shutter speed of 1/125 and adjust up or down to fit your needs. You basically want a speed that's slow enough to show obvious blurring of the background, but fast enough so your pan is as short as possible (to increase the chances of the subject being sharp).
Make sure there's something to blur in the background:
A background that's colorful or busy will show the blur better than a plain background (where there's not much to blur). Also consider that objects in the background that are closer to the subject will blur more than those that are further away. -You'll get a feel for this as you get some practice in different locations.
Good backgrounds -close trees, close buildings, close banners, or close stands of cheering fans.
Bad backgrounds -empty fields, empty streets, empty stands, and distant trees or buildings.
Technique:
This will take some practice, but be patient, it's worth it!
I'm writing this as if you're taking a panned photo of a car, but it'll work for other sports as well:
- Plant your feet about shoulder-width apart and at an angle that allows you to pan the section of track where you'll be taking the pictures.
- Do a couple of test pans (without taking a picture) to check your stance and get you in the rhythm of the car's motion for smoother panning later.
- Find the place on the track where you plan on taking the photo, set your focus there.
- (Optional:) If you can find some sort of landmark that you can easily see while you pan, this can be a big plus. (In my photo above I used that yellow-framed hole in the fence as my landmark. As I followed the car in my camera's viewfinder, when I saw that bit of yellow, I knew it was time to press the shutter button to take the photo.)
- Make sure your aperture is small enough (a large enough number) to have a deep enough depth of field to compensate for your focus being off a little bit.
- Start panning early, then when the car comes into view, follow it (early) in your camera's viewfinder. Keep the camera as steady as possible, and click the gently when you see your landmark. -Don't shake the camera when you press the button!
- Follow through with the pan after you hear the shutter close to keep everything as smooth as possible.
Other tips:
Don't rush it! -When you're starting out you should follow at least 5 or 6 cars before you even snap a shot. First, get your stance right and test it by following a couple cars with your camera. This also allows you to get used to how fast the cars are going (and therefore, how fast you'll be panning). Next, try to see how you want the car to end up in the frame, and then find one of the AF points in your viewfinder that'll match up with where you want the car to be so you can get the framing right.
After you've managed to follow a couple of cars and keep the pan steady, you know you're ready to fire off a test shot. After a photo has been taken, look at the result. Whether the car is sharp or not is not super-important yet; instead, look at the background -is it blurred enough? Too much? Adjust the shutter speed up or down as necessary, and continue taking photos until you're happy with the amount of blur (you want enough to show motion, but don't go overboard).
You may be asking: Why is "too much" blur bad? -Well, you'll get a heck of a lot of blur on a 1 second pan, but I challenge you to keep the subject in the EXACT same place in the frame for that long! In other words, the faster your shutter speed, the easier it is to keep the subject sharp. So, try for less blur as you start out and increase it as you get better at the technique.