Friday, November 28, 2008

Gimp Basics

When you open Gimp for the first time you'll get 2 seperate windows, the toolbox window is the one with all the little icons all over it; the image window is the one that's mostly gray with the menus at the top ("File", "Edit", "Select", etc).

GimpOpen

-------------------------------------------------------------------------------------

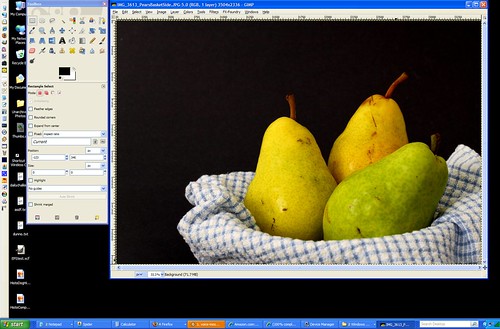
If you go to the "File" menu and open one of your photos it'll look like this:

GimpImageOpened

---------------------------------------------------------------------------------------

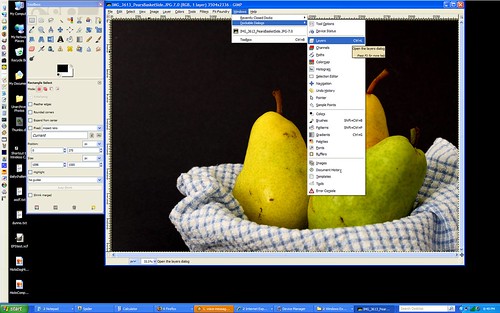
There are many other windows you can open to help you with certain tasks as well. They are usually hidden by default so that they don't get in your way, but you can open them at any time in the "Windows" menu, under "Dockable Dialongs":

GimpWindows

------------------------------------------------------------------------------------------

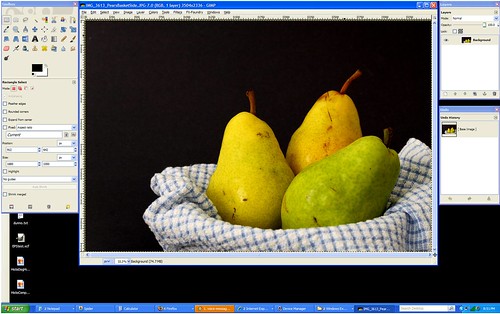
The optional windows I use most are "Layers" and "Undo". Here's how I arrange all the windows on my screen so I can get to everything easily:

GimpLayersUndo

----------------------------------------------------------------------------------------

All of the windows can be moved around and arranged however you want. To move them, click on the top of the window in the colored area (blue on my screenshots) and drag them wherever you want them. ("Drag" by holding the mouse button down while moving the mouse.)

Sunday, November 9, 2008

How to create a vignette effect in Gimp

Vignette is that effect you sometimes see where the corners of a photo are a little darker than the rest of the photo. Here's an example from Aaron Escobar's photostream on Flickr (click on the photo to go to the Flickr page):


Here are the steps to create this effect in Gimp:
* Go to the "Layer" menu and choose "New Layer" -make sure the default layer type of "Transparency" is selected, then select "Ok".
* In the toolbox, click on the Ellipse Select Tool and set the Feather edges to "100" (push the slider all the way to the right).
* Select the area where you want the vignette effect to end.
* When the area is selected, go to the "Select" menu and click "Invert" -this will select everything OUTSIDE of the circle instead of the circle itself.
* Click on the Bucket Fill Tool from the Toolbox. Make sure black (or whatever color you want your vignette to be) is selected, then click in the selected area to fill in the color.
* Adjust the layer's opacity to make the vignette go from black to more "see through" -by changing the opacity you can make it as dark or light as you choose. (The "Layer" window can be opened by clicking on the "Windows" menu, then going to "Dockable Dialogs" and selecting "Layers".
* Chances are the transition between the vignette and your photo is a bit more abrupt than you'd like it to be. That's ok we can make it more gradual...
* Click on the "Filters" menu, go to "Blur" > "Gaussian Blur".
* Move the blur radius up from the default "5" to somewhere around "150" depending on the transition you are looking for.
* When it looks good, flatten the image and save it and you're done!

Friday, November 7, 2008

Pay attention to the lessons all around you!

There are billions of people around the globe who take pictures. There are hundreds of millions who give honest effort to taking GOOD pictures. There are millions who'd love to be professional-level. So, what separates the people who get stuck in the "better than average but not great" category from those who really excel? I follow many successful photographers who got their start online. They all shot often, found inspiration everywhere, and tried new things.

Here's an example:
http://strobist.blogspot.com/2008/11/vote-and-consider-uplighting.html

...how often do you notice such things? There are photos everywhere you look: in advertisements, magazines, on the walls of restaurants. Look at those photos! Compare them to your own! Figure out where the light was coming from (from looking at the highlights and shadows), how the items or people were arranged, the angle of view, the framing, the background and depth of field, etc. Every photo is a learning opportunity if you're really passionate about your art and paying attention.