Showing posts with label shutter speed. Show all posts

Saturday, May 9, 2009

Panned Shots

You frequently see these kinds of photos on the covers of magazines because, well, they're impressive. They work for all kinds of sports, and the effect isn't hard to do (although it does take some practice!).

Use: Shutter Speed Priority Mode

The easiest mode to use for these kinds of shots is "Shutter Speed Priority" mode, since a slow shutter speed is what gives the motion blur effect.

Start out using 1/125th of a second:

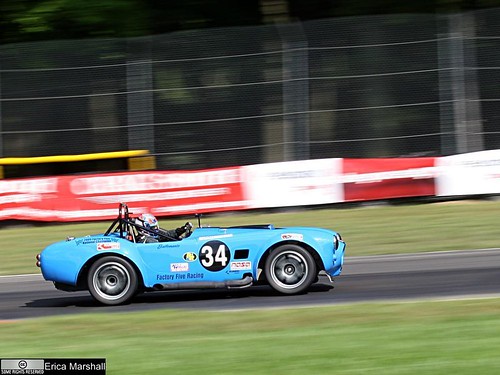
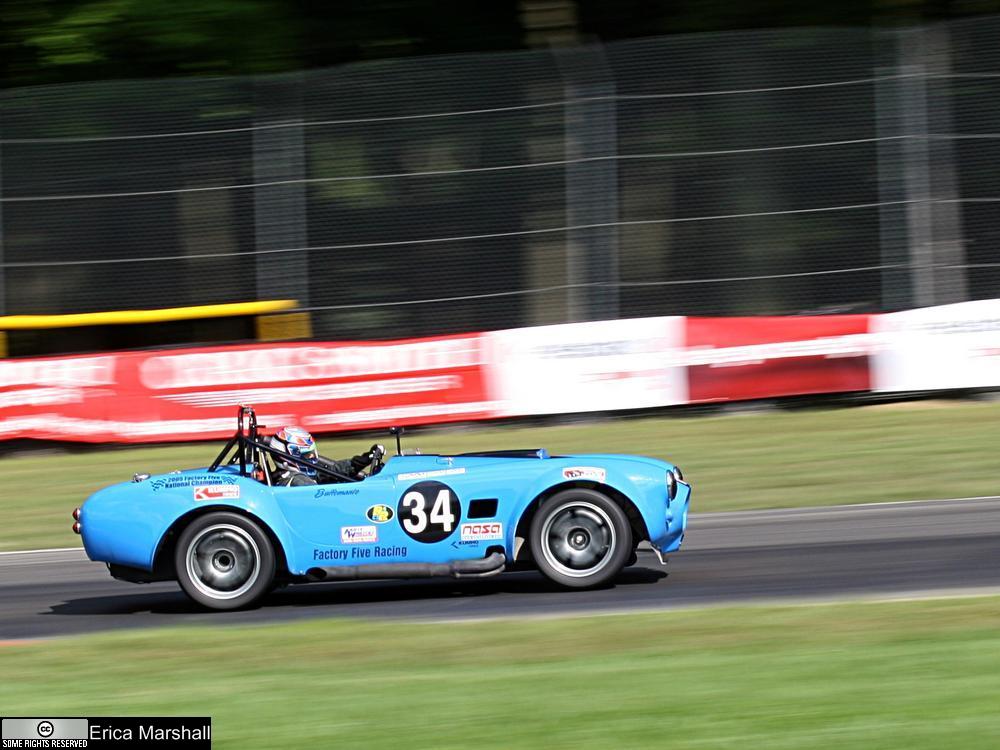
So, how slow is slow? -It depends on how fast your subject is moving and how far away from it you are, but generally, it's not as slow as you may think. The photo above was taken at 1/80th of a second.

With a fast-moving subject like a car, start with a shutter speed of 1/125 and adjust up or down to fit your needs. You basically want a speed that's slow enough to show obvious blurring of the background, but fast enough so your pan is as short as possible (to increase the chances of the subject being sharp).

Make sure there's something to blur in the background:

A background that's colorful or busy will show the blur better than a plain background (where there's not much to blur). Also consider that objects in the background that are closer to the subject will blur more than those that are further away. -You'll get a feel for this as you get some practice in different locations.


Good backgrounds -close trees, close buildings, close banners, or close stands of cheering fans.

Bad backgrounds -empty fields, empty streets, empty stands, and distant trees or buildings.

Technique:

This will take some practice, but be patient, it's worth it!

I'm writing this as if you're taking a panned photo of a car, but it'll work for other sports as well:

  • Plant your feet about shoulder-width apart and at an angle that allows you to pan the section of track where you'll be taking the pictures.
  • Do a couple of test pans (without taking a picture) to check your stance and get you in the rhythm of the car's motion for smoother panning later.
  • Find the place on the track where you plan on taking the photo, set your focus there.
  • (Optional:) If you can find some sort of landmark that you can easily see while you pan, this can be a big plus. (In my photo above I used that yellow-framed hole in the fence as my landmark. As I followed the car in my camera's viewfinder, when I saw that bit of yellow, I knew it was time to press the shutter button to take the photo.)
  • Make sure your aperture is small enough (a large enough number) to have a deep enough depth of field to compensate for your focus being off a little bit.
  • Start panning early, then when the car comes into view, follow it (early) in your camera's viewfinder. Keep the camera as steady as possible, and click the gently when you see your landmark. -Don't shake the camera when you press the button!
  • Follow through with the pan after you hear the shutter close to keep everything as smooth as possible.

Other tips:

Don't rush it! -When you're starting out you should follow at least 5 or 6 cars before you even snap a shot. First, get your stance right and test it by following a couple cars with your camera. This also allows you to get used to how fast the cars are going (and therefore, how fast you'll be panning). Next, try to see how you want the car to end up in the frame, and then find one of the AF points in your viewfinder that'll match up with where you want the car to be so you can get the framing right.

After you've managed to follow a couple of cars and keep the pan steady, you know you're ready to fire off a test shot. After a photo has been taken, look at the result. Whether the car is sharp or not is not super-important yet; instead, look at the background -is it blurred enough? Too much? Adjust the shutter speed up or down as necessary, and continue taking photos until you're happy with the amount of blur (you want enough to show motion, but don't go overboard).

You may be asking: Why is "too much" blur bad? -Well, you'll get a heck of a lot of blur on a 1 second pan, but I challenge you to keep the subject in the EXACT same place in the frame for that long! In other words, the faster your shutter speed, the easier it is to keep the subject sharp. So, try for less blur as you start out and increase it as you get better at the technique.

Once the shutter speed is set properly, just keep taking photos! I often take hundreds of shots and the number of "keepers" that I get is getting better and better as I go. (In my first year I probably went from 1 out of 100 to 1 of 20 being a reasonably good photos.)

Sunday, April 19, 2009

Avoiding blur due to camera shake

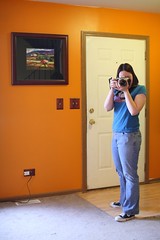
If you're without a tripod, at the highest ISO you're willing to shoot at and you're still getting shutter speeds that are too low to hand-hold your only options are to optimize your stance in order to be as stable as possible to eliminate camera shake. Here are some examples of stable shooting positions you can try:

First, slowly squeeze the shutter button:
The first thing to pay attention to when you are taking photos at low shutter speeds is how you are pressing the shutter button. Many people don't realize it, but they often jerk or move the entire camera when they push it. If you are reading this at home, grab your camera, line it up with the line where your ceiling meets the wall and watch as you press the button. If you move the camera, practice until you eliminate that movement.

Second, relax:
Tense muscles lead to shake due to muscle fatigue, so keep it loose. If you feel a muscle getting tired, burning, or shaking you are doing it wrong. Find a position that's comfortable and your shots will be more stable.

Third, breathe:
Another common problem is the natural tendency to hold your breath, but this will also lead to shake. Instead, take a slightly deeper than normal breath, then slowly let the air out as you gently press the shutter button.


Now on to stable positions to take photos:
Click on any of the photos below to see larger versions of them.

A normal stance:
Stable Shooting Position #1:  Standing
Your feet should be about shoulder-width apart and your arms should be relaxed.

A slightly more stable stance uses an "elbow tripod" like this:
Stable Shooting Position #2:  Standing, Elbows Tripod
When people try this stance they tend to press their elbows together too hard. Remember to keep it loose, not tense. Your elbows should be just touching and resting on your chest/stomach, so it'll cause your hips to come forward and your shoulders back a little bit, but it should be comfortable. There should be no squeezing or tension in the position at all.

If there's something horizontal to rest the camera on:
Stable Shooting Position #3:  Leaning
You can rest the camera directly on a chair, fence, car, or any other horizontal surface you can find. If the camera doesn't rest at the angle you'd like you can put your hand under it or prop it up on a towel, blanket, sweatshirt, or anything else you might have handy.

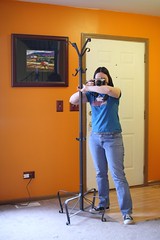
If you have a vertical pole you can use it as a brace:
Stable Shooting Position #7: Vertical Pole
This works well with stop sign poles and the like. Just grab the pole with your left hand, then use your forearm as a stable horizontal surface to rest your camera on. I use this position a lot for macro photography because it allows me to move the camera back and forth in tiny increments to get the depth of field exactly where I want it.

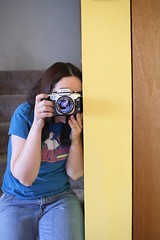
If there's a wall you can use it like this:
Stable Shooting Position #8:  Using A Vertical Wall
Press the camera against the wall with just enough force to keep it there (again, nothing should be tense to avoid shake due to muscle fatigue).

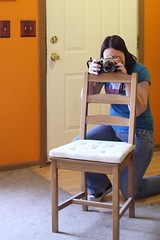
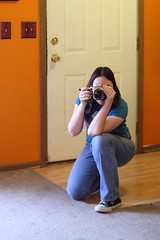
Another option is to kneel:
Stable Shooting Position #4:  Kneeling
Kneel in a stable position, then use your knee to rest your elbow on. Keep it comfortable and relaxed.

Or use a sitting position like this one:
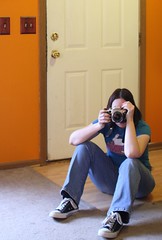
Stable Shooting Position #5: Sitting
Sitting is more stable than kneeling because you can create a tripod by resting both elbows on both knees. Keep it comfortable and don't let your knees fall outward or you'll be using your inner thigh muscles to keep them up and that will lead to shake from muscle fatigue pretty quickly.

Even more stable is the prone position shown here:
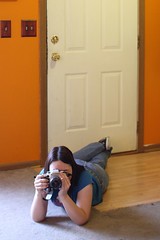
Stable Shooting Position #6: Laying
Here your "elbow tripod" rests directly on the ground. If the perspective works and you're willing to lay down this is a very stable position. Even more stable, if necessary, is resting your arm on the ground, then putting your camera on your arm, but this will give you an even lower perspective.

If all else fails, try burst:
If you use the above techniques and still can't get a stable shot, try putting your camera on "burst" so that holding the shutter button down will have the camera take several photos in a row. Many times the 2nd or 3rd photo will show less shake than the 1st. (This is especially helpful if you can't seem to press the shutter without moving the camera.)

Monday, June 16, 2008

Why learn about aperture and shutter speed?

Auto modes do a good job of capturing the world as you see it. Most of the time, though, these kinds of photos are seen as "snapshots". The semi-manual modes (the "priority modes") on your camera can give you considerable control over your photos to produce the end-result that YOU want rather than just taking whatever comes out of the camera as-is.

So, here's some inspiration. (You can click on any of the photos to view a larger version, the EXIF data, leave comments, etc.)

Aperture Priority Mode:

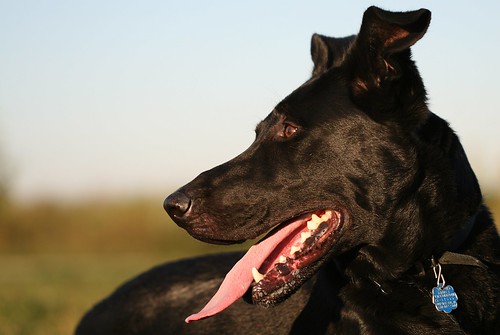
Small-numbered apertures (like f/4) will give you a more shallow depth of field. This can be useful when you have an ugly background like in the photo below where the background would have been a bunch of scrub brush in the distance at the local dog park:
42 Profile

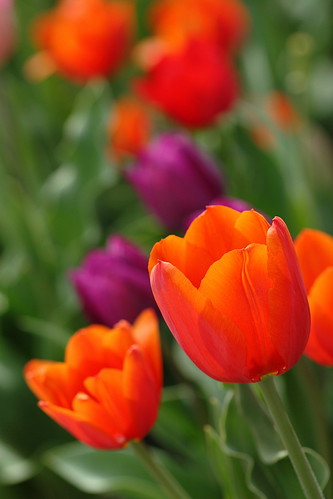
Another thing you can do with a shallow depth of field is place the viewer's attention on one specific thing like in this photo where I picked one particular tulip as the subject. Keeping the rest in-focus would have made the shot too busy and this one tulip (backlit so beautifully by the sun) would have gotten lost:
Suncatcher

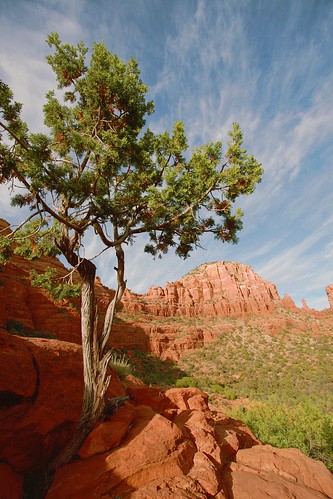
Large-numbered apertures give you larger depth of field, which allows everything in the shot to be in focus from near to far like this:
Sedona Tree

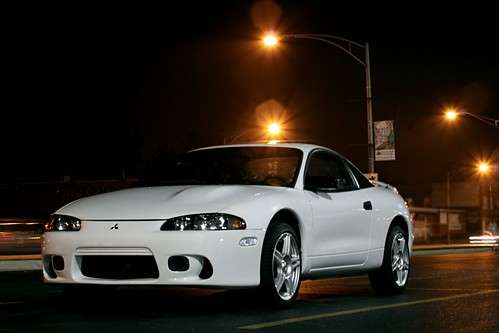
When taking shots at night, using a large-numbered aperture will give bright lights a star-like effect:
Eric's Eclipse

Shutter Speed Priority Mode:


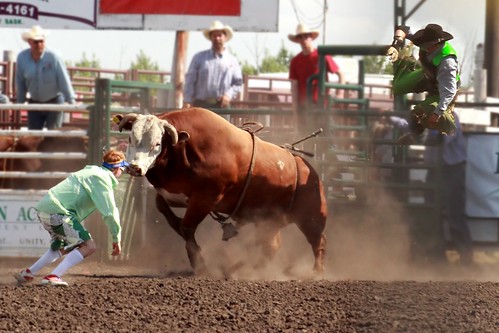
A fast shutter speed will freeze action like this:
Dismounted!

A slightly slower shutter speed like 1/60th to 1/125th can be hand held and moved along with something that's moving fast to create a "panned shot" like this one:
BlueFactoryFivePan

A slow shutter speed can be used for all sorts of things. The downside is you'll need a tripod for all of the following types of shots.

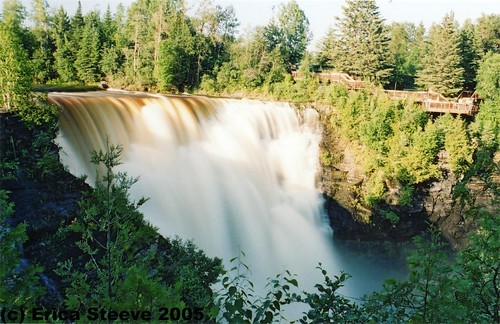
First, at about 1/6th to 1/8th of second you can blur the water in a waterfall to create a silky, milky water effect like this:
Kakabeka Falls

Or if you use 5 to 10 second exposures you can do light painting like this:
22.  "Light Painting"

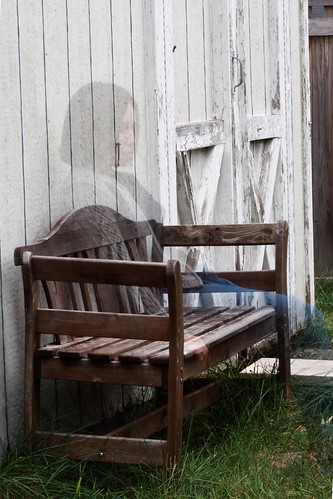
Or "ghostly" photos like this:
Do you believe in ghosts?

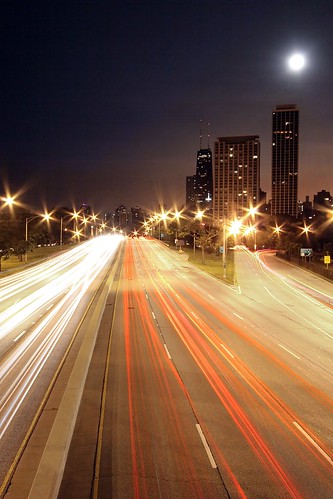
And even longer exposures can give interesting results when you have lights that move like on ferris wheels or moving traffic like this:
LSD at night 2

I hope this gives you an idea of the kinds of decisions that are open to you when you know how to use the creative controls on your camera. Learning to use them isn't that hard, but the rewards are pretty awesome.