Canon 28-80mm f/3.5-5.6:
This was the kit lens that came with the Elan IIe. It's lightweight and plastic. I don't use it much. I suppose it could be a decent walkaround lens, but I don't really do much "walkaround" photography. I can't really say much more -I don't use it because it's not wide enough for landscapes and it's not telephoto enough for wildlife photos.
Canon 75-300mm f/4-5.6 IS USM:
I bought this lens while I was still using Auto on my Elan IIe and I was floored at the reach it gave me. I got years of use out of it before realizing how soft its photos were. I still use it here and there -I don't really have an adequate replacement for it, but I consider it a low-quality lens. Photos printed to 8x10 would probably look fine, but any larger and I fear the quality issue would become a problem. Note that this lens has since been upgraded, changed, and there are also several versions on the market (non-IS, non-USM, etc).
Canon 100 f/2.8:
Photos I've taken with this lens.
Feeling confident in my skills in other areas, I decided to tackle macros, so I bought this lens. When it arrived I learned how challenging macros can be! But, since then, I've mastered the art and found out how amazing this lens really is. Aside from your average insect or flower macro, this lens gives a shallow depth of field which can be used artistically, and it's also got good low-light performance due to the f/2.8.
Canon 10-22mm f/3.5-4.5:
Photos I've taken with this lens.
I got this lens as a gift from my husband and when I got it I wasn't sure I'd really ever use it. Wow was I wrong! I love this lens. It's not only good for landscapes, but it's also nice when you have no choice but to shoot closer to your subject than you want as well, and playing with the distortion it gives at 10mm is fun as well.
Sigma 50-500mm f/4.5-6.3 (aka the "Bigma"):
I got this lens as a gift from my husband as well, but I knew I'd use this one. 500mm! And it's much sharper than my Canon 75-300mm. I've talked to a few pro wildlife photographers who use Canon 100-400mm lenses and they say that the Bigma is not far off in quality. This lens is great for wildlife and shooting races, but it has one big downside: it weighs 4 pounds all by itself. This means a tripod or monopod is necessary if shooting for any length of time and carrying it around is a chore. Still, it's a great lens if you have the need for something like it. As an interesting side-note, I rented a Canon 70-200mm f/2.8 IS and did a sharpness test comparing it against my Bigma and the Bigma turned out to be sharper!
Sigma 30mm f/1.4:
Photos I've taken with this lens.
In an attempt to get a more shallow depth of field for car photography, which I thought I wanted to get into more, I bought this lens. It's extremely sharp, even at f/1.4 and it does a great job of giving a more shallow DOF than any of my previous lenses, which is awesome for either eliminating a distracting background, but it also performs very well in low-light environments so it's been great indoors as well.
Canon 50mm f/1.8 II:
Photos I've taken with this lens.
During my research before buying the Sigma 30mm, I found this lens, which was a fraction of the price at around $100. The only downside of the lens seemed to be it's construction, so I bought one of these as well just to see the difference between the two. There's no doubt the Sigma 30mm is built better. It's solid, metal, and has a smooth-moving and dampened focus ring. This lens, in contrast, is very light weight, made of plastic, and has the cheesiest focus ring I've ever seen -it's very thin and hard to grip, especially because it's at the very end of the lens. Still, this just might be the sharpest lens I own (it's either this or the Canon 100mm f/2.8) even at f/1.8! My husband and I tend to share the Sigma 30mm f/1.4 and the Canon f/1.8II and use them fairly interchangeably. It's great for getting a shallow depth of field and indoors in low light due to the f/1.8.
Canon MP-E 65mm f/2.8:
Photos I've taken with this lens.
This lens was another gift from my husband. It's not a beginner's lens, that's for sure. I had a hard time with macros when I started on my Canon 100mm, but this lens is several times harder to master. Sure, it goes up to 5X while the Canon 100mm is a maximum of 1:1, so there's that. The bigger the subject, the shallower the DOF, so the harder focusing is and timing the shutter press if you hand hold for macros like most of us do. But, on top of that this lens is "fixed focus". I find that most photographers I talk to that haven't used this lens have little to no idea of what that means, but it's pretty simple really. Take a prime like the Canon 100mm macro, set the focus so it's set to focus as close as possible and then don't move it. That's the MP-E 65mm in a nutshell. There is no focus ring. The focus is in one place that moves as you increase the size of the subject from 1X to 5X, so you are forced to change your focus by moving the camera closer or further away from your subject. At 1X you have to focus just a couple inches from your subject, higher magnifications require you to get closer. And if that's not hard enough to deal with, after 1X the viewfinder gets darker and darker at higher magnifications until at 4X you can barely see your subject indoors, and at 5X the viewfinder is nearly black. Outdoors is better, but still challenging. This, I've found out, is what the focusing lamps on my macro flash is for, but they timeout before I can focus most of the time so, I've just stuck to 1X to 3X so far. I've yet to find a subject that really requires anything higher than that, but I count myself as an advanced beginner with this lens still, so I'll add more if I find anything helpful to pass along.
Showing posts with label equipment. Show all posts
Showing posts with label equipment. Show all posts
Thursday, July 8, 2010


Sunday, July 4, 2010
My Gear -Cameras
A commenter recently asked me to post my equipment list, so here's the first part:
Canon Elan IIe (film SLR):
My Dad and I bought it while I was in college and we "shared" it for years when I lived at home, then he passed it down to me a few years after I moved out of the house. It is still an excellent camera with most of the bells and whistles that my Canon 30D has, aside from the digital stuff, along with one none of my digital cameras have -it can automatically pick which autofocus point to use by following the movement of your eye. This feature requires some calibration to work, and it's not all that consistent, which is probably why they eventually dropped the feature in their products. I used this camera on it's various "Auto" modes while I was in college and for at least a year after it became "mine" before actually learning to use Manual Mode on it.
Canon 30D (mid-level DSLR):
My first digital SLR. I had decided I wanted a 5D because I was scared to buy a "cropped sensor" camera even though I had no idea what that meant. After a year of saving I had $1500 -half of what I needed for a 5D, but I was already so far behind the switch to digital and anxious to try it that I started researching what "crop sensor" meant to see if a 30D would work for me. I was surprised to learn that crop sensors are actually a benefit to photographers who shoot telephoto more than they do wide because they effectively add to the focal length of your lens. Since, at that time, I was mostly shooting wildlife photos (hence the name "Muddyboots Photography") I decided to go with the 30D and was very happy with it for 4 years. I still use it as a backup to my current camera, it's really nice to have two when you're at an event where you switch from telephoto to wide a lot.
Canon Rebel T1i/500D (budget-level DSLR):
A couple years ago I started getting into insect macros and I found myself struggling to hold the stem of a plant that an insect was on (to steady it) with one hand while operating my camera (one-handed) with the other. The 30D was just too big for my hands and I was jealous of my husband's 40D that had Live View on it, so took care of both issues by buying a T1i last year. -It took some getting used to to use the "Function" button needed to make up for the missing wheel. Otherwise, the camera's been great. There's no quality difference between the Rebel lineup and the 30D/40D/50D lineup, it's just a matter of body style. The Rebel body fits my hands better. I can now easily operate my camera one-handed, plus I have Live View, and video, so I'm thrilled!
Canon G11 (point and shoot):
Photos I've taken with this camera.
My old point and shoot died a few months ago. I hated that camera, but I got it because there was a cheap underwater housing for it, so it was a camera I could take when I went diving. But, I figured this might be the time to find a higher quality point and shoot camera that I wouldn't mind using when I didn't want to haul my SLR gear around with me, so I started doing some research. That was right before the G11 came out, so I was searching for information on the G10 -I loved the body and controls, but it's ISO performance above 200 was horrible, so I decided against it. Shortly after I made that decision, however, the G11 came out. Same body and controls, much better ISO performance, so I jumped on it. Underwater housings for it were about $170 the last time I looked, so it will fill that role as well when I have the money for Caribbean vacations again. I've since taken many photos with it and I must say I'm impressed. I recently printed this photo that I took with it set to ISO 400 at 11x14 and it's flawless without any noise correction at all!
Part II lenses) will be posted in the next day or II -stay tuned!
Cameras:
Canon Elan IIe (film SLR):
My Dad and I bought it while I was in college and we "shared" it for years when I lived at home, then he passed it down to me a few years after I moved out of the house. It is still an excellent camera with most of the bells and whistles that my Canon 30D has, aside from the digital stuff, along with one none of my digital cameras have -it can automatically pick which autofocus point to use by following the movement of your eye. This feature requires some calibration to work, and it's not all that consistent, which is probably why they eventually dropped the feature in their products. I used this camera on it's various "Auto" modes while I was in college and for at least a year after it became "mine" before actually learning to use Manual Mode on it.
Canon 30D (mid-level DSLR):
My first digital SLR. I had decided I wanted a 5D because I was scared to buy a "cropped sensor" camera even though I had no idea what that meant. After a year of saving I had $1500 -half of what I needed for a 5D, but I was already so far behind the switch to digital and anxious to try it that I started researching what "crop sensor" meant to see if a 30D would work for me. I was surprised to learn that crop sensors are actually a benefit to photographers who shoot telephoto more than they do wide because they effectively add to the focal length of your lens. Since, at that time, I was mostly shooting wildlife photos (hence the name "Muddyboots Photography") I decided to go with the 30D and was very happy with it for 4 years. I still use it as a backup to my current camera, it's really nice to have two when you're at an event where you switch from telephoto to wide a lot.
Canon Rebel T1i/500D (budget-level DSLR):
A couple years ago I started getting into insect macros and I found myself struggling to hold the stem of a plant that an insect was on (to steady it) with one hand while operating my camera (one-handed) with the other. The 30D was just too big for my hands and I was jealous of my husband's 40D that had Live View on it, so took care of both issues by buying a T1i last year. -It took some getting used to to use the "Function" button needed to make up for the missing wheel. Otherwise, the camera's been great. There's no quality difference between the Rebel lineup and the 30D/40D/50D lineup, it's just a matter of body style. The Rebel body fits my hands better. I can now easily operate my camera one-handed, plus I have Live View, and video, so I'm thrilled!
Canon G11 (point and shoot):
Photos I've taken with this camera.
My old point and shoot died a few months ago. I hated that camera, but I got it because there was a cheap underwater housing for it, so it was a camera I could take when I went diving. But, I figured this might be the time to find a higher quality point and shoot camera that I wouldn't mind using when I didn't want to haul my SLR gear around with me, so I started doing some research. That was right before the G11 came out, so I was searching for information on the G10 -I loved the body and controls, but it's ISO performance above 200 was horrible, so I decided against it. Shortly after I made that decision, however, the G11 came out. Same body and controls, much better ISO performance, so I jumped on it. Underwater housings for it were about $170 the last time I looked, so it will fill that role as well when I have the money for Caribbean vacations again. I've since taken many photos with it and I must say I'm impressed. I recently printed this photo that I took with it set to ISO 400 at 11x14 and it's flawless without any noise correction at all!
Part II lenses) will be posted in the next day or II -stay tuned!
Wednesday, June 2, 2010
Neutral Density Filters
Neutral Density or "ND" filters come in 2 types: graduated, where they fade from clear to gray, or normal which are all gray. This article will be focused on the more popular completely gray ones, but once you understand the concept it's not difficult to figure out how to use the graduated ones as well.
As I said before, ND filters are completely gray and they come in different strengths. Many manufacturers label their filters 0.3, 0.6, and 0.9 while others may label them 1X, 2X, and 3X. Either way, they block 1 "stop" of light, 2 "stops" of light, or 3 "stops" of light respectively. -More on that later.
If you take a series of photos, each with a different strength filter, then one more photo without an ND filter at all, you might be surprised to find out that none of the photos would look any different from the others. Think about it this way, your camera can adjust for shade or indoor lighting vs bright sunlight, right? Well, it adjusts for the darkness that results from the filter in the exact same way.
So why would you use an ND filter then?
ND filters cut the amount of light that enters your lens. This may not effect the look of your photo, but it does effect the settings for shutter speed, aperture, and ISO that the photo is taken with. Let me give you an example of when you'd use an ND filter:
Let's say it's really bright outside and you are shooting a waterfall. You want to blur the motion of the water to get a milky effect like this. So, you set your camera to the lowest ISO you can, which we'll say is 100. And you set your aperture to f/16 (a sharp, high-number to cut down on the amount of light in your photo), and the shutter speed that you have to use to get the photo properly exposed is 1/45. -That's likely to be too high to blur the water much at all! ...so you disregard the sharpness loss of setting your aperture to f/22 which eliminates 1 stop of light. That will give you a shutter speed of 1/30 -still not enough to blur the water and (as is the case with many lenses) that's the highest aperture you can set with the lens you are using, so there's nothing else you can do via settings to get a lower shutter speed to blur the waterfall. ...but when an ND filter will help you!
* A 0.3 or "1X" filter will eliminate 1 stop of light which would give you a shutter speed of 1/22.
* A 0.6 or "2X" filter will eliminate 2 stops of light. ...that'd get you a shutter speed of 1/15. Now we're getting closer...
* Your 0.9 or "3X" filter will eliminate 3 stops of light. ...that'd get you a shutter speed of 1/11. ...that would do it if it's a fast-flowing waterfall.
I find ND filters that remove 3 stops of light or so to be the most useful. Also note that if you have a set of filters you can stack them to get an additive effect.
* If you stack the 0.3 and the 0.9 that'd remove 4 stops of light which would give you a shutter speed of 1/8 which usually blurs waterfalls very well.
* Stacking all 3 would reduce the light by 6 stops which would give you 1/4.
* ...but note that stacking creates more glass to shoot through, likely lowering your image quality. High-quality filters may be okay, though, especially if you don't crop the photo or print it at it's maximum size.
As I said before, ND filters are completely gray and they come in different strengths. Many manufacturers label their filters 0.3, 0.6, and 0.9 while others may label them 1X, 2X, and 3X. Either way, they block 1 "stop" of light, 2 "stops" of light, or 3 "stops" of light respectively. -More on that later.
If you take a series of photos, each with a different strength filter, then one more photo without an ND filter at all, you might be surprised to find out that none of the photos would look any different from the others. Think about it this way, your camera can adjust for shade or indoor lighting vs bright sunlight, right? Well, it adjusts for the darkness that results from the filter in the exact same way.
So why would you use an ND filter then?
ND filters cut the amount of light that enters your lens. This may not effect the look of your photo, but it does effect the settings for shutter speed, aperture, and ISO that the photo is taken with. Let me give you an example of when you'd use an ND filter:
Let's say it's really bright outside and you are shooting a waterfall. You want to blur the motion of the water to get a milky effect like this. So, you set your camera to the lowest ISO you can, which we'll say is 100. And you set your aperture to f/16 (a sharp, high-number to cut down on the amount of light in your photo), and the shutter speed that you have to use to get the photo properly exposed is 1/45. -That's likely to be too high to blur the water much at all! ...so you disregard the sharpness loss of setting your aperture to f/22 which eliminates 1 stop of light. That will give you a shutter speed of 1/30 -still not enough to blur the water and (as is the case with many lenses) that's the highest aperture you can set with the lens you are using, so there's nothing else you can do via settings to get a lower shutter speed to blur the waterfall. ...but when an ND filter will help you!
* A 0.3 or "1X" filter will eliminate 1 stop of light which would give you a shutter speed of 1/22.
* A 0.6 or "2X" filter will eliminate 2 stops of light. ...that'd get you a shutter speed of 1/15. Now we're getting closer...
* Your 0.9 or "3X" filter will eliminate 3 stops of light. ...that'd get you a shutter speed of 1/11. ...that would do it if it's a fast-flowing waterfall.
I find ND filters that remove 3 stops of light or so to be the most useful. Also note that if you have a set of filters you can stack them to get an additive effect.
* If you stack the 0.3 and the 0.9 that'd remove 4 stops of light which would give you a shutter speed of 1/8 which usually blurs waterfalls very well.
* Stacking all 3 would reduce the light by 6 stops which would give you 1/4.
* ...but note that stacking creates more glass to shoot through, likely lowering your image quality. High-quality filters may be okay, though, especially if you don't crop the photo or print it at it's maximum size.
Wednesday, September 2, 2009
Researching the best budget all-around zoom lens
After my latest vacation I realized something. My camera bag is full of odd lenses, mostly primes, that have built up for various reasons. In my walk around kit I usually have a Canon 10-22mm, Canon 100mm f/2.8 macro, and a Sigma 30mm f/1.4. So, while my husband (who has a Sigma 17-70mm f/2.8-4.5) would photograph whatever was in front of us in a couple minutes, I'd take a few photos with one lens, then switch to another for a different view, and then sometimes even a third if I wanted close-ups or detail shots. It was truly frustrating.
Sure primes are sharper and yes, it's nice to have fast lenses, but honestly for walking around and taking tourist shots, perfection is unnecessary and avoiding frustration is my goal. I need my photography to be fun again. Lightening my load would be a big plus here too. So, I'm starting to look at budget all-around lenses. I don't expect them to be perfect optically. The larger the zoom range the better (within reason, optical quality DOES matter), oh and it must be CHEAP! I'm living on a part-time (read: every other weekend) Vet Tech position and my Manual Mode course income.
So, here's what I've found so far:
Click here for a spreadsheet of my research.
If you have experience with any of these lenses or any other advice, feel free to email me or leave a comment. It'll be awhile before I make a purchase -I just don't have the money together yet. It may end up being something I ask for at Xmas or my birthday. (December/January)
Sure primes are sharper and yes, it's nice to have fast lenses, but honestly for walking around and taking tourist shots, perfection is unnecessary and avoiding frustration is my goal. I need my photography to be fun again. Lightening my load would be a big plus here too. So, I'm starting to look at budget all-around lenses. I don't expect them to be perfect optically. The larger the zoom range the better (within reason, optical quality DOES matter), oh and it must be CHEAP! I'm living on a part-time (read: every other weekend) Vet Tech position and my Manual Mode course income.
So, here's what I've found so far:
Click here for a spreadsheet of my research.
If you have experience with any of these lenses or any other advice, feel free to email me or leave a comment. It'll be awhile before I make a purchase -I just don't have the money together yet. It may end up being something I ask for at Xmas or my birthday. (December/January)
Thursday, January 29, 2009
Help for lens shoppers!
If you are looking at getting a new lens, no matter what kind it is you might be overwhelmed by the lens descriptions. Do you need a Canon 75-300mm f/4-5.6 USM IS AF for $600 or will a Canon 100-300 f/5.6-6.7 AF for $130 do? And what will you get if you go for a Sigma 100-300 f/4 EX DG IF HSM for $1065?
Hopefully, if you're lens shopping you have a purpose in mind. Make sure you really think about what it is about your current lens(es) that is making you look for a new lens. What will the new lens be used for the most? Will there be other uses? What kind of lighting situations will it be used in? And are there features you want in a new lens?
Focal length:
This is usually the first part of the lens description followed by "mm" as in the bolded part here:
Canon 75-300mm f/4-5.6 USM IS AF
The smaller the number, the farther away your subject will appear and the more of your surroundings will fit into a shot. "Wide" lenses (10mm to 30mm) are often used for landscapes, "Normal" or "Standard" lenses are 30mm to 50mm and come close to what we see normally with our eyes. For this reason, they are often used for portrait work and as general walk-around lenses. Telephoto lenses are anything 100mm and up. They are used for wildlife, candids, and other situations where you want or need to take photos at a distance.
Zoom Lenses:
When you see two numbers like you do above "75-300mm" that means it's a zoom lens. These are the lenses most of us are familiar with. They'll make the subject appear closer or further away as we turn a ring on the lens.
Primes / Fixed Lenses:
If you see just one number, the lens is a "prime", otherwise known as a "fixed" or "standard" lens. These lenses don't "zoom". In order to make the subject appear closer or further away, you'll need to "zoom with your feet", in other words, move yourself closer or further away.
People choose primes because you can usually get better quality and "faster lenses" for much cheaper this way. (We'll discuss "fast" lenses later.) Usually people purchase something like a fast 30mm or 50mm prime for portrait work.
Maximum Aperture:
After the focal length there's usually a "f/" followed by a number or two numbers. The maximum aperture is bolded in the example below:
Canon 75-300mm f/4-5.6 USM IS AF
If you aren't using manual mode yet you can see some of my other articles for the specifics on aperture, but here's the quick and dirty -the lower the numbers after the "f/" the "faster" the lens is. f/4-5.6 is not all that fast, the example lens is fairly average. When you get into f/2.8 or even all the way down to f/1.0 with some specialty primes, those are what are considered "fast".
"Fast" lenses will give you 2 advantages. First, the lower that number, the better low-light performance you'll get. This is really why they are called "fast" -the lower your aperture number, the faster shutter speed you'll be able to achieve, so if you take photos of, say indoor sporting events or dance recitals a fast lens can help you avoid blur due to camera or subject movement.
The side-effect from using really low-numbered apertures like f/2.8 or 1.4 is a really shallow depth of field. So, if you like those photos with really smoothly blurred backgrounds and a sharp subject, those are done with small numbered apertures. This is very nice for portrait work, but when you are shooting indoor sporting events this will mean your focus has to be EXACT in order for you to get a sharp shot. Focus is very important because at these low-valued apertures your depth of field is so shallow.
Brand:
This usually comes first in the lens description. In the examples above it was Canon, but I included a Sigma lens in the first paragraph of this article as well. Nikon, Olympus, and other camera makers obviously make lenses for their systems as well, but Sigma, Tamron, Tokina, and others are 3rd party lens makers that make lenses for at least Canon and Nikon.
Personally, I consider Canon and Sigma whenever I go to buy a lens. I own both makes of lenses and feel that in some cases Sigma is just as good as Canon, but it does depend on the specific lens you are looking at. I know other photographers who are happy with their Tamron lenses, but I've never found one of quality for my own use. No matter what the make, you'll need to do your homework before buying a lens because quality will differ greatly depending on the lens you are looking at -even with Canon! (...unless you buy all "L" glass.) If you are on a budget, though, 3rd party lenses are worth considering!
The Alphabet Soup:
After the basic lens description ("Canon 75-300mm f/4-5.6") comes a bunch of letters. I'll try to define as many as I can here:
http://imaging.nikon.com/products/imaging/lineup/lens/glossary.htm
More Sigma lens definitions:
http://www.sigmaphoto.com/lenses/lenses.asp
Lens Test Data:
The final step in lens shopping is to look at comparisons between similar lenses. Google searches may result in many test shots, searches on Flickr can show you samples of what others have done with the lens, and these are really good things to do, but the best way to compare lenses is to look at the sites below:
Hopefully, if you're lens shopping you have a purpose in mind. Make sure you really think about what it is about your current lens(es) that is making you look for a new lens. What will the new lens be used for the most? Will there be other uses? What kind of lighting situations will it be used in? And are there features you want in a new lens?
Focal length:
This is usually the first part of the lens description followed by "mm" as in the bolded part here:
Canon 75-300mm f/4-5.6 USM IS AF
The smaller the number, the farther away your subject will appear and the more of your surroundings will fit into a shot. "Wide" lenses (10mm to 30mm) are often used for landscapes, "Normal" or "Standard" lenses are 30mm to 50mm and come close to what we see normally with our eyes. For this reason, they are often used for portrait work and as general walk-around lenses. Telephoto lenses are anything 100mm and up. They are used for wildlife, candids, and other situations where you want or need to take photos at a distance.
Zoom Lenses:
When you see two numbers like you do above "75-300mm" that means it's a zoom lens. These are the lenses most of us are familiar with. They'll make the subject appear closer or further away as we turn a ring on the lens.
Primes / Fixed Lenses:
If you see just one number, the lens is a "prime", otherwise known as a "fixed" or "standard" lens. These lenses don't "zoom". In order to make the subject appear closer or further away, you'll need to "zoom with your feet", in other words, move yourself closer or further away.
People choose primes because you can usually get better quality and "faster lenses" for much cheaper this way. (We'll discuss "fast" lenses later.) Usually people purchase something like a fast 30mm or 50mm prime for portrait work.
Maximum Aperture:
After the focal length there's usually a "f/" followed by a number or two numbers. The maximum aperture is bolded in the example below:
Canon 75-300mm f/4-5.6 USM IS AF
If you aren't using manual mode yet you can see some of my other articles for the specifics on aperture, but here's the quick and dirty -the lower the numbers after the "f/" the "faster" the lens is. f/4-5.6 is not all that fast, the example lens is fairly average. When you get into f/2.8 or even all the way down to f/1.0 with some specialty primes, those are what are considered "fast".
"Fast" lenses will give you 2 advantages. First, the lower that number, the better low-light performance you'll get. This is really why they are called "fast" -the lower your aperture number, the faster shutter speed you'll be able to achieve, so if you take photos of, say indoor sporting events or dance recitals a fast lens can help you avoid blur due to camera or subject movement.
The side-effect from using really low-numbered apertures like f/2.8 or 1.4 is a really shallow depth of field. So, if you like those photos with really smoothly blurred backgrounds and a sharp subject, those are done with small numbered apertures. This is very nice for portrait work, but when you are shooting indoor sporting events this will mean your focus has to be EXACT in order for you to get a sharp shot. Focus is very important because at these low-valued apertures your depth of field is so shallow.
Brand:
This usually comes first in the lens description. In the examples above it was Canon, but I included a Sigma lens in the first paragraph of this article as well. Nikon, Olympus, and other camera makers obviously make lenses for their systems as well, but Sigma, Tamron, Tokina, and others are 3rd party lens makers that make lenses for at least Canon and Nikon.
Personally, I consider Canon and Sigma whenever I go to buy a lens. I own both makes of lenses and feel that in some cases Sigma is just as good as Canon, but it does depend on the specific lens you are looking at. I know other photographers who are happy with their Tamron lenses, but I've never found one of quality for my own use. No matter what the make, you'll need to do your homework before buying a lens because quality will differ greatly depending on the lens you are looking at -even with Canon! (...unless you buy all "L" glass.) If you are on a budget, though, 3rd party lenses are worth considering!
The Alphabet Soup:
After the basic lens description ("Canon 75-300mm f/4-5.6") comes a bunch of letters. I'll try to define as many as I can here:
- AF -AutoFocus
- EF or EF-S -"EF" means it'll fit any Canon camera wether it's full frame or a crop sensor. These lenses are required if you have a full frame camera (a Canon 1D or 5D). "EF-S" lenses fit only crop sensor cameras. These include Canon's Rebel lineup (XT, XTi, XSi, XS), and the 10D, 20D, 30D, 40D, and 50D's. The "EF-S" lenses are usually a little cheaper, but if you decide to move to a 1D or 5D someday, you won't be able to use them on your full frame camera.
- HSM -Sigma's version of "USM", it's an autofocus mechanism that's faster, focuses better than non-HSM in low light, and it's quieter than non-HSM lenses as well.
- IF -Internal Focus, these lenses will not have rotating front elements and they won't change length while you are focusing. This is a good thing for macro photography where if the lens moves while you focus there's a risk of the front of the lens hitting your subject as you focus.
- IS -"Image Stabalized", this means the lens will compensate for some movement as you take photos. This helps in low-light situations when camera shake often ruins photos. It's not magic, but it'll help give you a stop or two advantage depending on the lens. Some lenses have dual IS motors so you can turn on just vertical IS or both vertical and horizontal compensation. The ability to turn off horizontal compensation is nice for automotive photography since it can help keep panned shot sharp.
- "L" -If you see an "L" tacked on to the end of a lens description like "Canon 70-200mm f/2.8L" it designates the lens as one of Canon's pro line lenses. If it's a telephoto, it'll be white like you see on the sidelines of many sporting events. If it's a wide-angle lens it'll just have a red ring that designates it as an "L", but either way "L" lenses are generally of excellent quality, but are also very expensive.
- Macro -These lenses will focus closer than non-macro lenses. True macro lenses will give you 1:1 size ratios although some "macro" lenses won't do 1:1, so if you really want to get into macros, make sure you verify whether the lens you're looking at will do 1:1.
- MF -Manual Focus
- OS -"Optically Stabalized", Sigma's equivilent of the "IS" designation for Canon lenses
- Rotating front element: One thing to watch out for on cheaper lenses is a front element that rotates. This will make it difficult to use a circular polarizer filter on the lens.
- USM -"Ultra Sonic Motor", this is an autofocus mechanism made by Canon that's fast, focuses better than non-USM in low light, and it's quieter than non-USM lenses as well.
- VR -"Vibration Reduction", Nikon's designation for image stabalized lenses
http://imaging.nikon.com/products/imaging/lineup/lens/glossary.htm
More Sigma lens definitions:
http://www.sigmaphoto.com/lenses/lenses.asp
Lens Test Data:
The final step in lens shopping is to look at comparisons between similar lenses. Google searches may result in many test shots, searches on Flickr can show you samples of what others have done with the lens, and these are really good things to do, but the best way to compare lenses is to look at the sites below:
- http://photozone.de the best site for lens reviews, they test center and edge sharpness, vignette, and chromatic aberration
- http://www.the-digital-
picture.com/Reviews/ there's a nifty tool on this site that allows you to compare lens sharpness tests side-by-side - http://www.dpreview.com/
lensreviews/
Monday, December 15, 2008
38¢ Can Cooler Snoot
My local hardware store had these can cozies on sale for thirty-eight cents and, since the inside is white, I figured that I might be able to make a snoot for my flash out of one of them, so I picked one up. It ended up fitting on my Canon 580EX perfectly and works well without modification since it has a hole in the bottom already. Here's some photos of the setup:
(click on photo for larger versions)
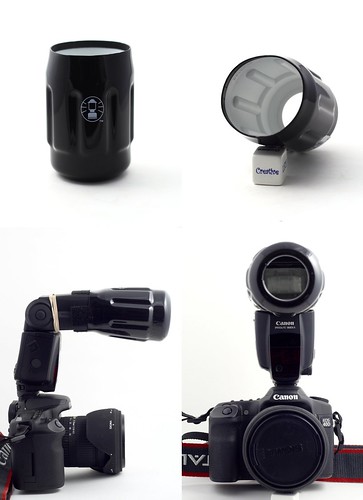
And here's a sample shot taken with it:
(click on photo for larger versions)
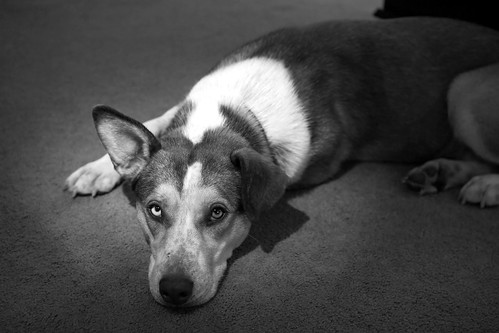
(click on photo for larger versions)
And here's a sample shot taken with it:
(click on photo for larger versions)
Friday, April 25, 2008
Infrared Photography Notes
Over the winter I started to see more and more infrared photography popping up in magazines and on the 'net and I became interested in dabbling in it myself. I did a bit of research, joined the Infrared_Photography yahoogroup (which has some amazing resources!), and decided that the most wise way to start out would be with the most minimal investment, an infrared Cokin filter, even though I was warned by the IR group that I'd need to shield the space between the filter and the lens as well as the viewfinder from light leakage while taking an image.
When it arrived I wanted so much to put it to use, but with no foliage outside it was hard to find a subject. Pine trees, I was told, should appear white, but for whatever reason it just never seemed to work for me. I did get a couple test pics, however, of a houseplant under a halogen light -that seemed to work.
But now that it's April and we've finally got green grass (and buds on the trees), I went out on Wednesday to try to take some pictures. It was slightly overcast, near noon, and I used my sweater draped over the entire camera (and held loosely around the filter) to shield the entire thing from light.
One problem I knew would be a challenge is the fact that IR photography with a non-converted camera requires long exposures and it was windy out that day. I knew I'd get some blur due to the wind, but tried to take lots of pictures to increase my chances of a getting a good shot via luck. I figured even with the blur I should be able to see how well the filter works...
Well, the end results were unusable. Not only was there blur, there was also light leakage from somewhere because I got a reflection of the lens assembly that can be seen clear as day in every shot. The long exposures and the resulting need for a tripod and blur due to wind as well as the need to line up the shot, insert the filter, cover the camera to block light intrusion, etc all add up to a big pain in the you-know-what.
So, for the last couple days I've been looking into getting a second camera and having it converted to infrared. The cost varies greatly depending on how you want to buy:
In short, getting a new converted camera from maxmax.com seems to be a rip-off. Their conversions are $50 more than the more popular LifePixel as well. It's disappointing that no one else out there is offering already converted cameras at set prices. I missed that eBay auction today because I'm just no good at remembering when it ends and going through the trouble of bidding and all that is a pain (IMO). Ebay seems to be the cheapest option, but I've seen some cameras go for ridiculous amounts, so it's really all about waiting for luck to be in your favor.
I don't know if I'll be able to hold out for another auction. I'm going on a trip next month and I'd really like to have an IR body with me. I'll post more as I figure it out. I emailed maxmax.com about their pricing to see if they'll be coming down anytime soon. Probably not, but worth a try.
Oh, and to preemptively answer the question of "why not film" -it seems to be hard to find a place that'll process it. I'm also unsure about whether my film body has an IR filter like all digital SLR's do. I'm also quite dependent on having instant feedback and histograms. Some call it lazy, maybe it is, but I do whatever gets me the image I want the easiest, and that's digital. Even though it IS a money pit >:-P
In the meantime, I do plan to take a minute or two this weekend to re-try my IR filter. I may not be able to fix the long exposures, but there has to be a way to eliminate those reflections, then maybe I can just hope for a day or two without wind... :-\ Something's gotta give. I really want to jump on this new IR bandwagon. Some of the photos I've seen are amazing!
When it arrived I wanted so much to put it to use, but with no foliage outside it was hard to find a subject. Pine trees, I was told, should appear white, but for whatever reason it just never seemed to work for me. I did get a couple test pics, however, of a houseplant under a halogen light -that seemed to work.
But now that it's April and we've finally got green grass (and buds on the trees), I went out on Wednesday to try to take some pictures. It was slightly overcast, near noon, and I used my sweater draped over the entire camera (and held loosely around the filter) to shield the entire thing from light.
One problem I knew would be a challenge is the fact that IR photography with a non-converted camera requires long exposures and it was windy out that day. I knew I'd get some blur due to the wind, but tried to take lots of pictures to increase my chances of a getting a good shot via luck. I figured even with the blur I should be able to see how well the filter works...
Well, the end results were unusable. Not only was there blur, there was also light leakage from somewhere because I got a reflection of the lens assembly that can be seen clear as day in every shot. The long exposures and the resulting need for a tripod and blur due to wind as well as the need to line up the shot, insert the filter, cover the camera to block light intrusion, etc all add up to a big pain in the you-know-what.
So, for the last couple days I've been looking into getting a second camera and having it converted to infrared. The cost varies greatly depending on how you want to buy:
- A USED, CONVERTED Canon Rebel XT sold on eBay today for $551.52
- A USED, UNCONVERTED Canon Rebel XT goes for about $350-$400
- A USED, UNCONVERTED Canon Rebel XTI or 20D goes for about $450-$500
- A NEW, UNCONVERTED Canon Rebel XTI goes for $509
- IR conversion service costs $400 for any Canon SLR
- A NEW, CONVERTED, NON-EBAY Canon Rebel XT costs $950
- A NEW, CONVERTED, NON-EBAY Canon Rebel XTI costs $1275 from www.maxmax.com !!!
In short, getting a new converted camera from maxmax.com seems to be a rip-off. Their conversions are $50 more than the more popular LifePixel as well. It's disappointing that no one else out there is offering already converted cameras at set prices. I missed that eBay auction today because I'm just no good at remembering when it ends and going through the trouble of bidding and all that is a pain (IMO). Ebay seems to be the cheapest option, but I've seen some cameras go for ridiculous amounts, so it's really all about waiting for luck to be in your favor.
I don't know if I'll be able to hold out for another auction. I'm going on a trip next month and I'd really like to have an IR body with me. I'll post more as I figure it out. I emailed maxmax.com about their pricing to see if they'll be coming down anytime soon. Probably not, but worth a try.
Oh, and to preemptively answer the question of "why not film" -it seems to be hard to find a place that'll process it. I'm also unsure about whether my film body has an IR filter like all digital SLR's do. I'm also quite dependent on having instant feedback and histograms. Some call it lazy, maybe it is, but I do whatever gets me the image I want the easiest, and that's digital. Even though it IS a money pit >:-P
In the meantime, I do plan to take a minute or two this weekend to re-try my IR filter. I may not be able to fix the long exposures, but there has to be a way to eliminate those reflections, then maybe I can just hope for a day or two without wind... :-\ Something's gotta give. I really want to jump on this new IR bandwagon. Some of the photos I've seen are amazing!
Tuesday, January 29, 2008
$70 Lens Review: Canon 50mm f/1.8 II
Some call it the "fantastic plastic" and given the build quality, you'll know why. The Canon 50mm f/1.8 II is the lightest lens you're likely to ever hold in your hands (except for maybe the lens baby); the lens cap is laughably small, the focus ring is too! Also, it's autofocus is quite noisy and doesn't perform well in low-light or low-contrast conditions at all.
BUT!
This lens is quite sharp and for the money, it can't be beat. If you even THINK you might have a use for a fast normal prime, it may be worthwhile to check this lens out!
Here's a link to my sharpness test results for this lens.
Here's a link to my sharpness test results for the Sigma 30mm f/1.4 (around $400) for comparison.
And here's a link to all of my lens test results.
**PLEASE NOTE**
In the real world you aren't usually taking pictures of black and white text. I do my testing this way to show minimal differences that would probably never be noticed on actual photos. Also, remember when viewing the test results at 100%, this is the equivalent of having your photo printed at 30x20. If you don't crop much and don't print that big, you don't need a lens that's perfectly sharp at 100%.
My Thoughts:
...In the past few weeks I've been using this lens for studio photography, pics of my fish, etc and I must say that it's definitely a workable lens. If your subjects are moving (like my fish), you'll have to focus manually with that tiny little focus ring, but for me it really didn't matter. I got used to it pretty quick. In fact, I almost feel bad that I spent the money on the Sigma 30mm f/1.4 -it seems like a waste when this lens is so close in focal length and quality (of pictures). The Sigma is definitely better built, but I don't think I'd ever be able to tell the difference in quality between the two if real world photos from them were placed side-by-side. If you're deciding between the two and you're willing to live with the downsides of the "Fantastic Plastic", I'd say go for it!
What do I mean by "Prime"?
Prime lenses are non-zoom lenses, so they stay fixed at one focal length. If you want to "zoom in" or "zoom out", your only option is to do so with your feet.
Why would you want a "Prime" instead of a "Zoom" lens?
In the old days primes were considered superior because zoom lenses were often poorly made. Technology has since improved and some zooms are as good as primes. Zoom lenses, however, cost more (sometimes MUCH more). So, these days people usually buy primes to get a better quality lens for a lower price. Besides, "zooms" are not usually needed for studio work, macro photography, etc.
What do I mean by "a Fast lens"?
Fast lenses allow you to get higher shutter speeds in low-light conditions without a flash. Most of the time they are used to avoid blur in indoor photos when you can't (or don't want to) use a flash.
How do you identify how "fast" a lens is?: Lenses are identified by their focal length (for this lens, that's the 50mm part, which tells you how close your subject will appear through the lens), followed by the maximum aperture of the lens (for this lens, that's the f/1.8 part). The lower the number that follows that "f/", the "faster" the lens is (or the better it will perform in low-light conditions). f/1.8 is VERY fast, although my Sigma is a f/1.4 and Canon makes a 50mm "L series" lens that's a f/1.0!
BUT!
This lens is quite sharp and for the money, it can't be beat. If you even THINK you might have a use for a fast normal prime, it may be worthwhile to check this lens out!
Here's a link to my sharpness test results for this lens.
Here's a link to my sharpness test results for the Sigma 30mm f/1.4 (around $400) for comparison.
And here's a link to all of my lens test results.
**PLEASE NOTE**
In the real world you aren't usually taking pictures of black and white text. I do my testing this way to show minimal differences that would probably never be noticed on actual photos. Also, remember when viewing the test results at 100%, this is the equivalent of having your photo printed at 30x20. If you don't crop much and don't print that big, you don't need a lens that's perfectly sharp at 100%.
My Thoughts:
...In the past few weeks I've been using this lens for studio photography, pics of my fish, etc and I must say that it's definitely a workable lens. If your subjects are moving (like my fish), you'll have to focus manually with that tiny little focus ring, but for me it really didn't matter. I got used to it pretty quick. In fact, I almost feel bad that I spent the money on the Sigma 30mm f/1.4 -it seems like a waste when this lens is so close in focal length and quality (of pictures). The Sigma is definitely better built, but I don't think I'd ever be able to tell the difference in quality between the two if real world photos from them were placed side-by-side. If you're deciding between the two and you're willing to live with the downsides of the "Fantastic Plastic", I'd say go for it!
What do I mean by "Prime"?
Prime lenses are non-zoom lenses, so they stay fixed at one focal length. If you want to "zoom in" or "zoom out", your only option is to do so with your feet.
Why would you want a "Prime" instead of a "Zoom" lens?
In the old days primes were considered superior because zoom lenses were often poorly made. Technology has since improved and some zooms are as good as primes. Zoom lenses, however, cost more (sometimes MUCH more). So, these days people usually buy primes to get a better quality lens for a lower price. Besides, "zooms" are not usually needed for studio work, macro photography, etc.
What do I mean by "a Fast lens"?
Fast lenses allow you to get higher shutter speeds in low-light conditions without a flash. Most of the time they are used to avoid blur in indoor photos when you can't (or don't want to) use a flash.
How do you identify how "fast" a lens is?: Lenses are identified by their focal length (for this lens, that's the 50mm part, which tells you how close your subject will appear through the lens), followed by the maximum aperture of the lens (for this lens, that's the f/1.8 part). The lower the number that follows that "f/", the "faster" the lens is (or the better it will perform in low-light conditions). f/1.8 is VERY fast, although my Sigma is a f/1.4 and Canon makes a 50mm "L series" lens that's a f/1.0!
Saturday, November 10, 2007
One way to keep track of your memory cards.
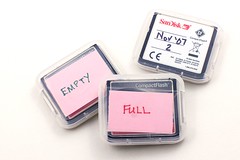
I just bought 2 more 2GB memory cards, which means I now have 4 cards to keep track of. It used to be easy when there was one card in the camera and one in the bag, but now it's going to be a bit trickier. I thought of a nice way to keep track of which ones are empty and which ones are full and figured I'd share...
I simply took a pieces of scrap paper and cut it into memory card sized pieces, then wrote "Full" on one side and "Empty" on the other side. Then, I used packing tape to sortof laminate them so they'd last longer. (The reason I made 3 instead of 4 is because one card will always be in the camera.)
On a similar note, I think it's important to be able to tell your cards apart in case you have a problem with a card -then you'll be able to tell which card it is. Or, if you have multiple problems with a card, you'll be able tell if its the same one each time. So, each time I buy a new card I mark it with the date and year (plus "1" or "2" if I buy more than one in a single month/year).
So, that's my tip for today...
Monday, November 5, 2007
Lens test: Sigma 30mm f/1.4 VS Canon 100mm f/2.8
Okay, so I did a TON of research before buying my newest lens, a Sigma 30mm f/1.4 "fixed" or "prime" (meaning it doesn't "zoom", its always at 30mm). But, in all my research I read over and over again that this lens was "L series" sharp in the center, but it's corner and edge performance was poor. The unanswered question was -where's the "center" VS the "edge"? Where does the sharpness fall off? How big of an area will be "L series" sharp? There seemed to be no answer to that question, but I bought it anyway based on a lot of SQF and MTF data as well as lens tests others have done (all archived and/or linked to on this page).
Now that I've had the lens for a couple weeks, I decided to run my own lens sharpness tests. This was my first attempt, so I wasted a whole day doing tests by taking pictures of a newspaper ad taped to the wall. After taking shots with EVERY LENS I OWN (and at several focal lengths for the zoom lenses!), I converted the resulting photos (over 250 of them) from RAW to jpeg, then started comparing them. It was then that I realized that my tests were flawed. The camera was not always exactly perpendicular to the wall, so the edges on many shots were blurry -not because the lens was flawed, but because they weren't in the plane of focus! (GRR!)
So, last night I re-did the test, but only with my Sigma 30mm f/1.4 and my Canon 100mm f/2.8. This time I laid some paper with printing on it on the floor, then used a level to make sure the camera's LCD screen was level before taking the photos (straight down). I had to redo these several times to try to get the framing of the photos to be roughly the same at both focal lengths, but I finally got it right.
All photos were taken on a tripod, using a remote shutter release, with mirror lockup enabled to get the most sharpness possible from each shot. Also, 2 photos were taken at each focal length so that if camera shake was an issue it'd be obvious when the 2 shots were compared.
After the photos were taken, the two versions were compared to make sure they were the same, then they were converted to jpeg. Now, because what I wanted to see when I was shopping around was an entire, full-resolution shot, I uploaded all the shots to flickr, they are in this set.
Then, I opened all the shots at once in Gimp, found the exact center of the photo, and then expanded them all to 100% so that they'd show the same area. Next, I arranged all the windows in order and in such a way that the shots with both lenses at each focal length were together for easy comparison, and then I took a screenshot and uploaded that photo as the "center crops" photo.
Then I looked for the clearest edge for both lenses , and took a crop from as close to the middle of the bottom and right-hand edges as possible, and with them arranged the same as the were for the center crops, I took another screenshot and uploaded those photos as the "bottom edge" and the "right edge" crops. And lastly, I did the same thing for the "corner crop" photo.
All the photos were added to a set which can be seen here: http://www.flickr.com/photos/erica_marshall/sets/72157602932628392/
I'm not going to dwell on results here, because you can see them for yourself. I do feel that it's really important to put this data in perspective, though, so here are some tips for using these test shots in the way they were intended:
If you compare the two lenses, you'll see that the Canon 100mm is much sharper through to the edges and corners than the 30mm. This isn't much of a surprise and does NOT say anything bad about the Sigma 30mm f/1.4. This dramatic difference is due to the focal length -it's much easier to get clear edges and corners with a longer focal length. My suspicion is that even the Canon 35mm f/1.4L lens isn't completely sharp in the corners!
These tests show black and white text to maximize the lack of sharpness. In the real world the difference in sharpness that you see here will almost be imperceptible. The differences will never be this clear in a real photo.
This is a fast lens who's use at low-numbered apertures (which is kindof the point of having it) will yield a very shallow depth of field. When you have a shallow DOF, your subject is usually not right on the edge or in the very corner of the frame anyway, so edge and corner performance isn't really all that important on this type of lens.
Keep in mind that none of these shots were sharpened at all, they are straight RAW files, converted to jpegs.
Don't fall into the trap of obsessing over numbers. I obviously have to an extent, but you have to be able to take a step back and see the whole picture. These tests may be flawed and the results may not apply in real world situations. Use at your own $risk$.
Perhaps one day I'll try to rent a Canon 28mm f/1.8 and re-do the tests so they can be compared more directly. But, I find it interesting to see how much of a difference aperture can make in the sharpness of your photos. In fact, I think I'm going to test the rest of my lenses as well, then label each lens with it's sharpest apertures and some indicator of where the sharpest part of the frame is as well.
As close to a conclusion as I'll get for now:
Last night I was asked if I was happy with my purchase or if I regretted it. I must say that I've already gotten use out of it in low-light situations where I never would have been able to manage a picture before, so I am finding it useful. As far as sharpness goes, I think it's acceptable in the center, and I know, now, how to get the best photos from it. But, not having other similar lenses to test, I cannot say for sure if I'd be happier with another (similar) lens. -I guess time will tell as far as how well it does in real-world situations. I have been impressed with it's use, like I said, but I haven't really had a photo yet that puts it to the test as far as sharpness goes. I do intend to use this lens a lot in my home studio, though, so I'll definitely post another review whenever I get around to getting a really good real-world picture with it.
Now that I've had the lens for a couple weeks, I decided to run my own lens sharpness tests. This was my first attempt, so I wasted a whole day doing tests by taking pictures of a newspaper ad taped to the wall. After taking shots with EVERY LENS I OWN (and at several focal lengths for the zoom lenses!), I converted the resulting photos (over 250 of them) from RAW to jpeg, then started comparing them. It was then that I realized that my tests were flawed. The camera was not always exactly perpendicular to the wall, so the edges on many shots were blurry -not because the lens was flawed, but because they weren't in the plane of focus! (GRR!)
So, last night I re-did the test, but only with my Sigma 30mm f/1.4 and my Canon 100mm f/2.8. This time I laid some paper with printing on it on the floor, then used a level to make sure the camera's LCD screen was level before taking the photos (straight down). I had to redo these several times to try to get the framing of the photos to be roughly the same at both focal lengths, but I finally got it right.
All photos were taken on a tripod, using a remote shutter release, with mirror lockup enabled to get the most sharpness possible from each shot. Also, 2 photos were taken at each focal length so that if camera shake was an issue it'd be obvious when the 2 shots were compared.
After the photos were taken, the two versions were compared to make sure they were the same, then they were converted to jpeg. Now, because what I wanted to see when I was shopping around was an entire, full-resolution shot, I uploaded all the shots to flickr, they are in this set.
Then, I opened all the shots at once in Gimp, found the exact center of the photo, and then expanded them all to 100% so that they'd show the same area. Next, I arranged all the windows in order and in such a way that the shots with both lenses at each focal length were together for easy comparison, and then I took a screenshot and uploaded that photo as the "center crops" photo.
Then I looked for the clearest edge for both lenses , and took a crop from as close to the middle of the bottom and right-hand edges as possible, and with them arranged the same as the were for the center crops, I took another screenshot and uploaded those photos as the "bottom edge" and the "right edge" crops. And lastly, I did the same thing for the "corner crop" photo.
All the photos were added to a set which can be seen here: http://www.flickr.com/photos/erica_marshall/sets/72157602932628392/
I'm not going to dwell on results here, because you can see them for yourself. I do feel that it's really important to put this data in perspective, though, so here are some tips for using these test shots in the way they were intended:
If you compare the two lenses, you'll see that the Canon 100mm is much sharper through to the edges and corners than the 30mm. This isn't much of a surprise and does NOT say anything bad about the Sigma 30mm f/1.4. This dramatic difference is due to the focal length -it's much easier to get clear edges and corners with a longer focal length. My suspicion is that even the Canon 35mm f/1.4L lens isn't completely sharp in the corners!
These tests show black and white text to maximize the lack of sharpness. In the real world the difference in sharpness that you see here will almost be imperceptible. The differences will never be this clear in a real photo.
This is a fast lens who's use at low-numbered apertures (which is kindof the point of having it) will yield a very shallow depth of field. When you have a shallow DOF, your subject is usually not right on the edge or in the very corner of the frame anyway, so edge and corner performance isn't really all that important on this type of lens.
Keep in mind that none of these shots were sharpened at all, they are straight RAW files, converted to jpegs.
Don't fall into the trap of obsessing over numbers. I obviously have to an extent, but you have to be able to take a step back and see the whole picture. These tests may be flawed and the results may not apply in real world situations. Use at your own $risk$.
Perhaps one day I'll try to rent a Canon 28mm f/1.8 and re-do the tests so they can be compared more directly. But, I find it interesting to see how much of a difference aperture can make in the sharpness of your photos. In fact, I think I'm going to test the rest of my lenses as well, then label each lens with it's sharpest apertures and some indicator of where the sharpest part of the frame is as well.
As close to a conclusion as I'll get for now:
Last night I was asked if I was happy with my purchase or if I regretted it. I must say that I've already gotten use out of it in low-light situations where I never would have been able to manage a picture before, so I am finding it useful. As far as sharpness goes, I think it's acceptable in the center, and I know, now, how to get the best photos from it. But, not having other similar lenses to test, I cannot say for sure if I'd be happier with another (similar) lens. -I guess time will tell as far as how well it does in real-world situations. I have been impressed with it's use, like I said, but I haven't really had a photo yet that puts it to the test as far as sharpness goes. I do intend to use this lens a lot in my home studio, though, so I'll definitely post another review whenever I get around to getting a really good real-world picture with it.
Monday, October 22, 2007
Choosing a normal prime lens for a Canon mount.
I just purchased a new normal prime lens for my Canon 30D and it took a lot of research to decide which one to get because there are a ton of them on the market ranging from $75 to $1300 or more. If you're in the market for such a lens, I hope my research can benefit you as well.
First, let's define the terms "normal" and "prime" for those who may not be "hip" to the "lingo" (I'm cool like that).
"Normal" lenses are usually 50mm lenses. This is the sweet spot between wide angle lenses and telephoto, hence, they're called "normal". There's one caveat these days, though, and that's the crop factor of your camera's sensor. Make sure you take that into effect. If you have a cropped sensor Canon camera, you'll most likely be looking for a 28mm - 30mm lens in order to get as close to normal as possible.
"Prime" means the same thing as "fixed" and all that means is that it's not a "zoom" lens. You can't zoom in or out with it. It has just one focal length, so you have to "zoom with your legs". Prime or fixed lenses are usually cheaper and sharper because they are more simple to manufacture and compromises don't have to be made so that they can work at sometimes dramatically different focal lengths (I have a 50-500mm lens, for example!).
The research:
There are many options out there for Canon mounts. If you're looking for a 50mm prime there's 3 main choices including the Canon 50mm f/1.8 which goes for $75 or so new! It's surprisingly sharp as well and many people are very happy with this lens. The downside seems to be bad bokeh (background blur) and the build quality isn't great (it's fragile and very plastic-y). Still, for $75, it'd be a nice first prime if you're just wondering what they are all about!
50mm choices include:
6IdceEAHQ&output=html
And for those who are interested, I ended up purchasing the Sigma AF 30mm f/1.4 EX HSM DC -I'll post a review soon!
First, let's define the terms "normal" and "prime" for those who may not be "hip" to the "lingo" (I'm cool like that).
"Normal" lenses are usually 50mm lenses. This is the sweet spot between wide angle lenses and telephoto, hence, they're called "normal". There's one caveat these days, though, and that's the crop factor of your camera's sensor. Make sure you take that into effect. If you have a cropped sensor Canon camera, you'll most likely be looking for a 28mm - 30mm lens in order to get as close to normal as possible.
"Prime" means the same thing as "fixed" and all that means is that it's not a "zoom" lens. You can't zoom in or out with it. It has just one focal length, so you have to "zoom with your legs". Prime or fixed lenses are usually cheaper and sharper because they are more simple to manufacture and compromises don't have to be made so that they can work at sometimes dramatically different focal lengths (I have a 50-500mm lens, for example!).
The research:
There are many options out there for Canon mounts. If you're looking for a 50mm prime there's 3 main choices including the Canon 50mm f/1.8 which goes for $75 or so new! It's surprisingly sharp as well and many people are very happy with this lens. The downside seems to be bad bokeh (background blur) and the build quality isn't great (it's fragile and very plastic-y). Still, for $75, it'd be a nice first prime if you're just wondering what they are all about!
50mm choices include:
- Canon EF 50mm f/1.2 USM L
- Canon EF 50mm f/1.4 USM
- Canon EF 50mm f/2.5 Macro
- Canon EF 50mm f/1.8 II
- Sigma AF 30mm f/1.4 EX HSM DC (EF-S mount)
- Canon EF 35mm f/2.0
- Canon EF 28mm f/1.8 USM
- Sigma 28mm f/1.8
- Canon 28mm f/2.8
- Canon EF 24mm f/1.4L USM
- Canon EF 24mm f/2.8
- Sigma 24mm f/1.8 EX Aspherical DG DF Macro
And for those who are interested, I ended up purchasing the Sigma AF 30mm f/1.4 EX HSM DC -I'll post a review soon!
Cropped sensor cameras -what's a "cropped sensor" and what effect does it have?
What's a crop factor?
Most film cameras are 35mm, and that refers to the size of the recorded image on the film. Professional-level ($$$) digital cameras have "full frame" sensors that are 35mm, and therefore replicate film exactly. So-called "Pro-sumer" DSLRs usually have smaller sensors in them because they are cheaper to manufacture. The smaller sensor obviously doesn't impact the image resolution much (DSLR's with cropped sensors are now being made at 10MP or higher resolution), but they do impact the way your lenses work.
Why might I want a full frame camera?
Full frame cameras have better high ISO performance. This means, in low light when you have to increase the ISO to get a clear shot, you'll get less noise (that grainy, static-looking stuff in your photo) with a full frame than you will with a cropped sensor camera. You may get a higher quality image as well, but you won't be able to tell the difference at normal print (11x14) or on-screen sizes. As person who tries to buy the best all the time I held out for a full frame camera for a long time before deciding to go cropped instead. I've found I have no need for a full frame and feel this is true for anyone who's not making enough money from their photography to cushion the extra expense. I've sold photos taken with a point and shoot, so buying a crop sensor camera won't impact most sales if that's your aim.
How do we account for the crop factor when looking into buying a new lens?
Easy! Look up the crop factor of your camera. For most Canons (20D, 30D, 40D, 300D, 350D, 400D, Rebel, Rebel XT, and the Rebel XTi) it's 1.6. For other camera types, just google your camera's make and model along with the words "crop factor" and you'll probably get an answer right away.
Then all you have to do is multiply your crop factor times the focal length of the lens to figure out what the equivalent would be for film. So, if you're looking at a 50mm lens and you have a Canon 30D, it would act like a 80mm lens (50 x 1.6 = 80).
But if, instead, you're looking for a lens that ACTS like it's 50mm on your cropped sensor, then all you have to do is divide 50mm by your crop factor. 50 / 1.6 = 31.25. So something in the 30mm range would work out best.
Why does this matter?Most of the time it doesn't. You just use your lenses to get the photos you want. If your 100mm lens isn't long enough for you to photograph birds, you go look for a lens with a higher focal length, and you'll know that a 200mm lens will get you twice as close. None of that changes. And don't fear that your photos will be "cropped" from what you see in the viewfinder -they will not. What you see is still what you get. The only time this will matter is if you're getting advice from someone with a film or full sized sensor camera -or, if you're thinking of buying a full frame camera vs a crop. That's all no biggie :-)
Most film cameras are 35mm, and that refers to the size of the recorded image on the film. Professional-level ($$$) digital cameras have "full frame" sensors that are 35mm, and therefore replicate film exactly. So-called "Pro-sumer" DSLRs usually have smaller sensors in them because they are cheaper to manufacture. The smaller sensor obviously doesn't impact the image resolution much (DSLR's with cropped sensors are now being made at 10MP or higher resolution), but they do impact the way your lenses work.
Why might I want a full frame camera?
Full frame cameras have better high ISO performance. This means, in low light when you have to increase the ISO to get a clear shot, you'll get less noise (that grainy, static-looking stuff in your photo) with a full frame than you will with a cropped sensor camera. You may get a higher quality image as well, but you won't be able to tell the difference at normal print (11x14) or on-screen sizes. As person who tries to buy the best all the time I held out for a full frame camera for a long time before deciding to go cropped instead. I've found I have no need for a full frame and feel this is true for anyone who's not making enough money from their photography to cushion the extra expense. I've sold photos taken with a point and shoot, so buying a crop sensor camera won't impact most sales if that's your aim.
How do we account for the crop factor when looking into buying a new lens?
Easy! Look up the crop factor of your camera. For most Canons (20D, 30D, 40D, 300D, 350D, 400D, Rebel, Rebel XT, and the Rebel XTi) it's 1.6. For other camera types, just google your camera's make and model along with the words "crop factor" and you'll probably get an answer right away.
Then all you have to do is multiply your crop factor times the focal length of the lens to figure out what the equivalent would be for film. So, if you're looking at a 50mm lens and you have a Canon 30D, it would act like a 80mm lens (50 x 1.6 = 80).
But if, instead, you're looking for a lens that ACTS like it's 50mm on your cropped sensor, then all you have to do is divide 50mm by your crop factor. 50 / 1.6 = 31.25. So something in the 30mm range would work out best.
Why does this matter?Most of the time it doesn't. You just use your lenses to get the photos you want. If your 100mm lens isn't long enough for you to photograph birds, you go look for a lens with a higher focal length, and you'll know that a 200mm lens will get you twice as close. None of that changes. And don't fear that your photos will be "cropped" from what you see in the viewfinder -they will not. What you see is still what you get. The only time this will matter is if you're getting advice from someone with a film or full sized sensor camera -or, if you're thinking of buying a full frame camera vs a crop. That's all no biggie :-)
Thursday, August 23, 2007
DIY Stealth Camera Bag
There are several reasons I've been looking to replace my Tamrac Velocity 7 sling style camera bag. Don't get me wrong, I love this bag. It's a perfect size and I love how accessible it keeps the camera. But, I carry it with me every day and, well, it LOOKS like a camera bag. -There's 2 downsides to that. One is, it's not all that fashionable (not that I'm all that "fashionable" anyway, but why be dragged down further by my camera bag?). Two is, everyone knows what's in the bag, which makes me a walking target for theft.
In fact, I'm my own worst enemy sometimes; a few weeks ago I went to lunch with my husband, then we walked a few doors down to get coffee. In the middle of my latte, I realized that I had left my camera bag in the sandwich shop! Luckily, it was still there, but I know next time my luck may not be as good...
So, I started looking at "stealth" camera bags. From what I saw, there are only a few options. The only one I liked, and one of the cheapest, was the Crumpler bags, which would cost anywhere from $105 to $128 depending on which model I wanted. One was a bit shorter than my current bag, so I was worried that my camera with my 75-300mm lens attached wouldn't fit. The other one was a bit too big -I don't know if I'd want to carry it around everyday. I also didn't like the idea of shelling out over $100 for a BAG!!!
I googled some more, and stumbled upon a blog post someone made about a camera bag they put together from various parts. It wasn't as compact as I'd like and the insert the guy used moved around in the bag unless it was held in place with more stuff, like a sweatshirt, books, etc. -I didn't want to deal with all that since I really wanted to keep my bag about the same size as the Tamrac bag I'm used to carrying. I needed just enough room for my camera and an attached lens (stored lens-down for accessibility), then compartments for 2 more lenses, one on each side. The insert he used was perfect, but the bag was much too big for my needs.
I took down the info about the insert, then searched for a bag that it'd fit more snuggly in. I probably searched for over an hour, then decided to give it a rest for the day. Later on I got to thinking -I had bought a bag that was about the right size from an Army Navy Surplus store locally years ago and I had never used it. I ran upstairs to my closet and dug it out. I measured it and it seemed perfect, so I coughed up the $20 for the insert and waited for the Fed Ex truck to arrive. When it did, cardboard and packing peanuts flew as I unpacked the insert, and then stuck it in my Army bag. It was a perfect fit!
Now I have a new $20 stealth camera bag :-) . It's just a tiny bit bigger than my Tamrac was, so now I don't have to use force to fit my Canon 10-22mm in the bag anymore ;-) There are all kinds of nifty pockets all over the thing, and the strap's wide enough that it was quite comfortable to carry it around all weekend at the Shootout!
Here's some pics of what it looks like, click on the photo to go to my Flickr page where you can see larger versions of it:
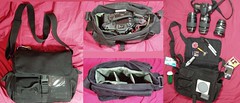
And here's the info if you want to make one for yourself for about $35 (the bag's about $15):
The downsides of this bag: The lens insert doesn't have as much padding between the lenses as my old bag. That's just those 2 interior walls, though. I find that the lenses are snug enough in there that I'm not concerned about them at all. The front velcro pockets have big gaps where stuff can fall out, so I don't use them much -just for snacks and other stuff that I could get by with loosing. And the last issue some may have with this bag is that it's not waterproof. In fact, it's canvas. I'm sure it'd soak up water nicely... That's why I have the plastic bag in the big back pocket, permanently. If I get stuck in a downpour, my plan is to just stick my camera bag in the plastic bag and run for it!
In fact, I'm my own worst enemy sometimes; a few weeks ago I went to lunch with my husband, then we walked a few doors down to get coffee. In the middle of my latte, I realized that I had left my camera bag in the sandwich shop! Luckily, it was still there, but I know next time my luck may not be as good...
So, I started looking at "stealth" camera bags. From what I saw, there are only a few options. The only one I liked, and one of the cheapest, was the Crumpler bags, which would cost anywhere from $105 to $128 depending on which model I wanted. One was a bit shorter than my current bag, so I was worried that my camera with my 75-300mm lens attached wouldn't fit. The other one was a bit too big -I don't know if I'd want to carry it around everyday. I also didn't like the idea of shelling out over $100 for a BAG!!!
I googled some more, and stumbled upon a blog post someone made about a camera bag they put together from various parts. It wasn't as compact as I'd like and the insert the guy used moved around in the bag unless it was held in place with more stuff, like a sweatshirt, books, etc. -I didn't want to deal with all that since I really wanted to keep my bag about the same size as the Tamrac bag I'm used to carrying. I needed just enough room for my camera and an attached lens (stored lens-down for accessibility), then compartments for 2 more lenses, one on each side. The insert he used was perfect, but the bag was much too big for my needs.
I took down the info about the insert, then searched for a bag that it'd fit more snuggly in. I probably searched for over an hour, then decided to give it a rest for the day. Later on I got to thinking -I had bought a bag that was about the right size from an Army Navy Surplus store locally years ago and I had never used it. I ran upstairs to my closet and dug it out. I measured it and it seemed perfect, so I coughed up the $20 for the insert and waited for the Fed Ex truck to arrive. When it did, cardboard and packing peanuts flew as I unpacked the insert, and then stuck it in my Army bag. It was a perfect fit!
Now I have a new $20 stealth camera bag :-) . It's just a tiny bit bigger than my Tamrac was, so now I don't have to use force to fit my Canon 10-22mm in the bag anymore ;-) There are all kinds of nifty pockets all over the thing, and the strap's wide enough that it was quite comfortable to carry it around all weekend at the Shootout!
Here's some pics of what it looks like, click on the photo to go to my Flickr page where you can see larger versions of it:
And here's the info if you want to make one for yourself for about $35 (the bag's about $15):
- The insert is made by Domke, search google for for "Domke FA-230" and you should get some results. I bought mine at Adorama (link), but B&H also has them.
- The bag can be found by searching google for "urban explorer bag". Since I got mine locally a few years ago, I can't really recommend a site to buy that part from.
The downsides of this bag: The lens insert doesn't have as much padding between the lenses as my old bag. That's just those 2 interior walls, though. I find that the lenses are snug enough in there that I'm not concerned about them at all. The front velcro pockets have big gaps where stuff can fall out, so I don't use them much -just for snacks and other stuff that I could get by with loosing. And the last issue some may have with this bag is that it's not waterproof. In fact, it's canvas. I'm sure it'd soak up water nicely... That's why I have the plastic bag in the big back pocket, permanently. If I get stuck in a downpour, my plan is to just stick my camera bag in the plastic bag and run for it!
Monday, August 13, 2007
"What kind of camera should I get?"
This is the most popular question that I get on my photography list. The answer, as you might suspect, is "it depends".
Are you happy with your current camera? If yes, then stop here -there's no need to upgrade! But, if there are things about your current setup that annoy you, then you may want to look into purchasing something that suits you better. -Read on!
First, I suggest making a list of things that you need out of a new camera. For example: Faster boot-up time (the time it takes from when you turn the camera on to when you can take the first photo, less shutter delay (the time it takes from when you push the button to when the camera actually takes the photo), or even stuff like a flash hot shoe, the ability to change lenses, an available underwater housing, etc. Whatever you feel your current setup is lacking and you NEED to have in your next camera -write it down!
Second, take a look at where you think this photography hobby of yours is going in the next 3 - 5 years (or however long you'd like to stick with your new camera). If you know you're serious about it and you'd like to become a pro (or achieve professional results), make sure the camera you choose will fit those goals or else you'll end up upgrading again much more quickly than you anticipated, which just wastes money in the long run!
Third, take a look at your budget and try to strike a balance between cost and features. Start looking at cameras in your price range, and actually go to a store and pick them up to make sure they feel good in your hand. People with large or small hands in particular need to do this to make sure that all buttons and dials can be reached easily or else you'll end up frustrated with your purchase down the line. You should eventually be able to use all the camera's features intuitively and without moving your eye from the eyepiece.
After getting an idea of cost, brands, and models, go to the following websites to read reviews so you can be assured you're making a wise investment in your new equipment:
* Steve's Digicams
* DP Review
Optionally, read user reviews as well for more information:
* Epinions
* Amazon
* ...and you can always google the camera brand, model, and the word "review" to get even more feedback on the cameras you are interested in
Once you have gone through all of that, you should be able to make an informed decision. If you choose to buy online, be very careful of some retailers who use deceptive practices like calling you to verify your order, then giving you the hard-sell on warranties and accessories (some of which should already come with your camera!). If you are unsure of the vendor you're thinking of buying from, read reviews for the vendor at VendorsReviewed.com or ResellerRatings.com. Or, do business with vendors who are known to be both fair and have decent prices as well, such as B&H Camera, Adorama or Amazon.
...I'll continue this topic with a post about point and shoots vs DSLR's soon!
If you want further help, feel free to post a comment here or join my Photography_Beginners Yahoogroup and ask for help. It'd be helpful to know what kinds of photography you're into as well as your budget and any specific brands and/or models you're particularly interested in.
Are you happy with your current camera? If yes, then stop here -there's no need to upgrade! But, if there are things about your current setup that annoy you, then you may want to look into purchasing something that suits you better. -Read on!
First, I suggest making a list of things that you need out of a new camera. For example: Faster boot-up time (the time it takes from when you turn the camera on to when you can take the first photo, less shutter delay (the time it takes from when you push the button to when the camera actually takes the photo), or even stuff like a flash hot shoe, the ability to change lenses, an available underwater housing, etc. Whatever you feel your current setup is lacking and you NEED to have in your next camera -write it down!
Second, take a look at where you think this photography hobby of yours is going in the next 3 - 5 years (or however long you'd like to stick with your new camera). If you know you're serious about it and you'd like to become a pro (or achieve professional results), make sure the camera you choose will fit those goals or else you'll end up upgrading again much more quickly than you anticipated, which just wastes money in the long run!
Third, take a look at your budget and try to strike a balance between cost and features. Start looking at cameras in your price range, and actually go to a store and pick them up to make sure they feel good in your hand. People with large or small hands in particular need to do this to make sure that all buttons and dials can be reached easily or else you'll end up frustrated with your purchase down the line. You should eventually be able to use all the camera's features intuitively and without moving your eye from the eyepiece.
After getting an idea of cost, brands, and models, go to the following websites to read reviews so you can be assured you're making a wise investment in your new equipment:
* Steve's Digicams
* DP Review
Optionally, read user reviews as well for more information:
* Epinions
* Amazon
* ...and you can always google the camera brand, model, and the word "review" to get even more feedback on the cameras you are interested in
Once you have gone through all of that, you should be able to make an informed decision. If you choose to buy online, be very careful of some retailers who use deceptive practices like calling you to verify your order, then giving you the hard-sell on warranties and accessories (some of which should already come with your camera!). If you are unsure of the vendor you're thinking of buying from, read reviews for the vendor at VendorsReviewed.com or ResellerRatings.com. Or, do business with vendors who are known to be both fair and have decent prices as well, such as B&H Camera, Adorama or Amazon.
...I'll continue this topic with a post about point and shoots vs DSLR's soon!
If you want further help, feel free to post a comment here or join my Photography_Beginners Yahoogroup and ask for help. It'd be helpful to know what kinds of photography you're into as well as your budget and any specific brands and/or models you're particularly interested in.
Friday, August 3, 2007
Filters
Filters are thin, round pieces of glass surrounded by a threaded ring that allows it to be screwed onto the front part of a lens. They are usually used with SLR-type cameras, but are becoming more and more available for point and shoots and video cameras as well.
Many filters that were popular for film cameras can now be effectively reproduced in common image editing software such as Photoshop, Gimp, Adobe Elements, Paint.NET, etc. But, other filters' effects cannot be reproduced and you may, therefore, wish to carry some or all of these with you in your camera bag:
UV:
UV filters are clear and often have no effect on your photos other than maybe reducing haze a bit. So, why use them? Most people who use UV filters do so only to protect their lenses. If you may be shooting in rough conditions, it's a good idea to use a UV filter on your lens. A scratched UV filter is much cheaper to replace than it would be to repair your lens! I, like many others, use UV filters on my lenses most of the time. The argument against using UV filters is that many people opt for the cheaper ones, and are therefore buying expensive glass, only to put another element of cheap glass in front of it, therefore reducing the quality of the photos as a result. For this reason, when I'm shooting important shots, I remove my UV filters "just in case".
Neutral Density (ND):
These filters are basically sunglasses for your lens. All they do is remove light. -You may think you can do that with exposure compensation, but in really bright conditions, when you want a long shutter speed (say, for taking photos of waterfalls), a neutral density filter will allow you to use a much longer shutter speed than you otherwise would be able to -even with your ISO on it's lowest setting. If you plan on taking slow shutter speed shots during the day, this type of filter is definitely recommended.
Graduated Neutral Density (GND):
Big name, I know, but an easy enough concept. This filter is split down the middle (often half and half) -part of it is clear, the other part is gray (just like the neutral density filter). The purpose for this is apparent as soon as you run into the following problem: When you're shooting a landscape where the sky (and perhaps the background too) is very bright, but the foreground is either in shadow, or just darker. In this case you're often left sacrificing the sky by exposing for the foreground or taking 2 shots and combining them later. With this filter, you can use the ND part to tone down the sky, while placing the clear portion of the lens where the foreground is so that it gets exposed properly. The problem is, these filters are often split 50-50, so your horizon must be placed in the middle of the shot for the filter to work. You can, of course, get around that by going a bit wide and planning on cropping, but it's kind of annoying. (You can sometimes overcome this exposure issue with a polarized filter instead.)
Circular Polarized / Polarizing Filter:
This filter is slightly different from the others in the fact that it has a freely rotating front element on it. When you screw the filter on the front of your lens, you'll then need to rotate the ring on the front of the filter in order to control the effect of the polarizer. So, what's it good for? -It's used for many reasons: It will make a blue sky bluer (although this works best when you're shooting 90 degrees from the sun), it can enhance or eliminate reflections on water or glass, it can enhance the colors in a rainbow, and sometimes it can even out the exposure as in my example above for the graduated neutral density filter. The reason it can do that without being split down the middle like the GND is this: A polarizer can darken a blue sky to make it bluer, but it won't effect the grass and other objects in your photo. So, if you use a polarizer to darken the sky, often photos come out evenly exposed. An example of this is shown below:
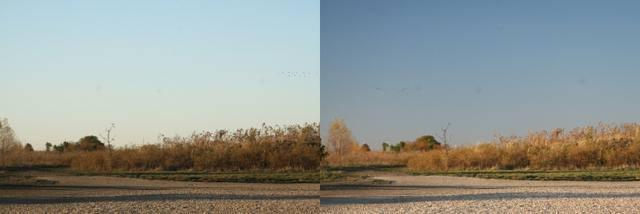
The photo on the left was taken without a polarizer, the photo on the right was taken with a circular polarizer. -See how because of the overly bright sky, the camera doesn't expose the foreground properly? The foreground is properly exposed when you tone down the sky with the polarized filter (like I did on the photo on the right).
In my opinion other filters such as star filters, softening filters, warming, cooling, and other "color filters", as well as many special effects filters like spot-focus, etc can all be achieved in software quite easily. You're free to use them, but many people choose to free up that bit of room in their bag instead.
Sunday, July 1, 2007
What I did this weekend
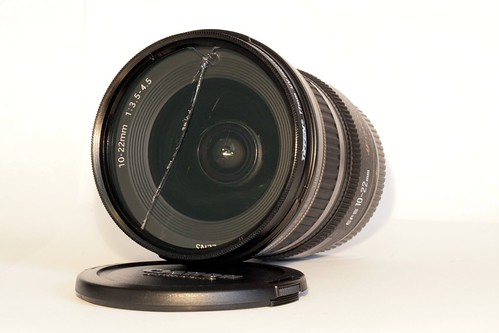
The photo above can also be seen here: http://www.flickr.com/photos/erica_marshall/425731394/
So, Ed and I had a small dinner party yesterday. While I was finishing up the last of the cooking so we could get the meal on the table, Ed's talking to Mike about my new lens. Then, he asks me to go get it and show it to him... So, I stop stirring the rice in the frying pan, and go get my Sigma 50-500mm lens. (It is an impressive looking lens.) ...I took my photo backpack out of the closet, grabbed the "Bigma" out of it, mounted it on my 30D, and handed it to Mike so he could check it out while I continued to stir the rice.
When Mike was ready to unload the 8lb beast, I took it back from him and tried to slip it back into the bag... Oh yeah, this is the one lens that won't fit in the bag while it's mounted to the camera. Grr... Rice burning... I remember the cap for the back of the lens is in the laundry room where I swapped the lens earlier, so I grab the backpack and head towards the laundry room to get everything put away. When I reach the laundry room, I start to swing the backpack up towards the top of the dryer and something flies out...
**Crack!**
Oh no. I look on the floor and see my brand new Canon 10-22mm f/3.5-4.5 rolling away across the linoleum floor!!! :-( Of course it couldn't be one of my cheap lenses...
No time to check it out, I needed to get back to the rice. The truth -I didn't want to know. I finished up the meal, ate, chatted, then cleaned up after dinner before getting a chance to take a quick peek at it.
I only got a quick glance at it, then put it back in the bag. I was just sickened by it, but I went back to our guests to talk a bit before bringing out dessert. Of course, all I could think of was that lens... Ed bought it for me for Xmas and I've been so excited to put it to use! So far I haven't done much with it since it's been so cold, but we're planning a trip to Arizona (Lake Powell, Sedona, maybe the Grand Canyon, and I was SO happy I'd have this lens for that trip! ...My next widest lens is a 28mm which, on my 30D, because of the crop factor, is actually something like a 42mm lens. In other words, not wide at all. I complained about this all last summer, and after finally getting my 10-20mm lens ...this happens.
When our guests left for the night, I contemplated not telling Ed about what happened. I looked up how much it'd cost to replace, etc while cleaning up the kitchen. In the middle of doing dishes and beating myself up about it, a thought occurred to me. There was a UV filter on the lens wasn't there? Could I have been lucky enough to have dropped this lens 4 feet onto a linoleum floor and have it survive? I tried to keep my excitement at bay as the thought occurred to me. Surely it was wishful thinking, but I went to go see it once more anyway ...now that I had some time to get a better look at it.
...I was right, it had a UV filter and I got lucky -just the filter was cracked. I gingerly removed the filter, blew the glass particles off the lens, and mounted it to my camera. I tested the manual focus and it was fine, Autofocus worked as well. Upon close inspection I see absolutely no damage resulting from the fall. Luck? Good construction from Canon? I don't know, but that was a bit more excitement than I needed.
Monday, May 7, 2007
Studio Photography On The Cheap
(Click on the photo to see a better version of it. Blogger is re-sizing it poorly, so it looks a little funky here...)
It's cold outside, so lately my creative juices have been flowing towards studio photography. Truth is, I have a real interest in it and I'm looking to start building a portfolio incase I get a chance to do some photos professionally.
So, this means I need practice (and hopefully some good photos). For "proper" studio photography, most people purchase light tents and photography lighting in order to get that soft light that eliminates harsh reflections as well as harsh shadows. -I'll probably buy the proper equipment eventually, but I wanted to demonstrate how I get studio shots without any investment in special equipment.
For those who are not interested in studio photography, note that the goals in studio work are the same as for portraits. It's just that for portraits, the subject's a bit bigger...
So, here's a walkthrough of a successful (in my opinion) studio shot McGyver-style.
Equipment and supplies that I used:
* Camera
* Tripod
* Shutter release cable (a self-timer works if you don't have one)
* 2 pieces of copy paper
* A white plastic garbage bag
* A 5-foot piece of wire, bent
* A paper towel
* A drinking glass and empty boxes for propping stuff up.
* A bright lamp (a halogen desk lamp is perfect)
* At least one other lamp (another desk lamp, a clamp light, or a floor lamp -whatever you have around)
I set up under a halogen spot-light that's in the ceiling above my kitchen counter. (I've also set up in the bathroom successfully -under the lights above my sink.)
I propped the copy paper up against the drinking glass so it was sitting at a 90* angle. This created the white below the bottle and pills in the picture as well as the white in the background without creating a "seam" between the two. (This works well with white poster board as well when you're shooting larger items.)
I then set the bottle on the paper, and arranged the pills around it in a non-centered way so the overall shape of the subject was more interesting -it also gave the pills a more hap-hazard look I think.
Next I needed something to filter the light through to spread it around. This is what the walls of a light tent do, so I looked around for something that'd work similar to that. What I ended up doing is taking a white plastic trash bag and some wire to make a frame to keep it flat. You could just as easily tape the corners of the bag to 4 boxes or something to keep it flat. It doesn't have to be perfect, and you don't need to cut the bag either -double-thickness (at least for the brand I'm using -regular Hefty bags) seems to work just fine. (Of course, if your light is significantly brighter or more dim, this may not be the case.
I propped my trash bag light filter up so it's middle would be over the bottle and under my halogen desk lamp. -I then turned the lamp on and checked how the lighting looked from the perspective I'd be shooting it from.
I ended up with a lot of glare on the label because it's glossy and I also had 2 bright spots on the bottle. This meant that the light was too bright. I placed a paper towel on top of the trash bag and moved it around until the highlights and hot-spots were gone.
The next thing I noticed was that, while my "trash bag light filter" made the shadows fuzzier, the shadows were still more noticeable than I liked. I grabbed a fairly dim floor lamp and propped it at a 45* angle against a chair, and aimed it directly at the bottle (from the front so that it eliminated the shadows in the front where they'd be visible in the photo).
I checked the view through my camera once again and found that this created more hot-spots, so I lowered the floor lamp until it's harshest light was below my subject, leaving it's softer (more diffused light) to fall on my subject and eliminate much of the shadows that I had a problem with earlier.
At this point, the setup was done. I was happy with how the scene looked, and the next thing to think about was exposure. -I had a fairly dark subject on a very light background which is always tricky. I knew the camera's light meter would see all that white and would try to tone it down, which would my my photo darker than it should be. -On top of that, my goal was to over-expose the background so it ended up looking all white! (but not so much that it over-exposed the white label on the bottle.) I decided I'd start with exposing the scene 1 stop above normal or at +1.
Next, I had to decide what setting to use on the camera. For studio shots I tend to go with Aperture Priority so that I can control the depth of field without worrying about the shutter speed because it really doesn't matter much in still-life photos like this one. Generally, an aperture of f/8 to f/16 is the sharpest part of any lens, so I try to keep within that range if I can. -I wanted a fairly shallow depth of field, though, so I decided to try f/8 to start with.
Last, I turned on mirror lockup. -Not all cameras have this option, but if yours does (on my Canon 30D it's Custom Function 12, for other makes and models, check your manual). Mirror lockup can help you get sharper photos when you're using slow shutter speeds and here's how it works: When you take a photo what happens is the mirror that allows you to see the image through the viewfinder flips out of the way so that the image can get through to your film or sensor. When the mirror flips up it causes the camera to vibrate ever so slightly. Mirror lockup creates a delay between when you click the shutter the first time (and the mirror flips up), then you wait and click the shutter a 2nd time to take the picture (after those micro-vibrations have probably stopped). You can get sharp photos either way, so if your camera doesn't have mirror lockup, don't worry about it; but if you do, I think it's worth playing with.
At this point I was ready to take my first shot. From start to finish I arranged the photo 2 different ways and I took about 25 shots total. -I had to play with the exposure compensation and aperture just a little bit each time before I got it to come out how I wanted.
After I was pretty sure I got a "keeper", I connected the camera to my computer, downloaded the photos, and opened it in Gimp. I used the "Levels" tool (Auto) to fix the white balance (I compensated for the warmth of the incandescent lights in the camera, but not quite enough.). After that, I used curves to just slightly adjust the darkest and lightest portions of the photo. Then, I cloned out the dust that was on the bottle. (I'm a dork -I missed the most important part of studio photography -preparing your subject to be photographed!) When I was done cloning, I applied a slight Unsharp Mask, cropped the photo to a square, and saved it.
I'm pretty happy with it as it stands right now except that I think as a result of editing it on my laptop screen, it appears that it looks a little washed out on my work monitor. I may have to go back and fix that...
Subscribe to:
Posts (Atom)