Tuesday, August 20, 2013

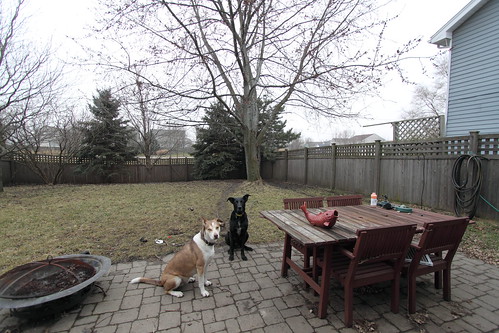
Do the photos of your black pet tend to look like this? Here are 3 tips to improve your photos:


Those of us lucky enough to live with black or dark-colored pets know that, for all our luck in having pets who's hair goes just fine with our formal wear, it is quite difficult to get good photos of them!  But if you keep a few short tips in mind you can get pictures to be proud of no matter what type of camera you are using.  (All photos in this post were taken with my Android phone, a Galaxy Nexus, and no photo editing was done.)

Photography is all about light and light is particularly important when taking pictures of a black pet, so let's break this down by light:

1.  Heavy clouds or shade:

Your photos of your pet may come out dull in the shade, but it is your best bet if your background must be light-colored.

2. Overcast but bright:

This is your best light.  It will allow your pet's fur to shine without the shadowed areas being completely black or the highlights being too bright.  A neutral (not too light, not too dark) background is best, but this light can be pretty forgiving. 
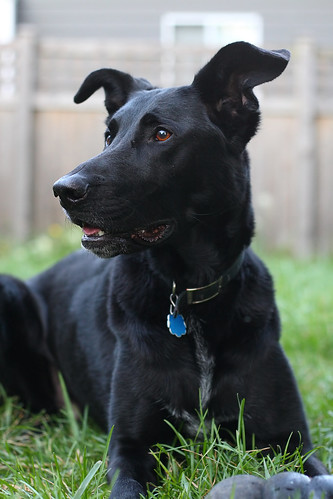
My dog, 42
(This photo was not taken with my phone, it will be replaced as soon as we have an overcast day so I can take a sample photo with my Galaxy Nexus.)

3. Bright sunlight:

This light isn't the most flattering and is most often what leaves your dog looking all black and featureless like the first photo in this post.  In bright light you need a darker background to try to tone the light down.  Fill flash may help you get more features in the shadows although it was not used in the sample photo below.  If no darker background is available, try zooming in as close as you can to balance the lighter background by filling more of the photo with your black or dark-colored pet.

Are you unsure if it is bright, cloudy, or overcast but bright outside?  Look at your pet's shadow to find out: 
  • No shadow = cloudy/shade
  • Well defined shadow = bright/sunny
  • Fuzzy shadow = overcast but bright

What about indoor cats, rabbits, or other dark-colored animals?  Try catching them in sunlight coming in from a window and all of the above still applies. If you must use indoor lighting treat it like shade -use a darker background.

Friday, February 3, 2012

Focal length examples

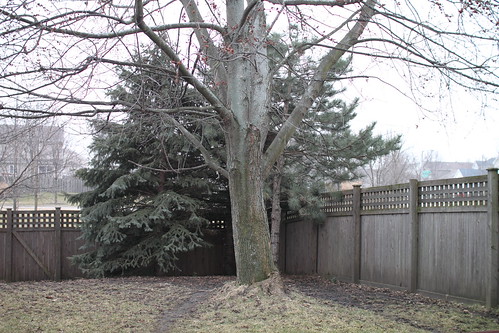
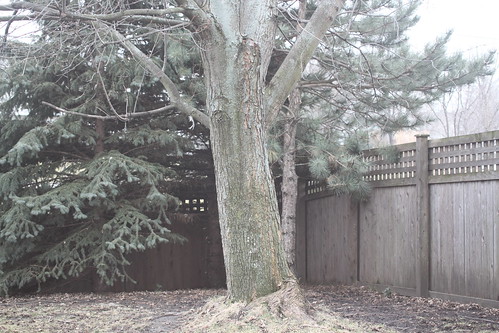
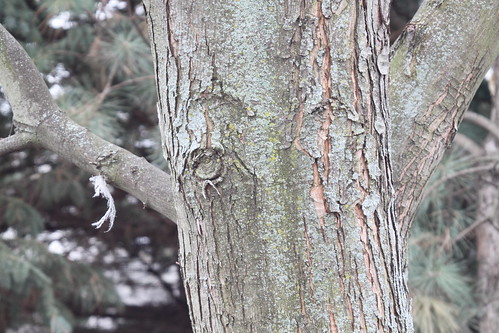
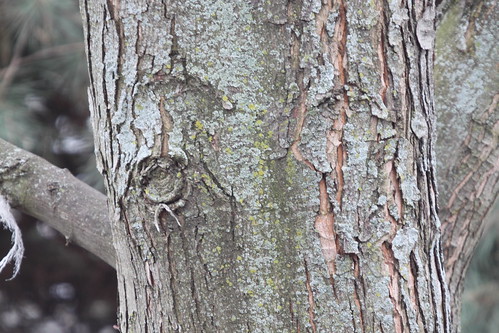
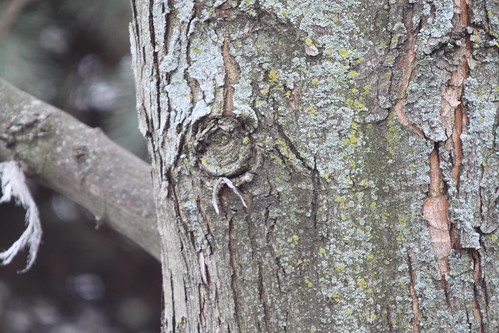
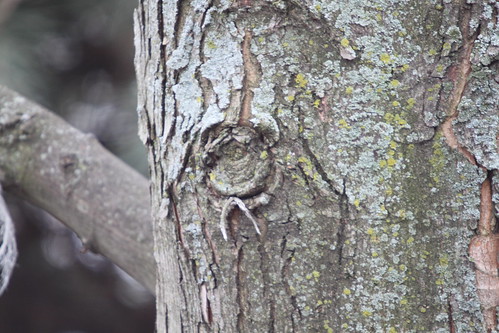
Someone was looking to see what various focal lengths actually look like and I thought it was a great question because, while seasoned photographers have the numbers ingrained in their brains, we shouldn't forget that they are abstract to people new to photography.  So what does 10mm, 20mm, 30mm and even 500mm really look like?  Just look at the examples below!

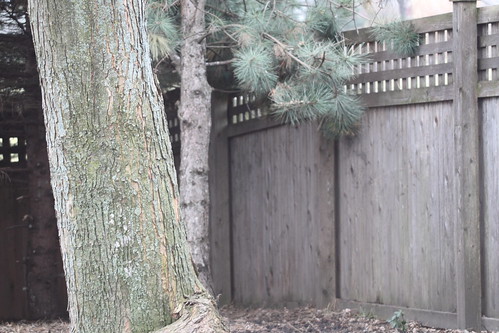
Keep in mind that the distance from the camera to the tree is 10 meters (about 30 feet) and the knot on the tree that you can see towards the end of the series is 6cm (2.5 inches) across.

Also, these example photos were taken with a cropped sensor camera.  Most of the mid to entry-level DSLR's have cropped sensors in them.  Full frame cameras are usually found in the pro line of whatever brand you use and using one of those would produce slightly "wider" or "less telephoto" images than the examples below.  But assuming you have the type of camera that most people have the examples below should be very close to what you'd see.


10mm:
Focal length example: 10mm

20mm:
Focal length example: 20mm

30mm:
Focal length example: 30mm

50mm:
Focal length example: 50mm

100mm:
Focal length example: 100mm

200mm:
Focal length example: 200mm

300mm:
Focal length example: 300mm

400mm:
Focal length example: 400mm

500mm:
Focal length example: 500mm

Thursday, February 2, 2012

Stacking photos for star trails.

Stacking photos allows you to use several photos to create an effect that you may not be able to produce with one shot alone.  In the case of star trails it allows you to create longer star trails than you may otherwise be able to achieve.  You can even go long enough to get circular star trails!

Since we'll be working with a fictional photo to make the idea more clear, you may want to check out some examples of the types of images we're talking about producing from our multiple shots:  Click here for link.

So, let's get to the how-to.  The idea is to take several shots of the sky with short star trails and then combine them together to get the longer trails that you want in your final image.  The illustration below should help you visualize what we'll be doing:

So, assuming you have the above 3 photos and you want to stack them to produce longer, circular, star trails, here's how you'd do it in Gimp.
  • Open all 3 photos as layers in Gimp.  (If you are not accustomed to working with layers in Gimp, please click on the menu on this blog and read up on how to use layers under "Image Editing".)
  • Open the "Layers" menu if it does not open automatically.  (It's in the "Windows" menu under "Dockable Dialogues" and then "Layers").
  • Click on the image above the "Background" layer in your layers dialog box.
  • At the top of the "Layers" box, click the down arrow to select the layer "Mode".
  • Choose "Lighten only".
  • Do the same for all the other layers except the "Background" layer. 
  • That's it!
The "Lighten only" mode allows only lighter things to show through the layers.  This is perfect for star trail photos since the star trails are lighter than the sky that's covering them in the other photos.

Tuesday, January 10, 2012

Carrying a camera at all times

Many photographers carry a camera with them everywhere they go so that, whenever a photo opportunity presents itself, it can be captured.  For beginning photographers this is good advice.  Beginners can get plenty of practice at trying new angles and perspectives to learn to compose a shot well, or even just learn what makes an interesting image..  But as you become a better photographer you start seeing less and less “keepers” coming from these happened upon photo opportunities.

The reason the good photos fall off as your photography gets better is that there comes a time when you've made all the big leaps in learning how to improve your photography from the camera side and you start finding that something called "quality of light" is what makes others’ photos better than the ones you’ve been taking.

 
Quality of light is what makes landscape photographers get up before sunrise to catch the warm light of sunrise on a hillside, tree, or rocky cliff.  It makes macro photographers hope for an overcast day, and makes architectural photographers get ready just before dusk to capture that magically blue sky balanced perfectly with a building's inside or outdoor lighting.  In short, it’s the exact opposite of happening across a shot.  A lot of planning and forethought go into capturing photos with the best possible (natural) lighting.  

 
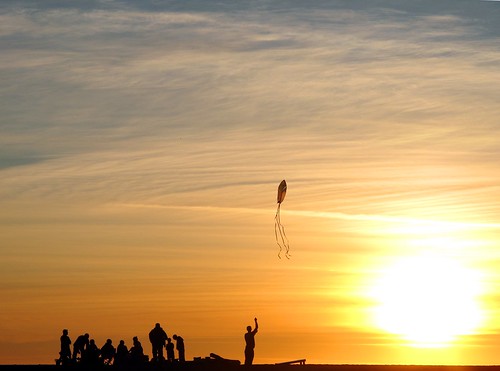
When this realization is made it's easy to decide that photography is work and that simply carrying a camera around and keeping an eye out for photo ops won't yield any significant successes.  In fact, that's what this blog post was going to be about.  The fact that good photography takes work and planning.  But I didn't finish the post, so I left it in draft form to finish later.  Then on Saturday I ended up proving my post wrong when i came across the scene below and was happy I had my camera with me so I could capture it:


Beach Sunset
 

So, I'll leave the question of whether or not to carry a camera at all times to the reader while noting that you can increase your chances of getting good shots by paying attention to the quality of light and shooting accordingly.  If you see a sunset, it's instinct to shoot it, but make sure you turn around too and see if the warm light isn't putting your best shots behind you.  Make the best of an overcast day by focusing on macros, and use the twilight hour to concentrate on architectural photo opportunities.

Saturday, December 17, 2011

Tuesday, September 13, 2011

Getting everything in-focus in an image.

Let's start by defining two terms:
-Shallow depth of field:  when only a small portion of the photo is in focus and everything in front of or behind the focus point is blurred.  Example:  http://www.flickr.com/photos/erica_marshall/852785112/in/set-72157625599893745
-Deep depth of field:  when a lot (or all of) the photo is in-focus and nothing is blurred due to being in front of or behind the focus point.

Two things work together to determine your depth of field:  where you focus, and your aperture.
-Low-numbered (aka "large" or f/4 rather than f/16) apertures give you a more shallow depth of field.
-High-numbered (aka "small" or f/16 rather than f/4) apertures give you a deeper depth of field.

But, the distance from the camera to where you focus also matters. 
-The closer to the camera that you focus, the shallower the depth of field at a given aperture.
-The farther away from the camera that you focus, the deeper the depth of field at a given aperture.

So, to get an infinity focus (or close to it) you need to focus far from the camera and use a high-numbered aperture.  If you aren't using Manual modes yet, then choosing the "Landscape" Auto mode on your camera (icon usually looks like mountains) and a distant focus point will get you similar results.

The sweet spot seems to be about a third of the way into the distance in your image -if you focus there (in a landscape) you should get about infinity focus.  But please note that macros and studio shots are different since the focus point is so much closer to the camera, it is often impossible to get infinity focus without taking several pictures with different areas in focus and then stacking them in software after the fact.

Wednesday, June 8, 2011

Black and white conversion

The easiest way to convert a photo to black and white is to choose the menu item or button in your imaging software that just converts it for you. In Gimp 2.6.3 you find this under the "Colors" menu and it's called "Desaturate". But like many other things in photography, the easy way isn't always the best way to go about things.

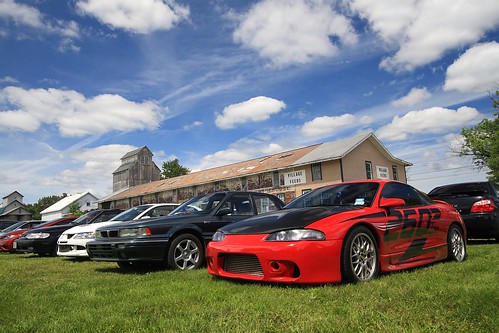
I'm going to use this photo as an example for two different ways to do black and white conversions. I use Gimp, but these different techniques will work in Photoshop and many other programs as well. Here's the photo we'll be working with for this article

Car Show

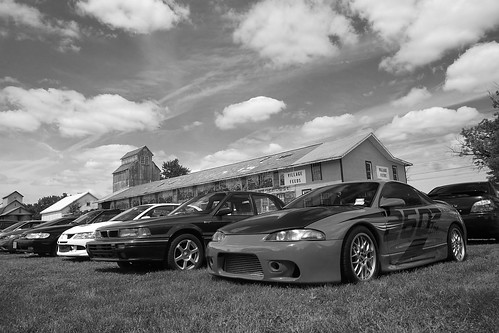
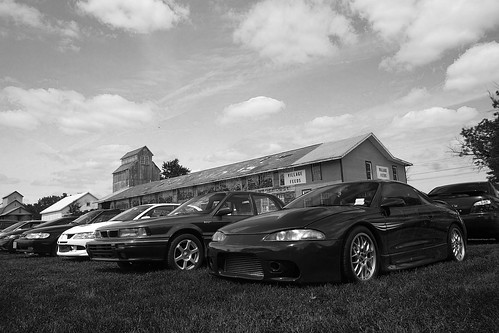
First, I'll show you what you get when you just "Desaturate" or do an auto color to black and white conversion

Example D

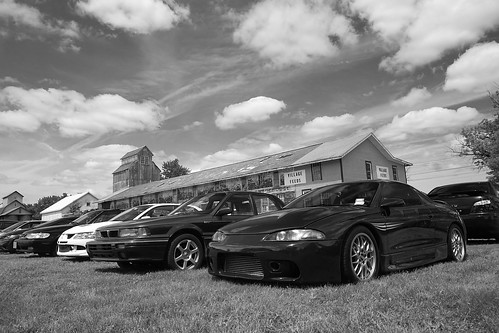
This isn't a bad black and white conversion, but the car ends up being a shade of gray that's very close to that of the grass, so it doesn't stand out well. The barn is a lighter shade too that blends in with the sky rather than standing out. So, let's talk about how Channels can help us get a better result.

Back in the day black and white photographers would carry filters with them that were red, green, or blue to adjust what colors would appear darker or lighter. Channels works in much the same way. This requires a little thought at first, but with some practice it becomes second nature. (And it's always fine to just play with the Channel controls until you like the way it looks too.)

If you put a red filter on the camera it blocks red from being recorded on the black and white film. This means that red blotchy skin is much less noticeable when a red filter is used. A red filter also darkens the color blue, so if you are shooting landscapes and you want a dramatic dark sky you can use a red filter as well. Let's make a table of the filters' effects to make this easier to use as a reference:

Red:
-makes red lighter
-makes blue darker

Blue:
-makes blue lighter
-makes green darker

Green:
-makes green lighter
-makes red darker

So, how does this relate to Channels? Channels adjust the amount of red, green, and blue used in the photo. This means that, effectively, Channels work like a filter does in black and white film photography. In fact, in Gimp (and I assume in Photoshop and other software), Channels will also convert to black and white at the same time that you adjust the amount of red, green, or blue. In Gimp this is done via a "convert to monochrome" checkbox. (The Channels tool in Gimp is under the "Colors" menu, then "Components", then "Channel Mixer".)

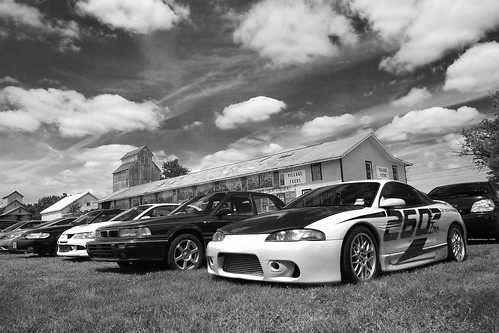
On to examples! Here is the photo using 100% red (the equivalent of using a red filter in black and white photography):

Example R

I like this result a lot! But, just to make sure this is the best one let's check out 100% green:

Example G

Check out the difference in the color of the car between these two photos! Pretty impressive, huh? Now let's see what 100% blue looks like:

Example B

See the difference in the look of the grass in this one? I think red's my pick for this photo. But, unlike the days of film where you'd have one of the 3 filters to choose from, nowadays you have more flexibility than you may even want! You can choose 75% red, 25% green or 80%-20%-20% or any combination you think looks the best. So, give it a try and gain a lot more control over the outcome of your color to black and white conversions!