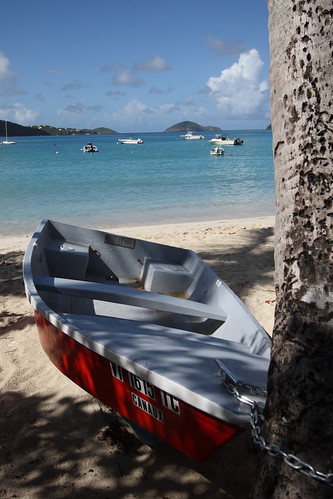
I knew from experience that while the scene was pleasing to my eye it wouldn't be captured in a photo as nicely. This is because the "dynamic range" (or the range of light vs dark) that the eye can see is a lot bigger than the range that the camera can record. The result would be either the areas in full sun being exposed properly or the areas in shadow being exposed properly, but having both areas look right would be impossible. So, I made sure my camera was set to take photos in RAW and I took a kindof middle-of-the-road photo making sure the histogram showed no data loss on the light or dark ends and here's the result without any editing:
Then, when I got home, I opened the photo in my RAW editor of choice (Canon's Digital Photo Pro or "DPP") and I used the brightness tool to make a copy of the photo that was 2 stops brighter than the original, then another that was 1 stop brighter, then another that was exposed normally, then 1 stop darker, and the final one at 2 stops darker.
The above is the "fake" part of "fake HDR" photos. For real HDR photos, you'd take separate shots at each exposure (+2, +1, 0, -1, and -2 or whatever will cover the dynamic range of the scene you are shooting). But, by shooting in RAW, you can record almost all of that data in one shot so you don't have to worry about the camera moving in-between the shots. I take the time to do 3 to 5 shots when the photo is important and I have a tripod handy, but I find that the "fake HDR" technique works just fine most times. (But I'm a relative HDR newbie, so take my advice there for what it's worth.)
What next? Well, you get some HDR software. I use FDRtools Basic (the free version of FDRtools). There are a lot of different programs available for HDR, so you can google for them to find one that you like. But basically, you feed it your images and the software will spit out a more even-toned version of the photo. You can tweak it if it doesn't automatically come up with what you were looking for. Some prefer a more cartoon-like appearance, others like it to be more subtle, the effect is up to you. But here's my result:
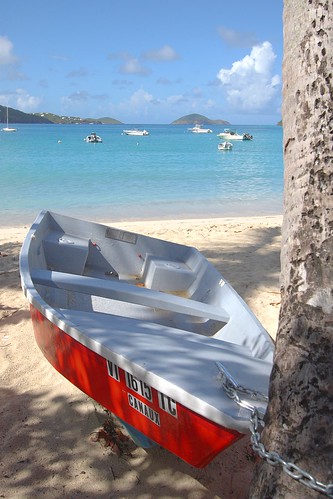
Better, don't you think? This looks a bit more like what we see with our eyes in mid-day conditions. So, while you should listen to the rule of thumb that says you'll get bad results in mid-day sun, now you know there's a work-around for it! Ahh... technology. :-)
2 comments:
Nice job. I was wondering when you said that you make multiple exposures in the RAW editor from a single exposure, what format were you saving each of the resulting pictures in? JPG? TIF? Thanks.
I convert the RAW file to 5 jpg files, each at a different exposure (-2,-1,0, +1, and +2).
Thanks for the question!
Post a Comment