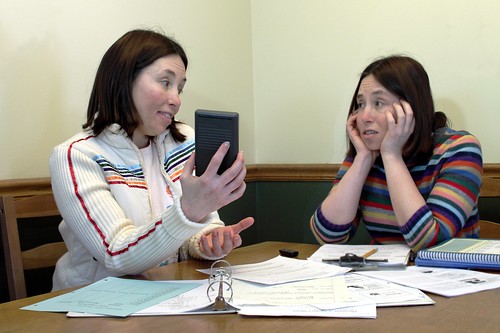
This is a fairly easy project to accomplish. You need a camera with manual mode, a tripod (or somewhere steady to place the camera on), and image editing software like Gimp (which is free).
If you aren't familiar with Manual mode, that's ok. You may need your camera's manual, however, if you don't know how to find out and change your ISO, aperture, and shutter speed.
- First, find your location and set up your camera.
- Put your camera on Aperture Priority mode. For Nikons this is usually marked on your mode dial as "A", for Canons it is "Av". (We'll switch to Manual mode later.)
- Decide on your primary ISO. For indoor photography with average lighting you'll need ISO 800, for brightly lit rooms 400 might be okay. We'll talk about adjusting this again a little later.
- Decide on your aperture. Aperture controls depth of field or how much of your photo will be in focus in the areas in front of and behind your focus. f/8.0 is a safe choice.
- Take a look at the shutter speed that results from your ISO and aperture choice by pressing the shutter button halfway while the camera is pointed at whatever you plan to photograph.
- If your shutter speed is 1/15 or slower you might have issues with motion blur in your photo. To get a faster shutter speed, increase your ISO (go from ISO 400 to 800, for example) and/or choose a lower-numbered aperture (go from f/8 to f/4, for example).
- If you have a shutter speed of 1/30 or higher you'll probably be okay. The closer you are to 1/30, the more careful you'll have to be to keep still while the photo is taken.
- Write down your ISO, shutter speed, and aperture.
- Change to Manual mode and dial in the ISO, shutter speed, and aperture that you wrote down.
- Change to the white balance that makes sense for the environment you are shooting in. If it's indoor (old-style) light bulbs or "warm" CFLs, use "incandescent" or "tungsten". For "cool" or "daylight-balanced" bulbs use "daylight", etc.
- If you have a remote it'll make it easier to get into position and take the photo, but if you do not, then you can use your camera's self timer instead. Experiment and see what works for you.
- Make sure your image is framed how you want it.
- Dial in the focus on where you will be.
- It may help to pre-envision your shot and make mental or actual marks for positions where your first and second photo might interact or in places you want to avoid overlap. These are easy to lose track of and hard to correct later in post.
- Either get yourself in position and take the photo with your remote, or press the shutter button and get into position before the self-timer takes the photo.
- When you think you have a photo that you want to use, go change outfits if you'd like to, and then get into position for the second photo and take that one the same way you did the first one.
- When you have the photos you want to combine, open one of them in Gimp or whatever photo editing software you use.
- Open the second photo as a layer "over" the first. (In Gimp, go to "File" > "Open as Layers").
- Use the Free Select Tool to roughly cut out your image from the image in the top layer (in Gimp you may need to go to "Windows">"Dockable Dialogs">"Layers" to see what layer you are working on).
- Invert your selection to change the selection from your image to everything else but you in the image on the top layer. (In Gimp, click on the "Select" menu and click "Invert".)
- Press the "Delete" key on your keyboard to delete everything but you in the image on the top layer.
- It should magically appear as if there were two of you in the photo at this point. If it looks good, flatten the image (in Gimp, go to the "Image">"Flatten").
- Make any other adjustments you'd like to the image and save as usual. Note that if you don't flatten the image before saving you may get an error or it may just not work. Images with multiple layers cannot usually be saved as a .jpg file.
No comments:
Post a Comment