So, let's open this photo in Gimp: (feel free to download it to follow along)
http://www.flickr.com/photos/15059459@N02/3269890274/
Then, open the Curves tool:
(click on image to view it larger)
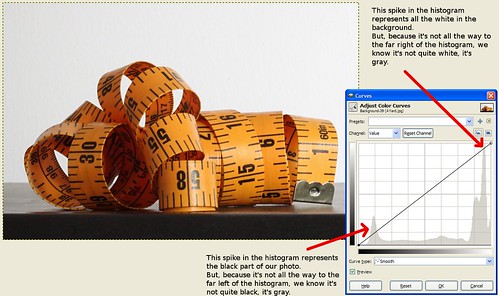
In the background of the Curves tool you can see the image's histogram. For this image, I wanted the white background to be pure white, meaning I wanted it intentionally over-exposed so it lost it's detail. That means, I expected the white spike on the right side of the graph to spill off the right side of the graph instead of being so far into the graph on that side.
I can also see that the spike on the left representing the black parts of the photo is too far in as well.
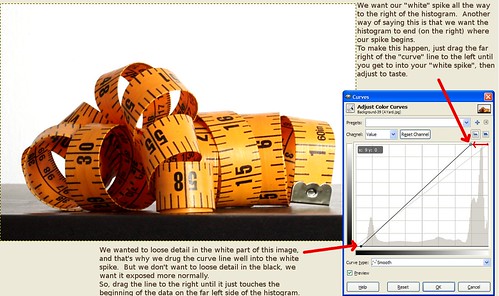
To fix the white, click on the far right hand part of the curves line and drag it to the left until it's in the middle of the "white spike". Essentially what you're doing here is making the histogram end in the middle of that white spike. In this case, to get the far left side of the photo to become pure white you actually need to drag the curve line past the middle of the spike as shown in the final screenshot below.
For the black, we're not aiming to loose the detail like we wanted to do with the white, so we're just going to drag the curve line on that side to the right until it touches the point where the data just begins on the left side of the histogram.
The result should look like this:
...now the white is pure white instead of gray and the black part at the bottom doesn't look so washed out.
1 comment:
This is cool!
Post a Comment