Tuesday, August 20, 2013

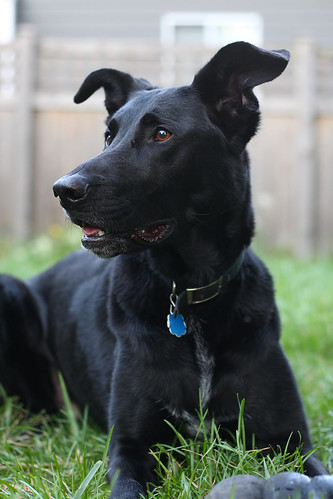
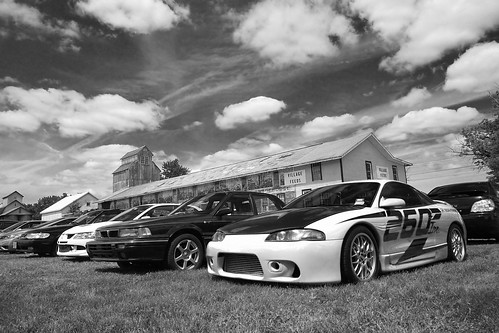
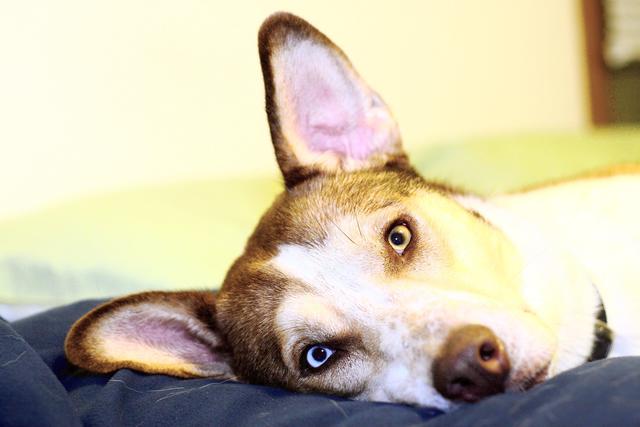
Do the photos of your black pet tend to look like this? Here are 3 tips to improve your photos:


Those of us lucky enough to live with black or dark-colored pets know that, for all our luck in having pets who's hair goes just fine with our formal wear, it is quite difficult to get good photos of them!  But if you keep a few short tips in mind you can get pictures to be proud of no matter what type of camera you are using.  (All photos in this post were taken with my Android phone, a Galaxy Nexus, and no photo editing was done.)

Photography is all about light and light is particularly important when taking pictures of a black pet, so let's break this down by light:

1.  Heavy clouds or shade:

Your photos of your pet may come out dull in the shade, but it is your best bet if your background must be light-colored.

2. Overcast but bright:

This is your best light.  It will allow your pet's fur to shine without the shadowed areas being completely black or the highlights being too bright.  A neutral (not too light, not too dark) background is best, but this light can be pretty forgiving. 

My dog, 42
(This photo was not taken with my phone, it will be replaced as soon as we have an overcast day so I can take a sample photo with my Galaxy Nexus.)

3. Bright sunlight:

This light isn't the most flattering and is most often what leaves your dog looking all black and featureless like the first photo in this post.  In bright light you need a darker background to try to tone the light down.  Fill flash may help you get more features in the shadows although it was not used in the sample photo below.  If no darker background is available, try zooming in as close as you can to balance the lighter background by filling more of the photo with your black or dark-colored pet.

Are you unsure if it is bright, cloudy, or overcast but bright outside?  Look at your pet's shadow to find out: 
  • No shadow = cloudy/shade
  • Well defined shadow = bright/sunny
  • Fuzzy shadow = overcast but bright

What about indoor cats, rabbits, or other dark-colored animals?  Try catching them in sunlight coming in from a window and all of the above still applies. If you must use indoor lighting treat it like shade -use a darker background.

Friday, February 3, 2012

Focal length examples

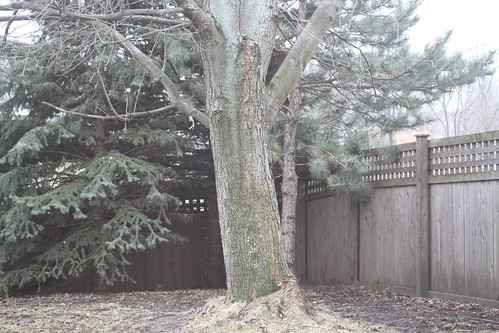
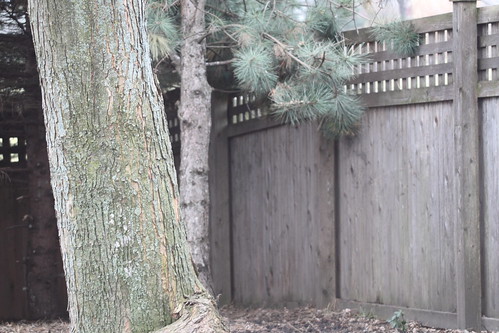
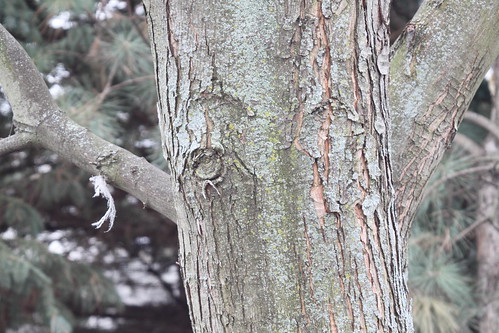
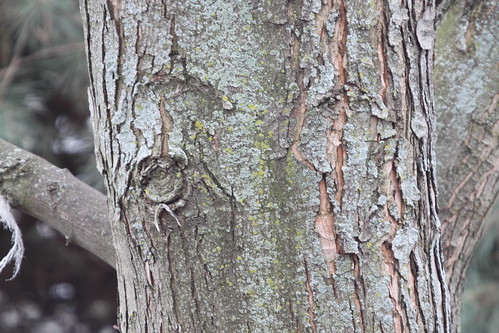
Someone was looking to see what various focal lengths actually look like and I thought it was a great question because, while seasoned photographers have the numbers ingrained in their brains, we shouldn't forget that they are abstract to people new to photography.  So what does 10mm, 20mm, 30mm and even 500mm really look like?  Just look at the examples below!

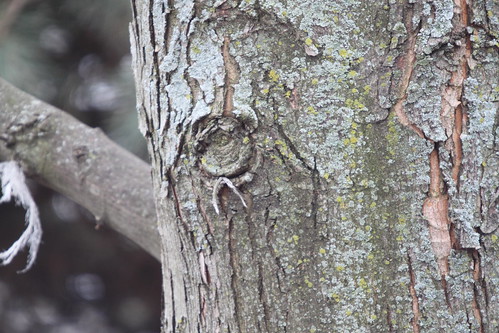
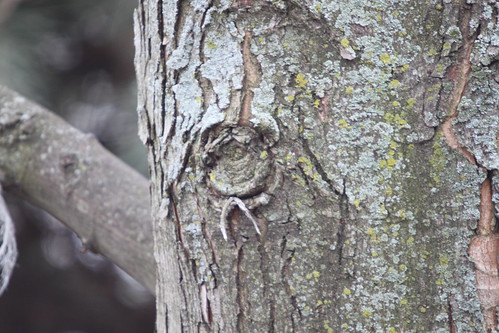
Keep in mind that the distance from the camera to the tree is 10 meters (about 30 feet) and the knot on the tree that you can see towards the end of the series is 6cm (2.5 inches) across.

Also, these example photos were taken with a cropped sensor camera.  Most of the mid to entry-level DSLR's have cropped sensors in them.  Full frame cameras are usually found in the pro line of whatever brand you use and using one of those would produce slightly "wider" or "less telephoto" images than the examples below.  But assuming you have the type of camera that most people have the examples below should be very close to what you'd see.


10mm:
Focal length example: 10mm

20mm:
Focal length example: 20mm

30mm:
Focal length example: 30mm

50mm:
Focal length example: 50mm

100mm:
Focal length example: 100mm

200mm:
Focal length example: 200mm

300mm:
Focal length example: 300mm

400mm:
Focal length example: 400mm

500mm:
Focal length example: 500mm

Thursday, February 2, 2012

Stacking photos for star trails.

Stacking photos allows you to use several photos to create an effect that you may not be able to produce with one shot alone.  In the case of star trails it allows you to create longer star trails than you may otherwise be able to achieve.  You can even go long enough to get circular star trails!

Since we'll be working with a fictional photo to make the idea more clear, you may want to check out some examples of the types of images we're talking about producing from our multiple shots:  Click here for link.

So, let's get to the how-to.  The idea is to take several shots of the sky with short star trails and then combine them together to get the longer trails that you want in your final image.  The illustration below should help you visualize what we'll be doing:

So, assuming you have the above 3 photos and you want to stack them to produce longer, circular, star trails, here's how you'd do it in Gimp.
  • Open all 3 photos as layers in Gimp.  (If you are not accustomed to working with layers in Gimp, please click on the menu on this blog and read up on how to use layers under "Image Editing".)
  • Open the "Layers" menu if it does not open automatically.  (It's in the "Windows" menu under "Dockable Dialogues" and then "Layers").
  • Click on the image above the "Background" layer in your layers dialog box.
  • At the top of the "Layers" box, click the down arrow to select the layer "Mode".
  • Choose "Lighten only".
  • Do the same for all the other layers except the "Background" layer. 
  • That's it!
The "Lighten only" mode allows only lighter things to show through the layers.  This is perfect for star trail photos since the star trails are lighter than the sky that's covering them in the other photos.

Tuesday, January 10, 2012

Carrying a camera at all times

Many photographers carry a camera with them everywhere they go so that, whenever a photo opportunity presents itself, it can be captured.  For beginning photographers this is good advice.  Beginners can get plenty of practice at trying new angles and perspectives to learn to compose a shot well, or even just learn what makes an interesting image..  But as you become a better photographer you start seeing less and less “keepers” coming from these happened upon photo opportunities.

The reason the good photos fall off as your photography gets better is that there comes a time when you've made all the big leaps in learning how to improve your photography from the camera side and you start finding that something called "quality of light" is what makes others’ photos better than the ones you’ve been taking.

 
Quality of light is what makes landscape photographers get up before sunrise to catch the warm light of sunrise on a hillside, tree, or rocky cliff.  It makes macro photographers hope for an overcast day, and makes architectural photographers get ready just before dusk to capture that magically blue sky balanced perfectly with a building's inside or outdoor lighting.  In short, it’s the exact opposite of happening across a shot.  A lot of planning and forethought go into capturing photos with the best possible (natural) lighting.  

 
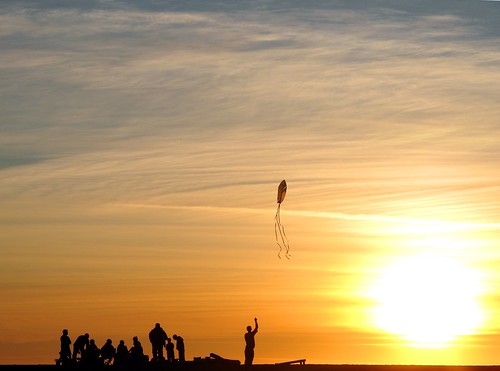
When this realization is made it's easy to decide that photography is work and that simply carrying a camera around and keeping an eye out for photo ops won't yield any significant successes.  In fact, that's what this blog post was going to be about.  The fact that good photography takes work and planning.  But I didn't finish the post, so I left it in draft form to finish later.  Then on Saturday I ended up proving my post wrong when i came across the scene below and was happy I had my camera with me so I could capture it:


Beach Sunset
 

So, I'll leave the question of whether or not to carry a camera at all times to the reader while noting that you can increase your chances of getting good shots by paying attention to the quality of light and shooting accordingly.  If you see a sunset, it's instinct to shoot it, but make sure you turn around too and see if the warm light isn't putting your best shots behind you.  Make the best of an overcast day by focusing on macros, and use the twilight hour to concentrate on architectural photo opportunities.

Saturday, December 17, 2011

Tuesday, September 13, 2011

Getting everything in-focus in an image.

Let's start by defining two terms:
-Shallow depth of field:  when only a small portion of the photo is in focus and everything in front of or behind the focus point is blurred.  Example:  http://www.flickr.com/photos/erica_marshall/852785112/in/set-72157625599893745
-Deep depth of field:  when a lot (or all of) the photo is in-focus and nothing is blurred due to being in front of or behind the focus point.

Two things work together to determine your depth of field:  where you focus, and your aperture.
-Low-numbered (aka "large" or f/4 rather than f/16) apertures give you a more shallow depth of field.
-High-numbered (aka "small" or f/16 rather than f/4) apertures give you a deeper depth of field.

But, the distance from the camera to where you focus also matters. 
-The closer to the camera that you focus, the shallower the depth of field at a given aperture.
-The farther away from the camera that you focus, the deeper the depth of field at a given aperture.

So, to get an infinity focus (or close to it) you need to focus far from the camera and use a high-numbered aperture.  If you aren't using Manual modes yet, then choosing the "Landscape" Auto mode on your camera (icon usually looks like mountains) and a distant focus point will get you similar results.

The sweet spot seems to be about a third of the way into the distance in your image -if you focus there (in a landscape) you should get about infinity focus.  But please note that macros and studio shots are different since the focus point is so much closer to the camera, it is often impossible to get infinity focus without taking several pictures with different areas in focus and then stacking them in software after the fact.

Wednesday, June 8, 2011

Black and white conversion

The easiest way to convert a photo to black and white is to choose the menu item or button in your imaging software that just converts it for you. In Gimp 2.6.3 you find this under the "Colors" menu and it's called "Desaturate". But like many other things in photography, the easy way isn't always the best way to go about things.

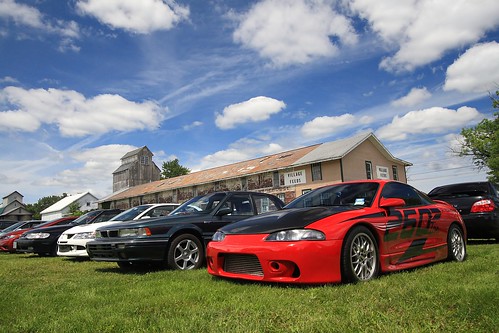
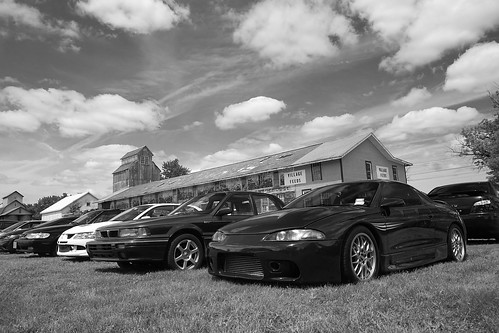
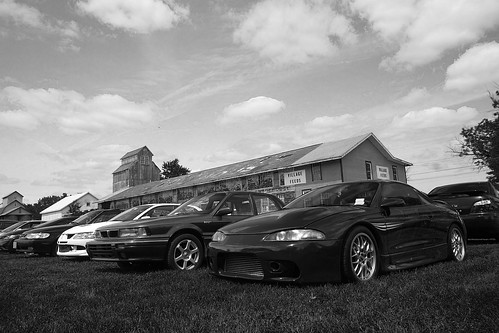
I'm going to use this photo as an example for two different ways to do black and white conversions. I use Gimp, but these different techniques will work in Photoshop and many other programs as well. Here's the photo we'll be working with for this article

Car Show

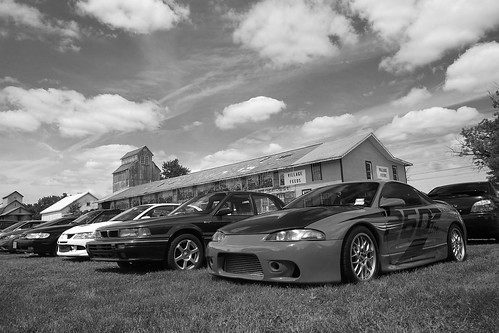
First, I'll show you what you get when you just "Desaturate" or do an auto color to black and white conversion

Example D

This isn't a bad black and white conversion, but the car ends up being a shade of gray that's very close to that of the grass, so it doesn't stand out well. The barn is a lighter shade too that blends in with the sky rather than standing out. So, let's talk about how Channels can help us get a better result.

Back in the day black and white photographers would carry filters with them that were red, green, or blue to adjust what colors would appear darker or lighter. Channels works in much the same way. This requires a little thought at first, but with some practice it becomes second nature. (And it's always fine to just play with the Channel controls until you like the way it looks too.)

If you put a red filter on the camera it blocks red from being recorded on the black and white film. This means that red blotchy skin is much less noticeable when a red filter is used. A red filter also darkens the color blue, so if you are shooting landscapes and you want a dramatic dark sky you can use a red filter as well. Let's make a table of the filters' effects to make this easier to use as a reference:

Red:
-makes red lighter
-makes blue darker

Blue:
-makes blue lighter
-makes green darker

Green:
-makes green lighter
-makes red darker

So, how does this relate to Channels? Channels adjust the amount of red, green, and blue used in the photo. This means that, effectively, Channels work like a filter does in black and white film photography. In fact, in Gimp (and I assume in Photoshop and other software), Channels will also convert to black and white at the same time that you adjust the amount of red, green, or blue. In Gimp this is done via a "convert to monochrome" checkbox. (The Channels tool in Gimp is under the "Colors" menu, then "Components", then "Channel Mixer".)

On to examples! Here is the photo using 100% red (the equivalent of using a red filter in black and white photography):

Example R

I like this result a lot! But, just to make sure this is the best one let's check out 100% green:

Example G

Check out the difference in the color of the car between these two photos! Pretty impressive, huh? Now let's see what 100% blue looks like:

Example B

See the difference in the look of the grass in this one? I think red's my pick for this photo. But, unlike the days of film where you'd have one of the 3 filters to choose from, nowadays you have more flexibility than you may even want! You can choose 75% red, 25% green or 80%-20%-20% or any combination you think looks the best. So, give it a try and gain a lot more control over the outcome of your color to black and white conversions!

Monday, February 14, 2011

New quicklinks!

For those who subscribe to this blog, I apologize for the last few posts tonight, but they are part of a huge improvement for navigating the articles here on the Muddyboots Photography Blog!

For the last 6 months or so it's become more and more obvious that finding the information you want on this blog can be frustrating at times, but I think I made great strides tonight with my "Quicklinks"!

Now you can simply click on your topic of interest on the top right side of this blog (under the donate button -hint, hint!) and get all the articles on that subject right away. No sifting through labels or tags required. It should be quick and easy!

So, check them out, let me know what you think, and stay tuned as I fill in some of the gaps of knowledge that I found while compiling these quicklinks. More articles will be coming soon!

Quicklinks for: Flash

Quicklinks for: Photography Equipment

Cameras:

Lenses:
Other equipment:
DIY

Quicklinks for: Image Editing

Many of the following are written for Gimp because it's free, but the steps are the same for Photoshop, PSE, Elements, Paint.NET, and any other image editing software that has layers.
File types:

Quicklinks for: Composition tips

Quicklinks for: SLR and Manual Mode Tutorials

Tutorials on using Manual Mode:

Tutorials on using your SLR more effectively:
How to's for specific photo situations:

Quicklinks for: Point and shoot tutorials

Tutorials on using your camera more effectively:
How to's for specific photo situations:

Saturday, February 5, 2011

Blurry Photos

Whether you have a point and shoot or a big expensive DSLR, everyone has to battle blur in their photos from time to time. So, here's a short discussion on why you get blur, how to avoid it, and then some ideas on how you can use blur to your advantage creatively in case you want to experiment or if you get stuck in a situation where you just have to work with it.

Why you get blur:
Photos are made of light, it's as simple as that. You've seen photos that were too dark -they just didn't have enough light. And photos that were too bright -they had too much light. So, you can imagine that in bright sunlight it's easy to get enough light to make a photograph, but in dim light it's harder to get the same amount of light. The camera has a few different ways to increase the amount of light in your photo, but they are all limited, and eventually all it can do is keep the shutter open longer which effectively just means it takes longer to record your photo. If anything moves while the shutter is open (while the photo is being recorded) it results in blur.

I want to mention too that dim light is sometimes tricky to recognize because our eyes adjust so well to poor lighting conditions, but most indoor light is considered quite dim for photography and even an overcast day can result in blurry photos especially when shooting subjects that move fast like sports or cars or if you are using a telephoto lens or zooming in a lot.

How to avoid blur in dim light:

For Auto Mode:

Tripod:
Like I said above, blur is a result of low light and movement. The movement can come from your subject (the people or items in your photo) or from the camera itself. If items that were not moving are blurred in your photo (tables, goal posts, etc) then at least some of your blur was coming from movement of the camera. This is easily corrected with a tripod. If you don't have a tripod you can set the camera on something steady or use one of these steady shooting techniques.

Use flash:
Usually cameras will automatically use flash to try to increase the amount of light in the photo. This works well when your subject is within about 15 feet of the camera. So, make sure your flash is turned on. If your camera has a mount for an external flash you can look into getting a flash that has a higher light output to get a larger range or the flexibility to bounce the light off the ceiling or use accessories like diffusers to make the light less harsh than what comes out of the flash that comes with your camera.

ISO:
Read your manual or look for a button or menu item that's labelled "ISO". It's possible that you may not be able to change it in "Auto" mode, so if you can't find it in the menu, try changing to "P" or "Program" mode instead (it's an Auto mode with a little more control).

ISO is a setting that controls how sensitive the camera's sensor is to light. When using lower ISO's like ISO 100 and 200 the sensor is less sensitive to light, but more accurate. With higher ISO's like 400, 800, or even 1600 and higher the sensor is more sensitive to light, but less accurate. If you are familiar with film at all, ISO is a lot like film speed.

So, the result of making the sensor more sensitive by setting the ISO higher is that your shutter speed (the amount of time your shutter is open) will be faster. When the shutter opens and closes faster, the chance of blur is less. ...so that's good! But, that "lack of accuracy" I spoke of earlier results in "noise" or a grainy or spotty appearance in your photo, so it's best to choose the lowest ISO possible for your shooting conditions.

Here's a general guide for choosing an ISO:
-ISO 100: bright sunlight (you can see well defined shadows on the ground)
-ISO 200: bright sun, but overcast (strong shadows can be seen, but their edges are fuzzy)
-ISO 400: overcast or bright shade (shadows are difficult to see or absent)
-ISO 800: dark shade or bright indoor light

I recommend grabbing your camera, finding your ISO setting, and taking some test shots at different ISO's to see the noise that results from higher ISO's and to see where that grainy appearance gets too bad for the photos to be considered usable. Every camera's different as far as noise goes, but noise is usually visible at ISO 400-800 and usually quite obvious at 1600 and above.

Try zooming out: Sometimes your camera can use a third setting called "aperture" to get a faster shutter speed. Sometimes the apertures your camera can achieve are limited when you are zoomed in on something. If possible you can try zooming out and getting closer to your subject instead to try to lessen the amount of blur that you are getting.

For Manual Mode:
Tripod: See the above advice on using a tripod or try some of these steady shooting techniques.

Flash: See the above advice on flash.

ISO:
See the above advice on ISO.

Aperture: When blur is an issue I tend to set my camera to aperture priority mode and set it to the lowest-numbered aperture that I can. Lower-numbered apertures (like f/4) allow more light into your camera than higher-numbered apertures (like f/20). Setting your aperture as low as it will go will ensure that you'll be using the fastest shutter speed you possibly can.

The lowest-numbered aperture available is determined by the lens you are using. So, if you need to get higher shutter speeds you may want to look into buying a "faster" lens. Typical lenses go down to about f/4, but "fast" lenses will go down to f/2.8, f/1.8, f/1.4, or even as low as f/1.0! Of course, the "faster" the lens, the more expensive! Canon and Nikon both make 50mm f/1.8 (non-zoom or "prime") lenses for between $100-$150. Because aperture also controls depth of field, these lenses will also give you a really shallow area of focus, so they are also great for portraits and other photography

Using blur creatively:
If you can't beat it, sometimes a little bit of blur can be a good thing...

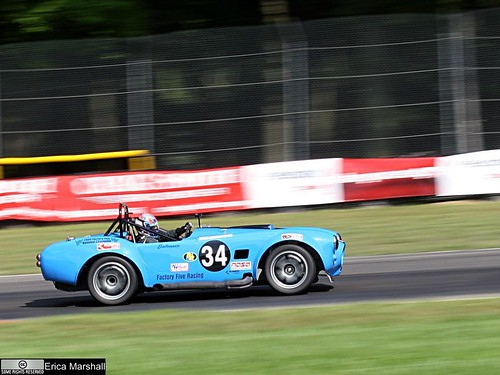
It can show movement:
BlueFactoryFivePan
Here's a how to on this "panning" technique.

Or blur can be used for light painting:
22.  "Light Painting"
Here's a how to on this "light painting" techinique.

Blur can look quite cool when there's traffic!
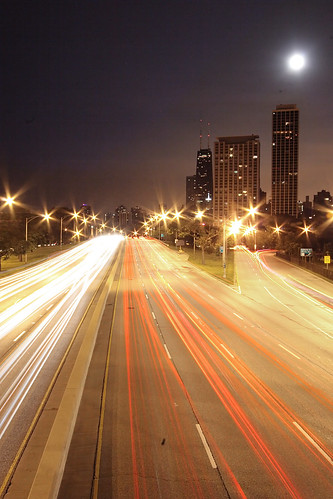
16.  "Cars"

Or can convey motion:
Wanna go for a ride?

Tuesday, January 25, 2011

Creating a twin

Fluid Therapy Math -I just dont get it


This is a fairly easy project to accomplish. You need a camera with manual mode, a tripod (or somewhere steady to place the camera on), and image editing software like Gimp (which is free).

If you aren't familiar with Manual mode, that's ok. You may need your camera's manual, however, if you don't know how to find out and change your ISO, aperture, and shutter speed.

  1. First, find your location and set up your camera.
  2. Put your camera on Aperture Priority mode. For Nikons this is usually marked on your mode dial as "A", for Canons it is "Av". (We'll switch to Manual mode later.)
  3. Decide on your primary ISO. For indoor photography with average lighting you'll need ISO 800, for brightly lit rooms 400 might be okay. We'll talk about adjusting this again a little later.
  4. Decide on your aperture. Aperture controls depth of field or how much of your photo will be in focus in the areas in front of and behind your focus. f/8.0 is a safe choice.
  5. Take a look at the shutter speed that results from your ISO and aperture choice by pressing the shutter button halfway while the camera is pointed at whatever you plan to photograph.
  6. If your shutter speed is 1/15 or slower you might have issues with motion blur in your photo. To get a faster shutter speed, increase your ISO (go from ISO 400 to 800, for example) and/or choose a lower-numbered aperture (go from f/8 to f/4, for example).
  7. If you have a shutter speed of 1/30 or higher you'll probably be okay. The closer you are to 1/30, the more careful you'll have to be to keep still while the photo is taken.
  8. Write down your ISO, shutter speed, and aperture.
  9. Change to Manual mode and dial in the ISO, shutter speed, and aperture that you wrote down.
  10. Change to the white balance that makes sense for the environment you are shooting in. If it's indoor (old-style) light bulbs or "warm" CFLs, use "incandescent" or "tungsten". For "cool" or "daylight-balanced" bulbs use "daylight", etc.
  11. If you have a remote it'll make it easier to get into position and take the photo, but if you do not, then you can use your camera's self timer instead. Experiment and see what works for you.
  12. Make sure your image is framed how you want it.
  13. Dial in the focus on where you will be.
  14. It may help to pre-envision your shot and make mental or actual marks for positions where your first and second photo might interact or in places you want to avoid overlap. These are easy to lose track of and hard to correct later in post.
  15. Either get yourself in position and take the photo with your remote, or press the shutter button and get into position before the self-timer takes the photo.
  16. When you think you have a photo that you want to use, go change outfits if you'd like to, and then get into position for the second photo and take that one the same way you did the first one.
  17. When you have the photos you want to combine, open one of them in Gimp or whatever photo editing software you use.
  18. Open the second photo as a layer "over" the first. (In Gimp, go to "File" > "Open as Layers").
  19. Use the Free Select Tool to roughly cut out your image from the image in the top layer (in Gimp you may need to go to "Windows">"Dockable Dialogs">"Layers" to see what layer you are working on).
  20. Invert your selection to change the selection from your image to everything else but you in the image on the top layer. (In Gimp, click on the "Select" menu and click "Invert".)
  21. Press the "Delete" key on your keyboard to delete everything but you in the image on the top layer.
  22. It should magically appear as if there were two of you in the photo at this point. If it looks good, flatten the image (in Gimp, go to the "Image">"Flatten").
  23. Make any other adjustments you'd like to the image and save as usual. Note that if you don't flatten the image before saving you may get an error or it may just not work. Images with multiple layers cannot usually be saved as a .jpg file.

Tuesday, January 11, 2011

Growth comes from overcoming frustration

With the funds I received from a rare and generous donation I was able to buy a Pullip doll that I intend on using for photography. That might sound really stupid, but as you can see from the examples of Pullip photos here, they really can make great subjects.

So, the doll arrived the other day and I immediately started to think about how to photograph her. My first thought was to make it animal-oriented. I bought her because she looks a little like me, and so I thought about posing her with all of my Vet Tech books (for school) in the background.

I arranged the books and the doll and this was my best shot out of the first shoot:


That wasn't nearly as effective as I thought it would be. So, I re-assessed the situation and decided to focus more on the doll. Here's my best shot from the 2nd round:


That's better, but still not a very good photo. I started getting frustrated. Why did I spend all that money on this stupid doll? Why can't I do this? Maybe I should stick with the still life genre or macros -things I'm good at.

I took a deep breath and thought about the advice I'd give to someone else in my situation -take a look at other people's photos of the same subject. That's when I found this photo. THAT's what I wanted to produce!

What's the difference? No background. They got in much closer. I decided to forgo the background and start working on the kitchen table. I propped my doll's head up and positioned her, then took some photos shooting down at the doll at various angles. And that's how I came up with this:


Untitled

Much better. Postable. I'm glad I stuck with it. The trick of searching Flickr for inspiring photos has helped me out of similar situations in the past and it's one of my favorite pieces of advice for frustrated photographers. The other lesson to be learned (or re-learned) here is that even though our instincts often lead us to want to include more in a photograph, it's often more effective to get closer instead. Zooming in can eliminate distractions and create more intimacy with your subject. I think that's where I was going wrong with the first couple of shots.

Tuesday, January 4, 2011

Critique guide for beginners

Getting critique on your work is the only way to find out how others perceive your work. But, beginners are often hesitant to join in with critiquing because they don't think they have the skills to judge a photo yet. I strongly disagree. Many of us aim to one day be good enough to have their photo in a newspaper or hanging on someone's wall. But the people who will be buying your art for their wall or looking at your photo in the newspaper will not be photographers -they'll be normal, everyday people. So, when giving critique don't worry if you could do better or not, it makes no difference -it's your opinion matters. And don't be concerned about being "right" or "wrong" -your opinion is just one opinion and the photographer should only take it as such. Just remember -there is no right or wrong when it comes to your own personal opinion!

So, with this in mind, here's a little cheat-sheet to give you some inspiration on what to look at when giving critique.

Here are the some basic areas to focus on:

1. As a whole, do you like the image? Does it look like someone spent time on it? Is it eye-catching? Could you see it on a wall, in an advertisement, or newspaper?
2. Exposure Overall is the photo too dark or too bright? Does it look dull and grayish?
3. Lighting: Is the lighting even? Are the shadows too dark or the highlights too bright? Are there distracting shadows?
4. Sharpness: Is the subject of the photo in focus? How much of the photo is in focus? Would the photo benefit from the background being more or less in focus?
5. Framing: Are there parts of the photo that were included, but don't add to the photo? Or is something missing or cut off that would have added to the photo?
6. Contrast: Does the subject stand out from the background, or does it get somewhat lost in it?
7. Noise: Does the image have a grainy appearance? Does it add to the image or negatively impact it?


Other areas of critique:

8. Rule of Thirds: Is the subject and/or horizon centered? Would the rule of thirds help make the photo more interesting?
9. Balance: Does your eye tend to ignore parts of the photo due to subject placement, bright spots, or certain colors?
10. Perspective: Is the angle that the photo was taken at effective? Would another angle be more interesting or appropriate?
11. Effects: Is the use of vignette (making the outside of the photo dark), adding of frames, selective colorization, etc effective or distracting? Does it add to the photo?
12. B&W vs Color: Was the use of color or black and white appropriate? Might it look better the other way?

Tuesday, October 12, 2010

Is lack of time an excuse?

Since I lost my job a couple years ago I've had a lot more time on my hands. For the last year I've been volunteering and working a part time job, but that left plenty of time for photography. Funny thing is I lost my motivation or inspiration. I'm not sure which was the cause, but I just stopped taking photos. It frustrated me, but I'd pick up my camera and just have no idea what to shoot. Even dragging my equipment on hikes didn't inspire me. All I got was a backache.

So, it's funny that now that I'm back in school with no time on my hands, and worse yet in the middle of a week that started with an Exam and a quiz on the same day yesterday, another quiz today, and contains 2 Lab Practicals tomorrow -and it's now that I end up having one of those flashes of inspiration that I've been missing. I took a good hour or two out of my studying to play with a concept that occurred to me while on a study break in the backyard as I was playing with my dogs.

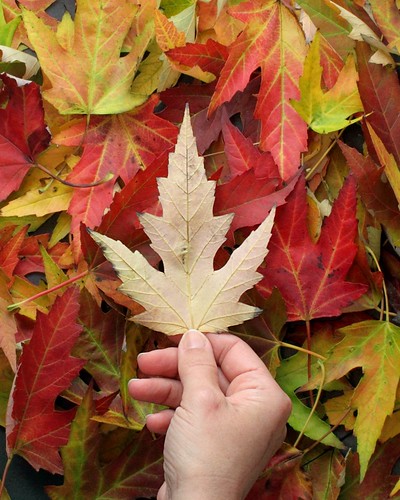
I was looking at the leaves that were falling from the Maple tree in my backyard. They are beautiful and they reminded me of a photo that I had submitted to a contest about a month ago. It was taken at least 2 years ago. I'm proud that it's currently in the top ten, but it's just a reminder that I have nothing new in my portfolio. ...anyway, I started looking at the leaves that were face-down on my lawn and how plainly white they looked. How is one side so different than the other? Then a concept occurred to me...

I heard something a long time ago that struck me. Two people who are intent on fighting could hold a quarter up between them and fight for hours about whether it was heads or tails. Both would be right ...from their own perspectives. But we rarely think about how much our perspective adds to the conflicts in our life.

So, there was my concept. The leaf would replace the quarter. Beauty on one side, dull and boring on the other. It mirrors the perspective idea and maybe even expands on it. But, how do you shoot that?

I tried a variety of shots to convey the idea, but simplicity won (as usual, for me anyway) and this was the photo I came up with:

The Importance Of Perspective:

The importance of perspective
It's easy to think your perspective is the only one, but much can be missed by not fully investigating whatever's at hand.

This shot was accomplished by gathering all the "pretty" leaves from my backyard in a bucket, bringing them inside, and arranging them on a piece of black poster board at the bottom of my light tent, which was on the floor. A lamp was set on the side of the light tent opposite my hand. I then put my camera on a tripod and attached the remote (although the self-timer would work as well), grabbed one of the leaves, held it up and pressed the button!

Thursday, July 8, 2010

My Gear -Lenses

Canon 28-80mm f/3.5-5.6:
This was the kit lens that came with the Elan IIe. It's lightweight and plastic. I don't use it much. I suppose it could be a decent walkaround lens, but I don't really do much "walkaround" photography. I can't really say much more -I don't use it because it's not wide enough for landscapes and it's not telephoto enough for wildlife photos.

Canon 75-300mm f/4-5.6 IS USM:
I bought this lens while I was still using Auto on my Elan IIe and I was floored at the reach it gave me. I got years of use out of it before realizing how soft its photos were. I still use it here and there -I don't really have an adequate replacement for it, but I consider it a low-quality lens. Photos printed to 8x10 would probably look fine, but any larger and I fear the quality issue would become a problem. Note that this lens has since been upgraded, changed, and there are also several versions on the market (non-IS, non-USM, etc).

Canon 100 f/2.8:
Photos I've taken with this lens.
Feeling confident in my skills in other areas, I decided to tackle macros, so I bought this lens. When it arrived I learned how challenging macros can be! But, since then, I've mastered the art and found out how amazing this lens really is. Aside from your average insect or flower macro, this lens gives a shallow depth of field which can be used artistically, and it's also got good low-light performance due to the f/2.8.

Canon 10-22mm f/3.5-4.5:
Photos I've taken with this lens.
I got this lens as a gift from my husband and when I got it I wasn't sure I'd really ever use it. Wow was I wrong! I love this lens. It's not only good for landscapes, but it's also nice when you have no choice but to shoot closer to your subject than you want as well, and playing with the distortion it gives at 10mm is fun as well.

Sigma 50-500mm f/4.5-6.3 (aka the "Bigma"):
I got this lens as a gift from my husband as well, but I knew I'd use this one. 500mm! And it's much sharper than my Canon 75-300mm. I've talked to a few pro wildlife photographers who use Canon 100-400mm lenses and they say that the Bigma is not far off in quality. This lens is great for wildlife and shooting races, but it has one big downside: it weighs 4 pounds all by itself. This means a tripod or monopod is necessary if shooting for any length of time and carrying it around is a chore. Still, it's a great lens if you have the need for something like it. As an interesting side-note, I rented a Canon 70-200mm f/2.8 IS and did a sharpness test comparing it against my Bigma and the Bigma turned out to be sharper!

Sigma 30mm f/1.4:
Photos I've taken with this lens.
In an attempt to get a more shallow depth of field for car photography, which I thought I wanted to get into more, I bought this lens. It's extremely sharp, even at f/1.4 and it does a great job of giving a more shallow DOF than any of my previous lenses, which is awesome for either eliminating a distracting background, but it also performs very well in low-light environments so it's been great indoors as well.

Canon 50mm f/1.8 II:
Photos I've taken with this lens.
During my research before buying the Sigma 30mm, I found this lens, which was a fraction of the price at around $100. The only downside of the lens seemed to be it's construction, so I bought one of these as well just to see the difference between the two. There's no doubt the Sigma 30mm is built better. It's solid, metal, and has a smooth-moving and dampened focus ring. This lens, in contrast, is very light weight, made of plastic, and has the cheesiest focus ring I've ever seen -it's very thin and hard to grip, especially because it's at the very end of the lens. Still, this just might be the sharpest lens I own (it's either this or the Canon 100mm f/2.8) even at f/1.8! My husband and I tend to share the Sigma 30mm f/1.4 and the Canon f/1.8II and use them fairly interchangeably. It's great for getting a shallow depth of field and indoors in low light due to the f/1.8.

Canon MP-E 65mm f/2.8:
Photos I've taken with this lens.
This lens was another gift from my husband. It's not a beginner's lens, that's for sure. I had a hard time with macros when I started on my Canon 100mm, but this lens is several times harder to master. Sure, it goes up to 5X while the Canon 100mm is a maximum of 1:1, so there's that. The bigger the subject, the shallower the DOF, so the harder focusing is and timing the shutter press if you hand hold for macros like most of us do. But, on top of that this lens is "fixed focus". I find that most photographers I talk to that haven't used this lens have little to no idea of what that means, but it's pretty simple really. Take a prime like the Canon 100mm macro, set the focus so it's set to focus as close as possible and then don't move it. That's the MP-E 65mm in a nutshell. There is no focus ring. The focus is in one place that moves as you increase the size of the subject from 1X to 5X, so you are forced to change your focus by moving the camera closer or further away from your subject. At 1X you have to focus just a couple inches from your subject, higher magnifications require you to get closer. And if that's not hard enough to deal with, after 1X the viewfinder gets darker and darker at higher magnifications until at 4X you can barely see your subject indoors, and at 5X the viewfinder is nearly black. Outdoors is better, but still challenging. This, I've found out, is what the focusing lamps on my macro flash is for, but they timeout before I can focus most of the time so, I've just stuck to 1X to 3X so far. I've yet to find a subject that really requires anything higher than that, but I count myself as an advanced beginner with this lens still, so I'll add more if I find anything helpful to pass along.